
User Guide


CRESTRON CNSNET PC Interface
REMOTE CONTROL SYSTEMS
4 DOC. 8085
9. From the "Project Install" dialog box, enter or select the project directory. The suggested directory is
the same directory used earlier to install VisionPC/Control.
10. The "Project Install" dialog box also offers the opportunity for last minute verification or modification
of COM port and network ID settings.
11. The program prompts the user for additional disks, as required.
12. Installation is complete. Select the OK button to return to the Program Manager window.
Preparation for Use
Hardware Hookup
Refer to figure 3 for a typical hook-up diagram of the CNSNET. Complete the following steps in the order
provided to ensure proper installation of the unit.
1. Before making any connections, review latest revision of network interconnection drawing (Doc.
5411).
2. Connect the network female connector to the 4-pin male connector at the front of the CNSNET. The
male connector is marked 24 Y Z G. Network termination points are available at the control system
power supply. Network units may also be daisy-chained together. Refer to the latest revision of the
CRESNET II reference manual section on CNPWS power supplies for wire gauge specifications and
connection details.
3. Connect one end of the seven foot telephone cable to the CNSNET panel marked RS-232. Figure 4
illustrates a detailed drawing for the cable.
4. Attach the RJ11 to DB9S adaptor to the loose end of the telephone cable.
5. Attach the nine-pin connector to the proper COM port on the PC.
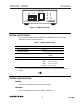
6. Apply power to the CNSNET and observe illumination of the red LED marked ID SEL and green LED
marked NET PWR on the unit's panel.
Identity Code
Each device on the CRESNET II network requires a unique identity code (ID CODE). These codes consist of
a two-digit hexadecimal number ranging from 03 to FE. The ID CODE of each unit must match the ID CODE
specified in the "NET.ID" statement of the CRESNET II SIMPL-I program in order for the device to be
addressed properly. The CNSNET ID CODE is not manually set on the unit itself. Instead, the CNSNET ID
CODE is assigned in VisionPC/Create and can be modified during installation of VisionPC/Control disk(s).