Contents Welcome to the Cricut Expression® 2: 5th Anniversary Edition!......................................... 1 Diagrams.......................................................................................................................... 2 Button and Icon Legend.................................................................................................... 3 Safety Information...........................................................................................................
Tools............................................................................................................................... 22 Materials........................................................................................................................ 22 Machine Settings............................................................................................................ 23 Screen Calibration.................................................................................................
Welcome to the Cricut Expression® 2: 5th Anniversary Edition! To celebrate the 5th Anniversary of Cricut®, we’re introducing something very special — the Cricut Expression® 2: 5th Anniversary Edition machine. It’s an all-new version of the Cricut Expression® Personal Electronic Cutter. On the outside, we’ve given it an all-new look, including an full-color LCD touch screen that’s bigger and faster.
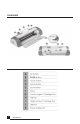
Diagrams 2 diagrams
Button and Icon Legend Cut Clear All Tools Backspace Settings Materials Image Apply All Redo Undo Space 8 8 Art Quantity Machine Settings Project Quantity Calibrate Fit to Page About Auto Fill Composite Return New Material New Tool Relative Size True Size Paper Saver Mat Size Layered Edit Paper Size Size Copy Start Position Flip Horizontal Add Image Center Point Flip Vertical Delete Image Fit to Length Rotate Save Cut Speed Cartridge Cut Pressure Home Multi-Cut Load/Un
Safety Information Disconnect electrical power before servicing or cleaning. WARNING! Do not place your fingers or other objects in the Cricut Expression 2 machine while it is connected to electrical power, powered on, or during cutting operations. Rapid movements of the cutting carriage during operation may cause bodily injury and/or damage to the Cricut Expression 2 machine. Always follow basic safety precautions when using this product to reduce risk of injury from fire or electric shock.
FCC Statement The U.S. Federal Communications Commission (in 47 cfr 15.105) has specified that the following notices be brought to the attention of users of this product. This device complies with part 15 of the FCC rules. Operation is subject to the following two conditions: (1) This device may not cause harmful interference, and (2) this device must accept any interference received, including interference that may cause undesired operation.
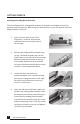
Getting Started Installing the Cutting Blade Assembly The Cricut Expression 2 cutting blade assembly is located in the bottom of your box, separate from the machine. Before you turn the machine on, you will need to insert the blade assembly. To do this: 6 1. Open the front door on the Cricut Expression 2 machine. Remove the cardboard inserts from both sides of the carriage. 2. Remove the cutting blade assembly from its bag. The blade assembly fits into the black cradle on the left side of the carriage.
Positioning Your Cricut Expression 2 Machine Place your Cricut Expression 2 machine at least 12" (30.48 cm) from the edge of your table to prevent it from tipping and causing possible injury. Allow 24" (60.96 cm) in the back of the Cricut Expression 2 machine for mat movement. When positioning your Cricut Expression 2 machine, choose a location that: • cannot be accessed by children.
After you complete the screen calibration, agree to the end user license agreement, and review the warranty information, you will be ready to begin your first project! First Project 1. On the home screen, press the Image button directly to the right of the preview mat. 1 of 1 2. Select one of the images by pressing the corresponding button. 3. The image you selected will be added to the Image Queue. 4. Press the Home button located at the bottom right of the screen. 5.
7. Select the material from the dropdown menu that most closely matches the paper you mounted on the mat. 8. Verify that the correct cutting tool has been inserted into the machine and has been set to the proper depth and press the Cut button. 9. Hold the mat up to the rollers and press the Load button at the bottom of the screen. 10. Press the Cut button. 11. When the cutting operation ends, press the Unload Mat button to eject the mat from the machine and peel the image from the mat.
Basic Operations Buttons and Machine Controls Power — turns the machine on and off. Pause — stops the machine while in the middle of a cut. Pressing the Pause button again will start the cutting operation where it was paused. Home — opens the Home screen. Zoom — pressing and holding this button while selecting an image on the screen will zoom the image so that it takes up the entire screen. Releasing the button and tapping it a second time will return the image back to normal.
Mat Preview The Mat Preview area provides an overall view of your current project. Each image that has been added to the project will appear on the mat. Pressing an image will allow you to make changes to the image directly. Pressing the Edit icon will allow you to make changes to the image itself. For more details on editing an image, see page 15. Pressing the Delete icon will remove the image from the project.
Jump Last — moves you to the last mat in the project. If you are currently viewing the last mat in the project, this button will be grayed out and unavailable for selection. Navigation Buttons To the right of the Mat Preview area, there are three navigation buttons which provide access to the other functions of the Cricut Expression 2 machine. Image Button — opens the Image Screen, where you can select pictures, text, icons, and other elements to include in your project.
Image Screen The Image Screen is the central location for selecting and editing images you want to include in your project. Compatible Cartridges Your Cricut Expression 2 machine comes with preloaded internal cartridges. You can also use any original Cricut cartridges and Cricut Imagine Art cartridges for Cricut Expression 2 projects. Cricut Imagine Colors & Patterns cartridges, however, contain only printing information and thus cannot be used with the Cricut Expression 2 machine.
Keypad Mode Keypad Mode features a grid of image keys familiar to Expression owners. To select an image to be included in your project while in Keypad Mode, simply press its button and it will be added to the Image Queue located at the top of the Image Screen. You can use either Keypad or Gallery Mode for all original cartridges as well as the internal Cricut Expression 2 cartridges.
Edit Image in Queue To edit an image which is currently in the queue, press the image and then press the Edit icon on the popup window. This will bring up the image in the Image Editor for you to make the desired changes. Zoom Image in Queue To zoom in on an image in the Image Queue to see a larger, more detailed view, press and hold the Zoom button on the machine console and then touch the image. To return to the normal view, release the Zoom button and tap the screen.
Layered and Composite Images Some images that come on the Cricut Imagine Art cartridges are separated into individual elements called layers. This separation gives you an additional level of control over the size of each layer of the image in your project. Not only can each of these layers be individually changed to suit your needs, but they can also cut separately.
Settings Screen 8 8 1 of 1 The Settings screen contains access to a variety of project settings, allowing you to manipulate the images in the project, the size of the paper and mat, as well as other settings which affect the functions of the entire Cricut Expression 2 machine. Similar to the Home page, you can see a preview of your current project in the Mat Preview section.
8 Project Quantity This feature can be used to repeat the entire project. This is often useful when you need to cut your project several times. When you press the Project Quantity button, you will see a popup window containing the Project Quantity controls. You can change the number of times the project is repeated by pressing the Decrease Value and Increase Value buttons, then pressing the Save button at the bottom left corner of the screen.
orientation rather than portrait. To save your selection, press the Save button at the bottom right corner of the screen. You can cancel any changes you have made by pressing the Cancel button at the bottom left of the screen. Paper Size The Paper Size button allows you to choose a custom paper size for your project. When you press the Paper Size button, you will see a popup window containing the Paper Size controls. The current width and height are displayed in the boxes in the middle.
section. This can help you more accurately adjust the starting point for the cutting blade. For more information about changing the start position in machine settings, please see page 23 . Center Point The Center Point button uses the center of the image to locate the shape in your project rather than the lower left corner of the image.
Apply All The Apply All page is an easy way to apply multiple settings to the images in a project at the same time. Using the controls in this area, you can select settings for each image in your current project such as choosing: True or Relative Size Flip Vertical Flip Horizontal Rotate Size Paper Saver Paper Saver Paper Saver automatically arranges the images in your project so that it uses the least amount of paper possible.
Tools The Tools button allows you to define and save profiles for tools you work with often. Each profile contains a label for the tool and a number which specifies the depth that should be set for the tool on the blade assembly prior to cutting. To save a new Material profile: 1. Press the New Tool button. 2. Enter a name for the tool. 3. Press the Save button. If you decide against saving the new profile, you can cancel the profile creation by pressing the Cancel button instead of Save.
If you decide against saving the new profile, you can cancel the profile creation by pressing the Cancel button instead of Save. You can delete a profile by selecting it in the dropdown menu and pressing the Delete button. Machine Settings The Machine Settings button opens a screen which contains four settings which control the overall behavior of your Cricut Expression 2 machine. The Increments buttons allow you to select the measurement increments.
The Cutting Light dropdown allows you to choose from the following options: • Always On • Always Off • During Cutting The Language Selection dropdown allows you to select whether the labels, instructions, and other information displayed in the Cricut Expression 2 machine in a language other than English. Additional languages will be available at a later date. After making any change to the Machine Settings, pressing the Save button will put the changes into effect.
Cut Settings Screen The Cut Settings Screen contains settings which allow you to control the cutting of your project. Material Selection If you have any previously defined materials set up for your Cricut Expression 2 machine, you can use this dropdown menu to select this material and proceed by loading your mat and pressing the Cut button. You can also select one of the pre-defined materials in the dropdown menu.
Cutting Heavyweight or Lightweight Materials Your Cricut Expression 2 machine can cut a variety of materials. For an optimal cut on lightweight materials such as vellum or heavyweight materials such as thin cardstock, you may need to adjust the blade depth, speed of the cut, or cut pressure. When you find settings that work well for you, be sure to save them so that you can use them again in the future. For details on how to define a new material, please see the Material Settings section on page 22.
TIP: Cutting on cardstock and other heavy materials will reduce the life of your blade, but it will produce the best cuts. TIP: If the Cricut Expression 2 machine produces poor cutting results, always insert a new blade first before trying other options. 4 Adjusting Cut Speed The Cut Speed button allows you to control the cutting speed for an optimal cut on a variety of papers. If you regularly cut simple shapes, you may want to adjust this setting up to increase the cutting speed.
4 Multi-Cut The Multi-Cut button allows you to cut a project up to nine times on top of the original cut lines. This allows the machine to cut thicker materials such as thin chipboard. It is recommended that you set your blade depth to 6 when using Multi-Cut, since the effectiveness of passing the blade over the same cut is limited by blade depth. The current Multi-Cut value is displayed in the middle section of the Multi-Cut popup box.
Basic Care Blade Life You can expect anywhere from 500 to 1500 single cuts from your cutting blade before it requires replacement. Your actual cutting blade life will vary, depending on the settings you use and the materials you cut. When the quality of your cuts decreases, it is probably time to replace your cutting blade. For best results, use only genuine Cricut Replacement Cutting Blades, available at participating Cricut retailers (part #290002).
WARNING! Cutting blades are extremely sharp and should be handled with the utmost care. They are also potential choking hazards; they should be kept away from children. Caring for the Cutting Mat You can expect anywhere from 25 to 40 full mat cuts (expect even more when a cut is smaller than the full mat) from your Cricut Expression 2 cutting mat before it requires replacement. Your actual cutting mat life will vary, depending on the settings you use and the papers you cut.
Optional Adapter Installation Your Cricut Expressions 2 machine has an adapter slot in the back to enable future functionality such as Wi-fi. Please see documentation included with future adapters for installation instructions.
Troubleshooting Problem: The cutting mat didn’t load when I pressed the Load button. Solution: Press the Unload Mat button and then reload the mat before pressing the Cut button again. Problem: The blade is not cutting all the way through the paper. Solution 1: Adjust the Multi-Cut setting on the cut screen to allow for multiple cuts along the same cutting lines. Solution 2: Increase the cut pressure in the Project Preview screen.
Solution 1: Check the USB cable to make sure that it is properly connected. Solution 2: Make sure that the connected device is powered on. Solution 3: Make sure that the Cricut Expression 2 machine and the attached device have the latest firmware installed.
Cricut Expression® 2: 5th Anniversary Edition Statement of Limited Warranty Part 1—General Terms This Statement of Limited Warranty includes Part 1—General Terms, Part 2— CountrySpecific Terms, and Part 3—Warranty Information. The terms of Part 2 replace or modify those of Part 1. The warranties provided by PROVO CRAFT AND NOVELTY, INC. (“PROVO CRAFT”) or its authorized repair center in this Statement of Limited Warranty apply only to Machines you purchase for your use and not for resale.
What This Warranty Does Not Cover This warranty does not cover the following: 1. Blade housing and cutting blades, whether supplied with the Machine or sold separately from the Machine; 2. Cutting mats, whether supplied with the Machine or sold separately from the Machine; 3.