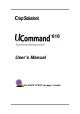
User’s Manual For QUICK START see page 2 inside...
UCommand-616 Universal Remote Control User’s Manual
PREFACE PREFACE About this manual This manual is designed to make using the UCOMMAND-616 as easy as possible. The information in this document is furnished for instructional use only, is subject to change without notice, and should not be construed as a commitment, representation or warranty regarding the performance of the product. Updates and additional information can be found at our website: www.crispsolutions.
UCommand-616 Universal Remote Control User’s Manual Contact Technical support for Crisp Solutions products is available via e-mail and on the Web. E-mail: support@crispsolutions.com Web: www.crispsolutions.com Crisp Solutions LLC 2530 Berryessa Rd.
TABLE OF CONTENTS TABLE OF CONTENTS PREFACE ................................................................................ i TABLE OF CONTENTS.......................................................... iii LIST OF FIGURES ................................................................. v CHAPTER 1..................................................................................... 1 Introducing the UCommand-616................................................. 1 Unpacking the UCommand-616 ...............
UCommand-616 Universal Remote Control User’s Manual The setup menu.................................................................... 18 CHAPTER 4................................................................................... 21 Programming and Customizing the UCommand-616............... 21 Menu functions...................................................................... 21 Setting the clock.................................................................... 22 Using the timer......................
LIST OF FIGURES LIST OF FIGURES Figure 1-1: Front view ............................................................................... 5 Figure 1-2: Rear view ................................................................................ 7 Figure 2-1: Inserting the batteries ........................................................... 10 Figure 2-2: Turning the LCD on .............................................................. 12 Figure 2-3: The Information Screen.......................................
UCommand-616 Universal Remote Control User’s Manual Figure 4-21: The “other” menu ............................................................... 48 Figure 4-22: Adjusting the contrast ......................................................... 49 Figure 4-23: Adjusting the backlight .......................................................
Chapter 1—Introducing the UCommand-616 Chapter 1 Introducing the UCommandUCommand-616 Congratulations on the purchase of your UCOMMAND-616 Universal Remote Control. The UCommand-616 is a digital remote control that is easy to use and configure, enabling you to control all your IR equipped electronic devices. A key feature of the UCommand-616 is the touch screen control panel, which reduces the number of buttons on the device, making it easy for you to find the function you want.
UCommand-616 Universal Remote Control User’s Manual • This User’s Manual If any of the above items are missing or appear damaged, contact your dealer immediately. Do not throw the shipping carton away in case you need to ship your UCommand-616. Quick Start If you are already familiar with the basics of teaching commands to universal remote controls, you can skip reading the next few chapters right now and get started on programming right away.
Chapter 1—Introducing the UCommand-616 9. As soon as the button has been learned, the screen will advance the to the next button to be learned. Again, press the corresponding Device button. You can program any button in any order just be selecting it with the tip of your finger. 10. Once a full screen is programmed, the remote will automatically display the next screen to be learned, until all four screens have been programmed.
UCommand-616 Universal Remote Control User’s Manual UCommand-616 features This section provides an overview of the key features of the UCommand-616. For more information on getting the most from these features, refer to Chapter 2. • • • • • • • • • • • • • 4 Large touch screen display with automatic backlighting for visibility in dim lighting.
Chapter 1—Introducing the UCommand-616 Identifying components This section provides an overview of the UCommand-616’s features and controls. Refer to the following illustrations to identify the components of the UCommand-616. Refer to Chapter 4, Customizing the UCommand-616, for a detailed description on operating and getting the most from these features. Main M 1999 01- 01 03:23 Friday 1. LCD 2. Off PLAY off 4. Device direct access 3. Device power CH+ VOL- VOL+ CH- menu STOP mute 6.
UCommand-616 Universal Remote Control User’s Manual 6 1. LCD The LCD display allows you to configure and operate your devices by touching the screen to select the function you want. Push any hard button to power on the UCommand616. Refer to The LCD on page 12 for a description of the functions in this display. 2. Off button At the Main Menu display, press this button to turn the UCommand-616 off. When a Device menu is displayed, this button functions as a power-off button for the selected device.
Chapter 1—Introducing the UCommand-616 The following illustration shows the rear of the UCommand-616. 8. IR port 9. Connector for Battery charger 10. Battery compartment 11. Learning eye Figure 1-2: Rear view 8. IR port Point the IR port end at the IR receiver of your device. 9. Connector for battery charger (option) Optional universal adapter port to charge Ni-MH batteries. 10. Battery cover Remove this cover to replace the AAA batteries. 11.
Chapter 1—Introducing the UCommand-616 8Identifying components
Chapter 2—Getting Started Chapter 2 Getting Started Chapter 1 helped to familiarize you with the various components and controls of the UCommand-616. This chapter will guide you through the steps for inserting the batteries and using the many features. Incorrect use of the batteries may cause them to burst or may cause leakage, which might damage the interior of the unit. Be sure to only use the correct type of alkaline or rechargeable Ni-MH batteries with the UCommand-616.
UCommand-616 Universal Remote Control User’s Manual Inserting batteries To insert batteries, refer to the following illustration and instructions: Connector for Battery charger 1. Remove battery cover. 2. Insert batteries. Ensure that you insert the batteries according to the marking inside the battery case. Figure 2-1: Inserting the batteries 10 1. Locate the battery-bay cover at the back of the UCommand616. 2. Put your thumb in the battery cover slot and pull to remove the cover. 3.
Chapter 2—Getting Started Power supply precautions • • • • Be sure that the positive (+) and negative (-) polarities of each battery match the polarities indicated in the compartment. Do not use the optional charger when using alkaline or other non-rechargeable batteries. Do not expose the batteries to excessive heat or flame. Keep batteries out of the reach of children. Power supply tips • • • Device configuration data is automatically saved when batteries are being replaced.
UCommand-616 Universal Remote Control User’s Manual The LCD The LCD (Liquid Crystal Display) touch screen allows you to configure and operate your UCommand-616 with the touch of a finger.
Chapter 2—Getting Started Touch screen precautions While the touch screen has been designed to withstand the rigors of daily use, it is not indestructible. Please read the following use and care instructions carefully: • • • • • • • Tap the LCD touch screen gently; never use force. Do not use a pen or any sharp object to tap the screen to avoid damaging the surface. You can use a blunt object such as a pencil eraser or the cap of a pen. Keep the touch screen dry. Wipe off any spills immediately.
UCommand-616 Universal Remote Control User’s Manual The Information screen The Information screen is displayed when you press the Information screen shortcut icon on the UCommand-616: Macro screen shortcut icon Information screen shortcut icon Main 1999 01- 01 03:23 Friday Date and time Press this icon to enable or disable the beep signal. Indicates battery charge level. Press this arrow to scroll to the previous screen. Press this arrow to scroll to the next screen.
Chapter 2—Getting Started UCommand-616 buttons The UCommand-616 has two sets of buttons for your convenience— direct access (hard) buttons and touch screen buttons. Direct access buttons The direct access buttons provide you with easy access to often-used functions such as volume and channel control, fast forward and fast reverse, play and stop. These can be programmed to your liking.
UCommand-616 Universal Remote Control User’s Manual Touch screen buttons The touch screen buttons enable you to control your devices as you would with your remote control, set up macros, and configure the LCD panel the way you want. Main AU X2 AU X1 TUNE / R TAPE CD PLA Y off CH+ VOL- VOL+ CH- men u STO P mut e ENTE R Figure 2-5: Touch screen buttons Using the touch screen is easy. Simply press the screen to activate a function.
Chapter 3 Operating the UCommandUCommand-616 This chapter describes how to set up the UCommand-616, how to automatically configure devices, and how to use advanced features such as the macros and timers. Press the Hardware Access Button with your finger to turn the UCommand-616 on. The first screen that you see is the Main menu. The main menu The Main menu displays a list of the devices currently available on the UCommand-616.
UCommand-616 Universal Remote Control User’s Manual For example, from the Main menu, press the TV button to display the TV device menu: Device Header Press this header to return to the Main Menu. TV 1 2 3 4 5 6 7 8 9 100 0 1 Indicates menu page number Figure 3-2: The TV device menu You can easily configure all device commands using the Learning function. Refer to page 26, Using the Learning function. The setup menu The Setup menu enables you to configure all aspects of your UCommand-616.
Chapter 3—Operating the UCommand-616 Setup Clock Timer Program Adjust Macro Duplicate Other Figure 3-3: The setup menu To scroll through the items on the setup menu, use the hardware channel up and channel down buttons. Press the enter (mute) mute button to enter an item submenu. Press the menu button to return to the previous screen. CH+ CH- menu Refer to Chapter 4, Customizing the UCommand-616 on page 21, for information on using the items in the setup menu.
UCommand-616 Universal Remote Control User’s Manual 20 The setup menu
Chapter 4 Programming and Customizing the UCommand UCommand--616 This chapter shows you how to customize your UCommand-616 to make it fit your particular requirements, how to use the Learning function to configure your devices, and how to set up the LCD panel to your specifications. Menu functions Press the menu button for three seconds to open the Setup menu. The functions shown are covered in detail in this chapter. menu Clock Enables you to set the date and time.
UCommand-616 Universal Remote Control User’s Manual Setting the clock The Clock menu enables you to set the UCommand-616 date and time. In the Setup menu, scroll to clock and press ENTER. You see the following screen: Clock Blinking cursor 1 1999 01- 01 03:23 Friday 0 1 2 3 4 5 6 7 8 9 Figure 4-1: The clock menu Change the number under the blinking cursor by pressing 0 to 9 on the LCD panel. After you enter a number, the cursor automatically moves to the next position.
Chapter 4—Programming and Customizing the UCommand-616 Using the timer The Timer function enables you to set up devices to turn on at specified times. In the Setup menu, scroll to Timer and press ENTER. You see a list of timers: Timer Timer 01 Timer 02 Timer 03 Timer 04 Figure 4-2: Timer list Use the channel up or channel down to scroll through the list. There are 12 timers available. Select one of the timers and press ENTER.
UCommand-616 Universal Remote Control User’s Manual Each function is described below. Timer View View enables you to look at previously stored timer settings. Timer Setup Setup enables you to set up a device function to activate at a specified time. Scroll to Setup and press ENTER. The following screen appears: Timer Press here to select which day or days you want the timer to run. 03:23 0 Daily 0 1 2 3 4 5 6 7 8 9 Press these numbers to enter the time you want the timer to run.
Chapter 4—Programming and Customizing the UCommand-616 Most often, you would select a Macro to run at a specific time. However, you can also program a single Device function. For example, you can set the TV to turn off at that time. Or you could set the VCR to Play, or even Record (the VCR channel must be preset in this circumstance). Relabeling timers You can easily relabel the timer names, as follows: 1. From the Timer menu (Figure 4-3) scroll to Relabel and press ENTER.
UCommand-616 Universal Remote Control User’s Manual Using the Program menu The Program menu enables you to set up devices with the Learning function, clear a configuration for a single Key, clear the configuration for a whole Device, or clear the configuration for All devices. Program Learning Clr. Key Clr. Device Clr.
Chapter 4—Programming and Customizing the UCommand-616 Main M 1999 01- 01 03:23 Friday PLAY off CH+ VOL- VOL+ CH- menu STOP mute ENTER 5 ~ 10 cm Learning eye REMOTE CONTROL Figure 4-6: Using the Learning eye From the program menu (Figure 4-5), scroll to Learning and press ENTER.
UCommand-616 Universal Remote Control User’s Manual Press this macro shortcut icon to open the macro recording function. Refer to page 43. Program AUX 1 AUX 2 TUNER / TAPE CD Figure 4-7: Programming devices Press the button of the device that you want to program. The following screen displays: Learn Figure 4-8: Programming the direct access buttons The buttons on the LCD screen correspond to the direct access buttons.
Chapter 4—Programming and Customizing the UCommand-616 The filled (black) circular button corresponds to the direct access power button. With the Learning eye, you can now map buttons on your device remote control to the direct access buttons on the UCommand-616. Follow these instructions: 1. Point your remote control at the UCommand-616’s Learning eye as shown in Figure 4-6. 2. Press your Device remote control Power button. When the screen displays OK, release the Power button.
UCommand-616 Universal Remote Control User’s Manual Clearing a key The Clear Key function enables you to erase the settings for a button in one of the device menus. Follow these instructions: 1. In the Program menu, scroll to Clr. Key and press ENTER. The list of devices appears. 2. Press the device you want to configure. 3. In the device menu, press the key you want to clear. 4. Repeat steps 1. through 3. for all other keys you want to clear.
Chapter 4—Programming and Customizing the UCommand-616 Clearing all devices The Clear All function allows you to erase the commands for all devices programmed into the UCommand-616. Follow these instructions: 1. In the program menu, scroll to Clear All and press ENTER. 2. You are prompted to press the ENTER button to delete the settings for all devices, or press the menu button to cancel the changes and return to the previous screen.
UCommand-616 Universal Remote Control User’s Manual Adjust Resize/Add Relabel Delete Figure 4-10: Resize/Add screen for Main menu Functions are described below. Resizing buttons on the Main menu Follow the instructions below to resize buttons for the Main menu. 1. Scroll to Resize/Add and press ENTER for the Main menu: Press this icon to toggle between button resize and text edit functions. Press this icon to undo an action.
Chapter 4—Programming and Customizing the UCommand-616 2. Press the button you want to resize. 3. Touch the spot where you want to locate the upper left corner of the button. This spot can be anywhere there is space. A black square appears (use a blunt pointer for accuracy). Main AUX 1 AUX 2 TUNER / TAPE CD Figure 4-12: Setting upper left corner 4. Touch a spot for the lower right corner.
UCommand-616 Universal Remote Control User’s Manual 5. Touch the space between the two black squares. Main AUX 1 AUX 2 TUNER / TAPE CD Figure 4-14: Completing the adjustment 6. The button assumes the new size and location.
Chapter 4—Programming and Customizing the UCommand-616 7. Once the button is repositioned, the UCommand displays the Labelling screen (see Relabeling buttons on the Main menu on page 37). Adding/Creating buttons If the total number of buttons on both Main menu pages is less than ten, you can add a new device button using the procedure for Resizing buttons. Warning: Do not attempt to create more than eight (8) buttons on either one of the Main menu pages.
UCommand-616 Universal Remote Control User’s Manual Adjust Resize/Add Relabel Delete Figure 4-17: Adjusting main menu buttons 3. Follow the procedure for Resizing buttons in the previous section (Resizing buttons on the Main menu, see page 32), but select an empty space to place the left-hand corner and the right-hand corner. 4. Once the button is created, the UCommand displays the Labelling screen (see next section).
Chapter 4—Programming and Customizing the UCommand-616 Relabeling buttons on the Main menu You can easily relabel the buttons on the Main menu. Follow these instructions: 1. From the Adjust menu (Figure 4-9) select Main Menu and press ENTER. 2. Scroll to Relabel and press ENTER again to display the Device list. Note the T icon in the upper right corner of the screen. Pressing this icon provides a shortcut that switches the mode into the Resize/Create function . 3.
UCommand-616 Universal Remote Control User’s Manual Adjust LD/VCD SAT VCR DVD AMP TV TUNER TAPE CD 6. Select which device attributes you want applied to your button. When accessing your relabeled button, the menus will be the same as the device that you select here. Deleting buttons from the Main menu You can easily delete buttons from the Main menu. Follow these instructions: 38 1. From the Adjust menu (Figure 4-9) select Main Menu and press ENTER. 2. Scroll to Delete and press ENTER again.
Chapter 4—Programming and Customizing the UCommand-616 Adjust Sure ? (Y) Enter (N) Menu 4. Press the ENTER button if you want to delete settings for the button. Press the menu button if you want to cancel the deletion and return to the previous screen.
UCommand-616 Universal Remote Control User’s Manual Adjusting buttons on the Device menu From the Adjust menu (Figure 4-9) select Device and press ENTER. You see the following screen: Adjust Resize / Add Relabel Delete Recall Figure 4-18: Adjusting buttons on the device menu The procedures for resizing and deleting buttons on the device menu are the same as those for resizing and deleting buttons on the main menu.
Chapter 4—Programming and Customizing the UCommand-616 Relabeling Device menu buttons You can easily relabel the buttons in device menus or choose icons to represent the buttons. Follow these instructions: 1. From the Adjust menu (Figure 4-9) select Device and press ENTER. 2. Scroll to Relabel and press ENTER again. You see the device list. 3. Select a device to relabel (eg. CD). You see the following screen: Adjust T Scan Shuf. Edit Rept.
UCommand-616 Universal Remote Control User’s Manual Scan . . . . . . . . . . . . . . . . . S A G M S Y B H N T Z C I O U D E F J K L PQR VWX icon 5. Note that there is one additional button—the Icon button. Press this button to display a list of icons. Scan . . . . . . . . . . . . . . . . . S CHCH+ REC < 6. > icon Press any of the buttons shown to replace the text (“Scan” shown here) with an icon. Press < and > to scroll between page views for more icons.
Chapter 4—Programming and Customizing the UCommand-616 Using macros The Macro feature allows you to create up to 12 macros and store up to 25 commands for each. You can setup, relabel, and delete macros from the Macro submenu. Once you have created a macro, you will be able to run many commands by pushing only one button. 1. From the Setup menu, scroll to Macro and press ENTER. You see a list of macros: Macro Macro 01 Macro 02 Macro 03 Macro 04 Figure 4-19: The macro list 2.
UCommand-616 Universal Remote Control User’s Manual Macro setup Follow these instructions to set up a macro: 1. From the Macro menu, scroll to Setup and press ENTER. The macro is now in record mode, and all buttons pressed next are added to the macro. 2. Press the device button combination that you want to be recorded into the macro. 3. If necessary, you can set a time delay between each command in the macro. In the upper right corner of the screen, there is an hourglass 6 icon.
Chapter 4—Programming and Customizing the UCommand-616 Macro Processing To run the macro, leave the Program menus and press the Macro shortcut icon M in the upper left corner of any screen; then select the macro you want to run from the Macro list. Relabeling a macro Follow these instructions to relabel a macro: 1. In the setup menu, scroll to Macro and press ENTER. The list of macros appears. 2. Scroll to the macro you want to rename and press ENTER.
UCommand-616 Universal Remote Control User’s Manual M Macro . 1. . . . . . . . . . . . . ........ A G M S Y B H N T Z P1 C I O U D E F J K L PQR VWX P2 P3 4. Select label characters from this screen: press P1 to access upper case letters, P2 to access lower case letters, and P3 to access numbers and special characters. 5. Press ENTER when you have made your changes. Deleting a macro Follow these instructions to delete a macro: 46 1. In the setup menu, scroll to Macro and press ENTER.
Chapter 4—Programming and Customizing the UCommand-616 Macro Setup Relabel Delete 3. Scroll to Delete and press ENTER. You see the following screen, and the macro information is deleted. Macro Processing The Macro Delete function only deletes the macro-recorded data; it does not remove the macro name from the Macro list. The Duplicate menu The Duplicate menu is used for transferring data between two UCommand-616 units and requires a special hardware setup.
UCommand-616 Universal Remote Control User’s Manual Making LCD adjustments The Other menu allows you to: • • • set the LCD contrast adjust the backlight calibrate your UCommand-616. From the Setup menu, scroll to Other and press ENTER. You see the following screen: Other Contrast Backlight Calibrate Figure 4-21: The “other” menu Procedures are described below.
Chapter 4—Programming and Customizing the UCommand-616 Set the LCD contrast Scroll to Contrast and press ENTER. You see the following screen: Other ( Press this arrow to decrease the LCD contrast. ) Contrast Press this arrow to increase the LCD contrast. Figure 4-22: Adjusting the contrast Press the right LCD arrow to increase the contrast. Press the left LCD arrow to decrease the contrast. The display changes to indicate Contrast strength.
UCommand-616 Universal Remote Control User’s Manual Adjusting the LCD backlight From the Other menu, scroll to Backlight and press enter. You see the following screen: Back-Light - - Switch - - Press to enable or disable the backlight ON - - Level - - Indicates the current backlight sensitivity level.
Chapter 4—Programming and Customizing the UCommand-616 Period: Touch the < > arrows to adjust the length of time the backlight stays on after it is first activated during use of the remote (each touch of the screen during normal use restarts the backlight timer). When you have finished adjusting the backlight, press ENTER to save your changes and return to the Other menu. Calibrating the LCD Rarely, the LCD buttons lose positioning calibration.
UCommand-616 Universal Remote Control User’s Manual 52 Making LCD adjustments
Appendix A Specifications Model UC-616 (UCommand-616) Display Touch liquid-crystal display Hard buttons 8 direct access hard buttons Pre-defined device types TV, DSS/SAT/Cable, VCR, DVD, AMP, Tape/Tuner, CD, AUX (other devices configurable) Macro capability 12 macro buttons with up to 25 commands Timer capability 12 programmable timer buttons with real time clock and calendar Remote capability 10 devices with 4 pages each; 10 - 12 buttons per page; 420 buttons max.
UCommand-616 Universal Remote Control User’s Manual Optional accessories 54 Power adapter DC 5V /1A Rechargeable AAA Ni-MH Batteries Docking Station with charging function, PCInterface (RS232 Serial Port) and copy function.
Troubleshooting If you have trouble configuring or operating the UCOMMAND-616, first ensure that you have inserted the batteries correctly (page 10). Then check the items below. Symptom After learning, the UCOMMAND-616 doesn’t operate your device/s. Remedy • • • • • • • Troubleshooting Move closer to the device. The maximum operating distance is approximately 10 meters.
UCommand-616 Universal Remote Control User’s Manual You cannot operate a device even after configuring the device using the learning function (page 26). • • • You see an “error” display during the learning procedure. • You see an “error” display during operation. • Problems with twoway remotes and DSP • The LCD screen turns off. • Short battery life • 56 Make sure that you have correctly “mapped” your device’s remote control to the UCOMMAND-616.
Appendix A —Troubleshooting If none of these solutions seems to help, go to our website at www.crispsolutions.com or contact support@crispsolutions.com Crisp Solutions LLC 2530 Berryessa Rd.
UCommand UC-616 Touch Screen Remote Control User’s Manual 8-12-00/UG-616 Printed in Taiwan