® TOP-MOUNT REFRIGERATOR Table of Contents ........................................................................ 2 www.crosley.
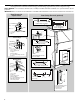
TABLE OF CONTENTS REFRIGERATOR SAFETY ............................................... 3 INSTALLING YOUR REFRIGERATOR ..........................................4 Unpacking Your Refrigerator .......................................................4 Space Requirements....................................................................5 Electrical Requirements ...............................................................5 Refrigerator Doors: Removing, Reversing (optional) and Replacing ........................
REFRIGERATOR SAFETY Your safety and the safety of others are very important. We have provided many important safety messages in this manual and on your appliance. Always read and obey all safety messages. This is the safety alert symbol. This symbol alerts you to potential hazards that can kill or hurt you and others. All safety messages will follow the safety alert symbol and either the word “DANGER” or “WARNING.
IMPORTANT: INSTALLING YOUR REFRIGERATOR Unpacking Your Refrigerator ■ Depending on your model, do not remove any permanent instruction labels inside your refrigerator or the Tech Sheet that is fastened behind the base grille. ■ Depending on your model, do not remove the white Styrofoam insert that is located behind the control panel on the ceiling of the refrigerator. The insert is part of the refrigerator and not part of the packing material.
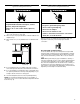
Space Requirements WARNING ■ Electrical Requirements WARNING Explosion Hazard Keep flammable materials and vapors, such as gasoline, away from refrigerator. Electrical Shock Hazard Plug into a grounded 3 prong outlet. Failure to do so can result in death, explosion, or fire. Do not remove ground prong. Do not use an adapter. To ensure proper ventilation for your refrigerator, allow for a .5 in. (1.25 cm) space on each side. ■ Allow 3 in. (7.
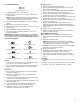
Refrigerator Doors: Removing, Reversing (optional) and Replacing TOOLS NEEDED: ⁵⁄₁₆ in. hex-head socket wrench, No. 2 Phillips screwdriver, flat-head screwdriver, ⁵⁄₁₆ in. open-end wrench, flat 2 in. putty knife. IMPORTANT: Before you begin, turn the refrigerator control OFF, unplug refrigerator or disconnect power. Remove food from doors. Door Removal & Replacement Door Swing Reversal (optional) 1-2 Top Hinge 1 1-1 1. Cabinet Hinge Hole Plugs 1. 5/16" Hex-Head Hinge Screws and Washers 2 1 1.
Door and hinge removal ⁵⁄₁₆” Hex-Head Hinge Screw 1. Unplug refrigerator or disconnect power. 2. Keep both doors closed until you are ready to lift them free from the cabinet. NOTE: Provide additional support for the doors while the hinges are being moved. Do not depend on the door magnets to hold the doors in place while you are working. 3. Remove the parts for the top hinge as shown in Top Hinge graphic. 4. Lift the freezer door free from the cabinet. 5.
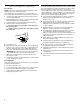
Door Closing and Alignment Door Closing NOTE: Keep the four bolts that secured the refrigerator in the shipping case. They are the leveling legs. If your refrigerator seems unsteady or you want the doors to close easier, adjust the refrigerator's tilt using these instructions. 1. Screw the legs all the way into the bolt holes in the bottom corners of the refrigerator. 2. Plug refrigerator power cord into a 3-prong grounded outlet. Move the refrigerator into its final position. 3.
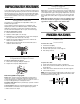
Power Saving Control USING YOUR REFRIGERATOR The Power Saving Control operates electronic heaters around the door openings. these heaters help keep moisture from forming on the outside of the refrigerator cabinet. ■ Use the CONSUMES LESS ENERGY setting when humidity is low. ■ Ensuring Proper Air Circulation Use the REDUCES EXTERIOR MOISTURE setting if moisture forms on the otside of the refrigerator cabinet.
REFRIGERATOR FEATURES Your model may have some or all of these features. Features that can be purchased separately as product accessories are labeled with the word “Accessory.” Not all accessories will fit all models. If you are interested in purchasing one of the accessories, please call the toll-free number on the cover or in the "Assistance or Service" section. Refrigerator Shelves The shelves in your refrigerator are adjustable to match your individual storage needs.
Frozen food storage guide Storage times will vary according to the quality and type of food, the type of packaging or wrap used (should be airtight and moisture-proof), and the storage temperature. Seal the package or container securely to prevent taste and odor transfer throughout the product. Ice crystals inside a sealed package are normal. This simply means that moisture in the food and air inside the package have condensed, creating ice crystals.
Power Interruptions If the electricity in your house goes off, call the power company and ask how long it will be off. 1. If the power will be out for 24 hours or less, keep both refrigerator doors closed to help food stay cold and frozen. 2. If the power will be out for more than 24 hours: a) Remove all frozen food and store it in a frozen food locker. OR b) Place 2 lbs. (907 g) of dry ice in the freezer for every cubic foot (28 L) of freezer space. This will keep the food frozen for two to four days.
■ Has a large amount of food just been added to the refrigerator? Adding a large amount of food warms the refrigerator. It is normal for the motor to run longer in order to cool the refrigerator back down. See the “Refrigerator Features” section. ■ Are the doors opened often? Expect the motor to run longer when this occurs.
The doors will not close completely Are food packages blocking the door open? Rearrange containers so that they fit more tightly and take up less space. ■ ■ Is the ice bin out of position? Push the ice bin in all the way. ■ Are the crisper cover, pans, shelves, bins, or baskets out of position? Put the crisper cover and all pans, shelves, bins, and baskets back into their correct positions. See the “Refrigerator Features” section for more information.
Notes 15
CROSLEY® REFRIGERATOR WARRANTY ONE-YEAR FULL WARRANTY ON REFRIGERATOR For one year from the date of purchase, when this refrigerator is operated and maintained according to instructions attached to or furnished with the product, Whirlpool Corporation will pay for factory specified replacement parts and repair labor costs to correct defects in materials or workmanship. Service must be provided by a Whirlpool designated service company.