
User Manual

- 2 -
1. Collect Items Needed for the Install
Steps:
a. Determine the hole(s) at which SSNs are to be installed.
b. Consult the site survey to determine the number of SSNs needed for the hole (plus 1 or 2
spares).
c. Consult the site survey to determine the depth for each sensor (upper and lower)
d. Collect needed SSNs and all other equipment, materials and tools as listed in Table 3.
e. Transport all items to the specified hole.
2. Setting SSN ID Numbers
The SSN IDs are set automatically by the network or by editing of the file joinmap.xtbl in the
same way as CCN IDs. In order to keep track of which SSN is installed at what location, it is
recommended that a logical scheme be employed to number these units. The network will
automatically increment the ID by 1 for each new Node that joins the network.
We recommend that the numbers 201-220 be reserved for CCNs. Sensor Nodes should be
numbered incrementally based on which holes they are installed on. Take the Hole number and
multiply by 10 then add 1 for each successive Node. E.g., on Hole #5 the first Sensor Node would
be 51, the second would be 52. For Hole 13, the first Sensor Node would by 131 and so on. Use
191-199 for the putting green and numbers less than 10 for the chipping green.
Note that the device whose ID is to change must be reset after changing the number in the
joinmap.xtbl file. So the Node must not be buried until the Node ID is set.
Steps:
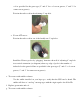
a. Remove SSN from box and verify the (manufacturer’s) unique ID number on the SSN
matches that on the box.
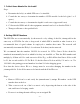
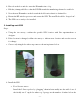
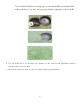
b. Take a sensor node out of the box; turn it on by depressing the button on the side of the
unit, and listen for beeping sounds.
c. If sensor is working the unit will beep-out an assigned ID.