
Installation Guide


48
STEP 3: Constructing the Bending Rail
The inside of the bending mold should be covered with
wax paper or plastic to prevent the glue from sticking to
the mold.
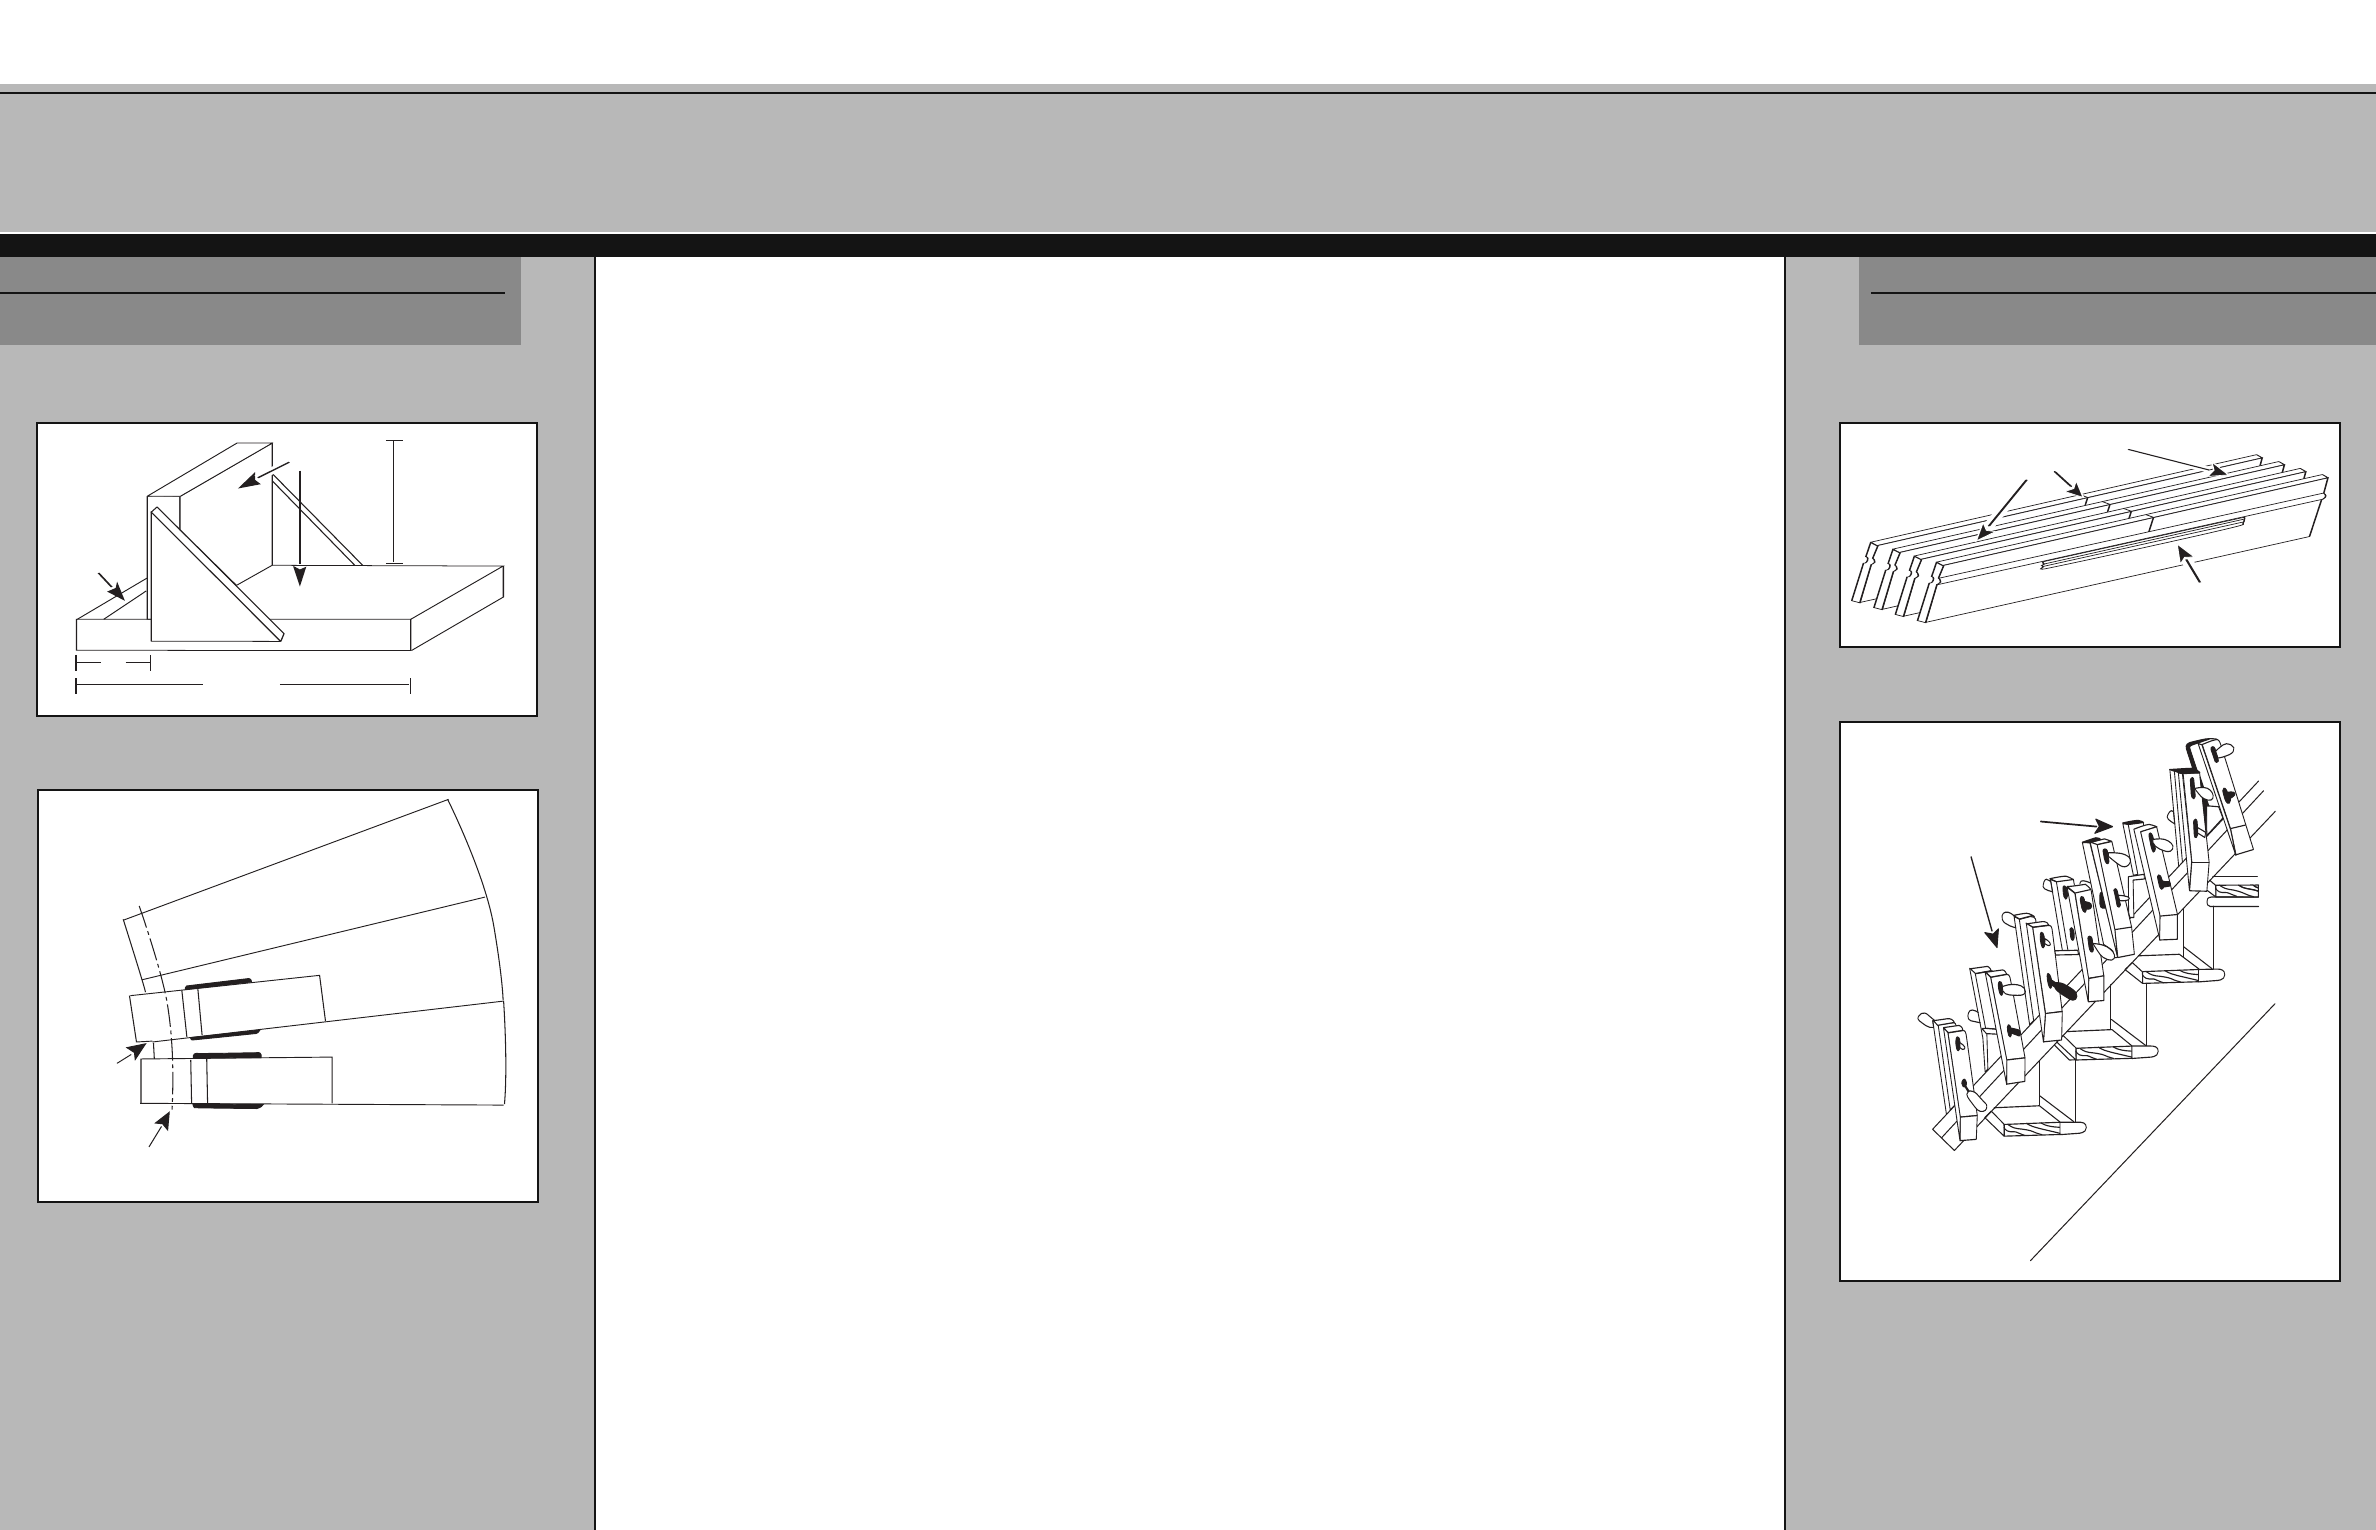
Special care must be taken if the required rail length is
longer than 16'. Shorter rails have to be spliced together to
provide these lengths. A butt joint on each layer of rail is
used to make this splice. These butt joints must be
staggered about 30" to maintain strength throughout the
splice and to minimize the bulge in the rail. Each butt joint
should have a 10" strip of nylon tape to hold the pieces
together while bending the rail (see Fig. Al-3).
Apply a thin even coat of carpenter’s glue to all contact
surfaces of the rail; a finishing sponge or tape roller would
be helpful. The rail should be assembled one layer at a
time, gluing each piece completely, starting from one
bending mold section and finishing with the other bending
mold section. Once assembled, use nylon tape to wrap the
rail about every 3'. This provides support while the rail is
being bent.
Clamp the rail at one end. Form the rail to the curve by
carefully pulling the rail to the guides and clamping it. At
each bending guide, clamp the rail to the vertical brace,
keeping the rail down on the front edge of the guide.
Continue one guide at a time to the end of the rail. A
clamp should be placed on each guide and between the
guides, no more than 6" apart (see Fig. Al-4). Clamp the rail
as of
ten as possible to provide a smooth bend in the rail
and good glue adhesion.
Stagger butt
joints for strength
U
se nylon tape to
secure butt joints
B ENDING R AIL
I NSTALLATION
APPENDIX 1
FIG. A1-3 - Splicing bending rail
4
7
Read all instructions carefully before starting.
The following procedures provide guidance for assembling
curved balustrades and balcony handrails.
STEP 1: Important Considerations Prior to Starting
The run, rise and radius of the staircase where the curved
rail is to be installed must be constant. For successful
results, the radius of the stairway should not be less than
the following:
STAIRCASES
6010B (30") 6210B (30") 6519B (36" to 42")
LEVEL BALCONY HANDRAIL
6010B (36") 6210B (42") 6519B (36" to 42")
STEP 2: Bending Guides
Build the bending guides as in Fig. A1-1. You will need a
bending guide for each tread. Find the centerline of the rail
b
y measur
ing t
he t
otal width of the rail, including the
bending mold, and dividing this width in half. Mark the
centerline on each bending guide, measuring from the
v
ertical brace. To protect the treads from glue, cover them
with a clear plastic.
N
ow, clamp the guides to the treads, keeping the rail
centerline aligned with the baluster centerline. The leading
edge of the bending guide must be flush with the tread
nosing. F
ig. Al-2 shows proper placement of the
bending guides.
The same basic procedure is used for a curved balcony.
Mark
t
he rail
centerline
2" x 6"
6"
6"
18-20"
APPENDIX 1
B ENDING R AIL
I NSTALLATION
FIG. A1-1 - Bending rail guides
Align rail centerline with
baluster centerline
Clamp in place,
flush with
tread nosing
FIG. A1-2 - Placement of bending rail guides
Place a clamp on each guide and no
more than 6" apart in between guides
FIG. A1-4 - Clamping the bending rail