
Installation Guide


8
STEP A.6 – Dry Fit the Starting Step
See Step B.2 and StairNote Five: All About Starting Steps
NOTE: If no starting step is to be used (first tread same as
all o
thers), go to Step A.7.
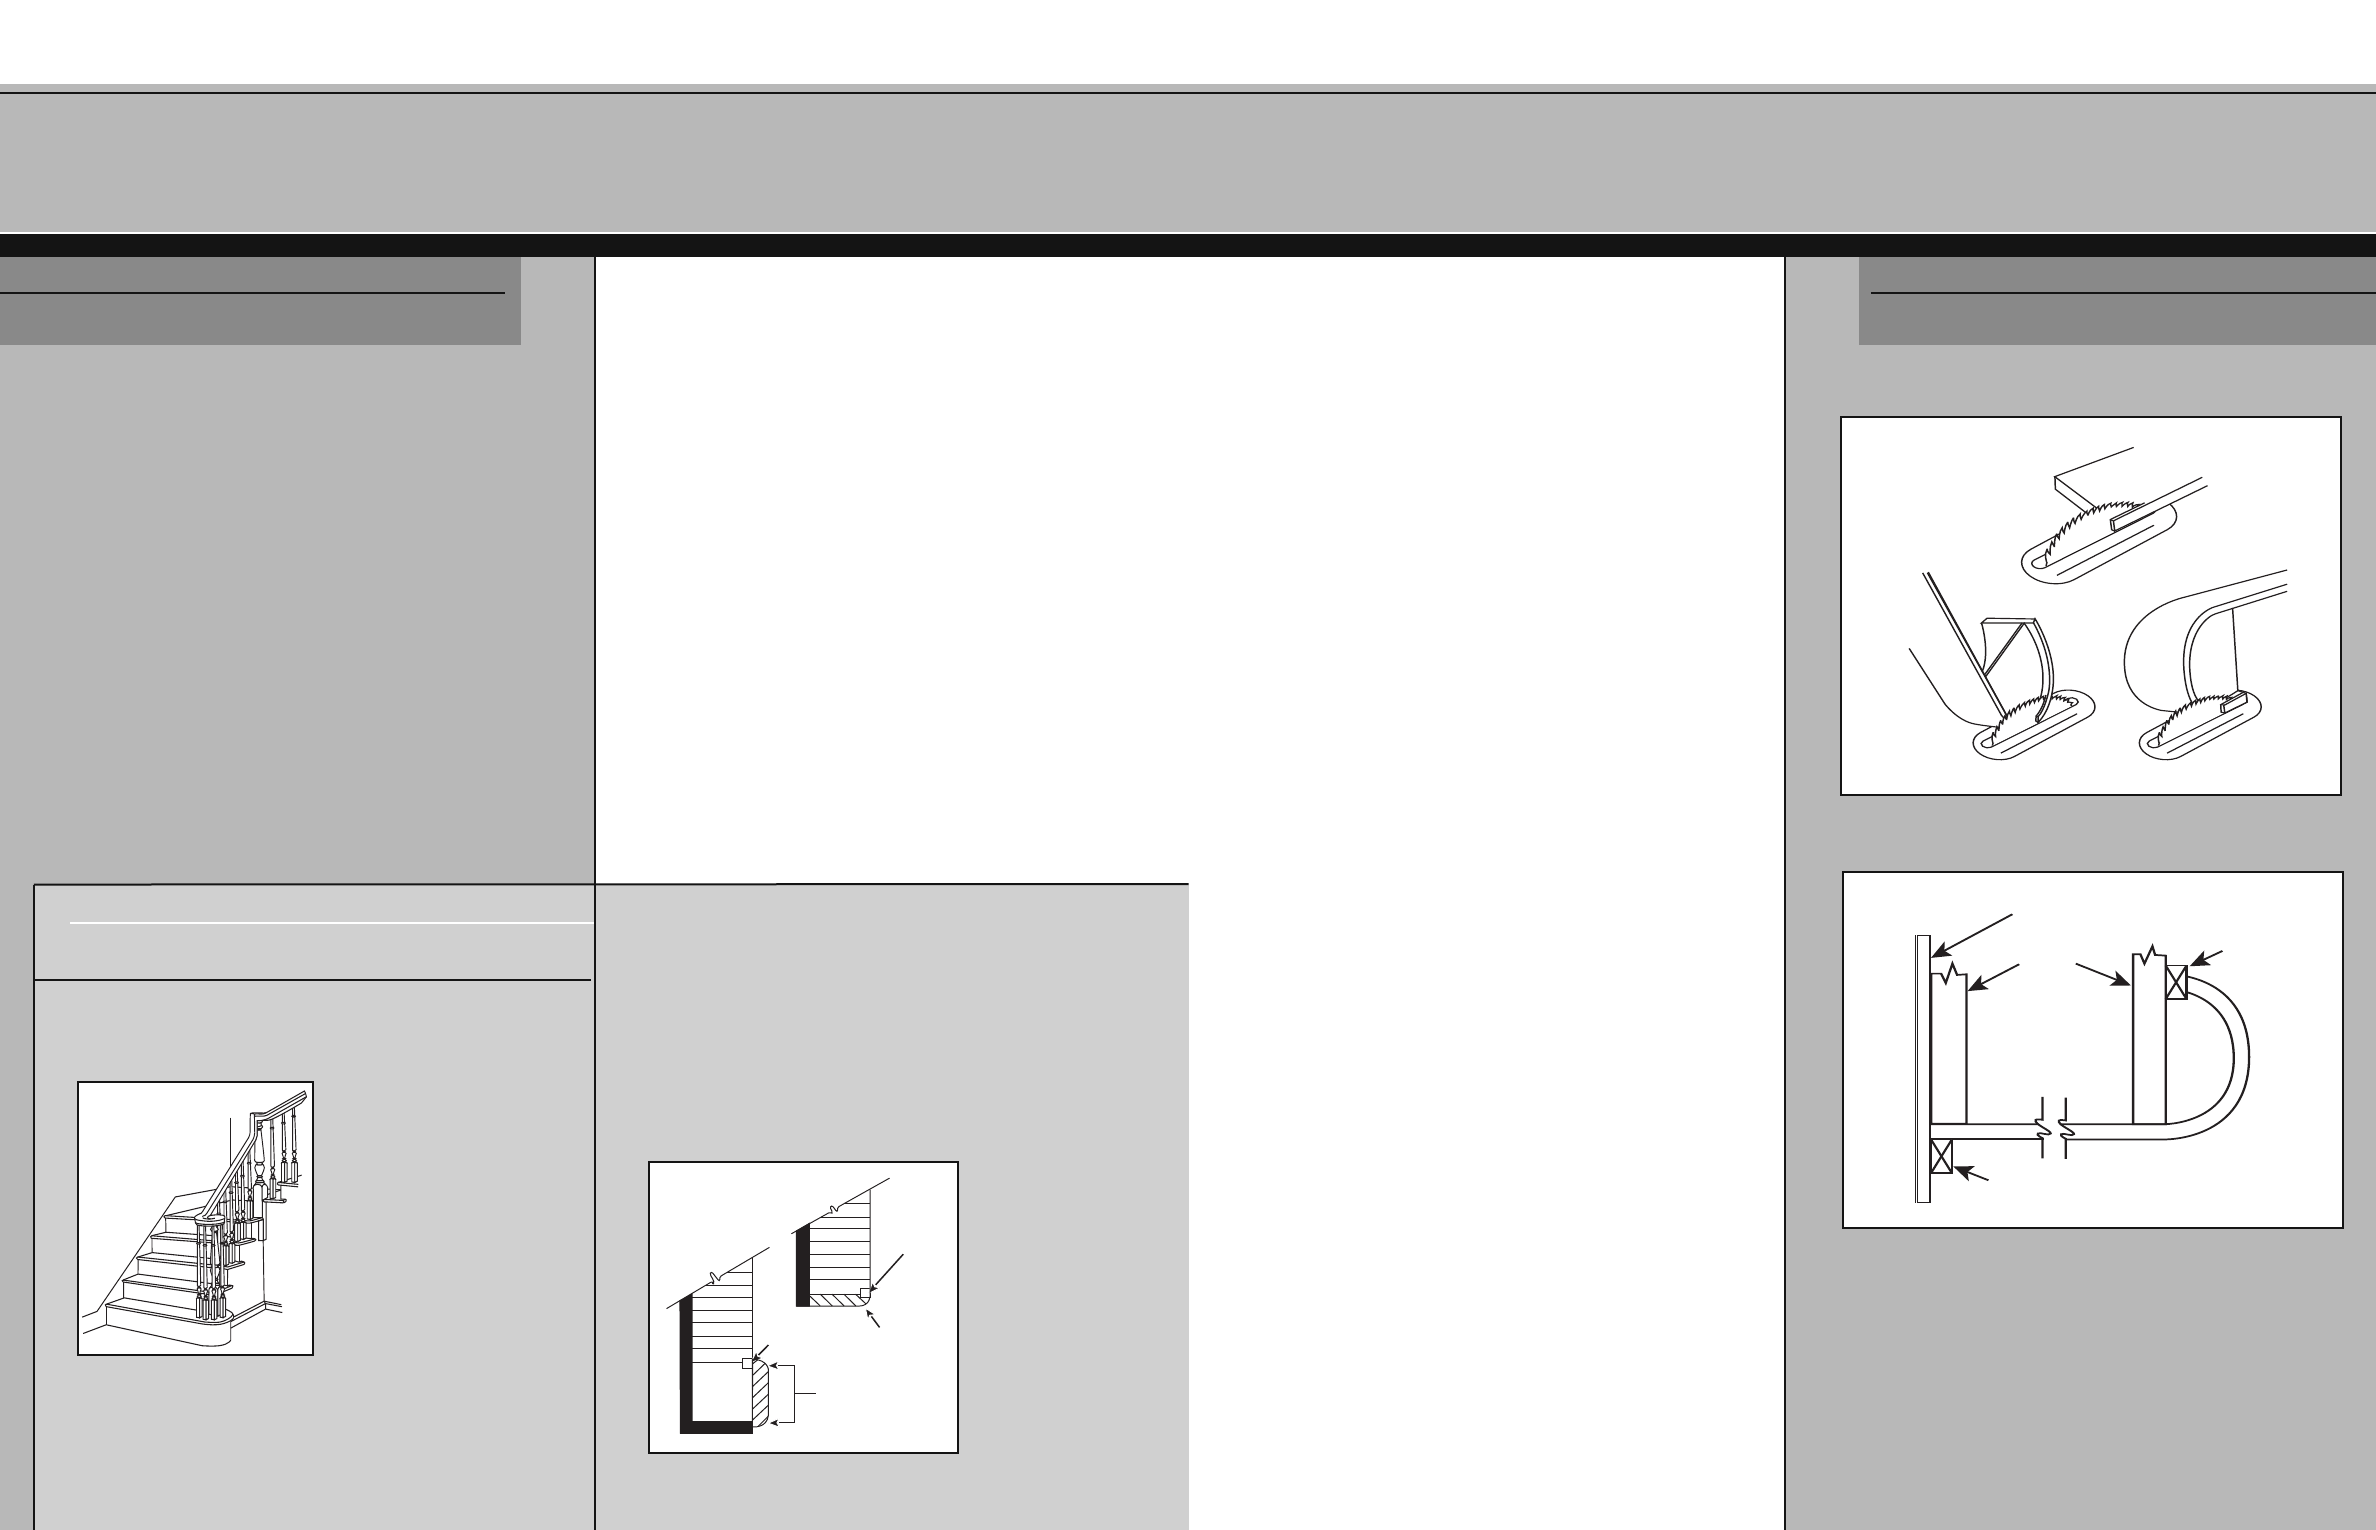
Begin by dry fitting the starting step riser (leave the tread
off). Rip it to the height of the first riser on the stringers.
Always rip the bottom edge of the riser. A table saw will
provide the smoothest and easiest cut. Slide the starting
step riser along the saw blade and carefully roll the riser up
to complete the trimming on the bullnose end (see Fig. 6-
1). Any irregularities in the cut will be hidden later by the
finish flooring or by shoe molding.
Determine the dimension of the first rise and rip the
starting riser
1
/1
6
" less. Place the riser end against the wall
skirt board and measure the gap between the curved end
and the mitered skirt board. Subtract
1
/2" from this
dimension and trim that much off the straight end. Slide
the riser back in place, but put a
3
/4" piece of scrap between
t
he curv
ed end and the skirt board. Scribe a line on the
straight end, using a
3
/4" block (see Fig. 6-2). Trim to this
scribe line and check for a snug fit.
The tread is cut to length in a similar manner. Place the
tread on the riser and butt the straight end against the wall
skir
t boar
d. Measur
e the gap between the notch and the
mitered skirt board on the curved end. Subtract
1
/2" from
this dimension and trim that much off the straight end.
Slide t
he tr
ead back in place, but put a
3
/4" piece of scr
ap
between the notch and the mitered skirt board. Scribe a
line on the straight end, using a
3
/4" block. Trim and check
f
or a snug f
it.
Wall
Skirtboard
3
/
4
" Scribe Block
Stringer
3
/
4
" Block
S TEP
A.6
SECTION A
7
If the stairway is closed on both sides, the task of scribing
both ends must be done on scraps and transferred to the
actual risers. Rip all risers and scraps as described above.
Cut all scraps
1
/2" shorter than the smallest inside
dimension. Place a scrap riser across the stringers, butt one
end against the skirt board, and scribe a line. Now do the
same at the other end. Trim both ends to the scribe lines.
Now place the scrap back on the stringers and butt either
end tightly to the skirt board. Precisely measure the distance
from the other end of the riser to the skirt board. Lay the
scrap on the actual riser blank and transfer one scribe line
to the riser. Slide the scrap toward the other end the exact
distance that was measured above. Scribe and trim the other
end. Use a 3˚ bevel to make this cut and it will be easier to
swing this end into place.
1
2 3
SECTION A
S TEP
A.5
Starting steps add character and
distinction to a stairway. The
g
entl
y rounded r
iser of a
starting step relieves the “boxy”
look of a plain s
tairway. In over-
t
he-pos
t inst
allations t
he
projecting “bullnose” ends
permit the placement of newels
of
f t
he cent
er
line. This allows
the use of a handrail that starts
with a decorative curved volute
or tur
nout.
Bullnose starting steps increase the overall width of a staircase by
appr
o
ximat
el
y 10" to 11
1
/4". An e
x
cep
tion t
o this is the “quarter
cir
cle” design t
hat is int
ended f
or use in ins
t
allations wher
e the
first newel is usually at the second riser. Verify this installation will
compl
y with local building code. Additionally, quarter circle starting
steps work well with post-to-post installations (see Fig. S-5b).
S
tudy t
he selection of
starting steps, treads,
and riser
s in the
cat
alog for a bett
er
understanding of this
beautiful f
eatur
e of
t
he Cr
o
wn Her
it
ag
e
Stairway System.
W
A
L
L
Landing
Newel
position
Quarter circle
(2 ends)
starting step
Newel
position
Quarter circle
starting step
W
A
L
L
FIG. 6-1 - Cutting a starting step riser
FIG. 6-2 - Scribing using a scribe block
FIG. S-5a - Starting steps add
character and distinction
FIG. S-5b - Quarter circle starting steps also
can be used in post-to-post installations
S TAIRN OTE
F IVE
A LL A B OUT
S TARTING S TEPS