
User's Manual

CopyDisc Duplicator Series
40
Appendix E: CopyDisc AutoPrinter Platinum
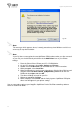
The section will provide you with detailed information on how to set up and operate your
CopyDisc Autoprinter Platinum printer fitted with a Prism thermal printer.
Note:
Your CopyDisc Autoprinter Platinum is fitted with a vacuum picker. The mechanical picker
is not compatible with the CopyDisc Autoprinter Platinum.
Box Contents
Carefully remove your CopyDisc Platinum printer from their shipping cartons and verify that all
parts are present. If there are missing or damaged parts contact Verity Systems or an authorised
partner/reseller immediately to correct any miss-packed or missing parts.
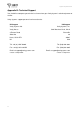
You should find the following:
Verity Systems CopyDisc robot
Prism thermal printer, fitted with a colour thermal ribbon
Printer Plate (with 4 fixing screws and washers)
Power Cable x 2
Printer parallel cable and printer serial cable
Input and output spindles
User Manual CD and Quick Start Guide
Printer Manual Folder (hard copy)
Printer Driver CD
Perfect Image Graphics software CD (not utilised when operating the Prism via the
CopyDisc)
Warranty Card
Networking software CDs (DiscPilot Client/CD label Designer CD and PublisherNET ServerCD)
Attaching your Printer and Duplicator
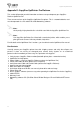
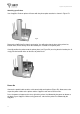
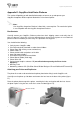
The printer first needs to be attached to the printer plate before fixing it to the CopyDisc unit.
Carefully turn the printer up side down and remove the four feet on the base of the printer (figure
F1).
Place the printer plate on top of the printer, matching the holes on the plate with the feet. Secure
the plate in place using the four small silver screws included (figure F2).
Remove all 4 feet
Fig. F1