HOW TO INSTALL ™ A CRUCIAL NVMe PCIe M.
PART 1: PREPARE 1. Gather supplies You’ll need your computer, a screwdriver, your new Crucial SSD, and your computer’s owner’s manual. 2. Back up important files Before starting the install process, save any important files on your computer to an external storage drive, a USB flash drive, or cloud storage. 3. Go slowly and deliberately The information you need is all here. Your computer will likely look different than the ones shown, but the process is the same.
2. Remove the power cable and battery Now remove the power cable and battery. The battery removal step applies only to laptops when it’s possible to remove the battery. To see how to remove the battery, refer to your owner’s manual. 3. Discharge residual power If your laptop has a removable battery, remove it, and hold the power button for five seconds to discharge any electricity left in the system. 4.
7. Insert the SSD Depending on your computer, there might be a heat sink or screw that needs to be removed prior to inserting your new NVMe PCIe SSD. To insert your Crucial NVMe PCIe SSD, hold the SSD carefully by the sides. Do not touch the gold connector pins. Align the notches in the SSD with the ridges in the PCIe slot, then insert at a 30-degree angle. Do not force the connection. To secure the drive, it might be necessary to insert the screw into the provided mount on the motherboard.
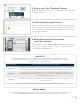
PART 3: COPY 1. Download the cloning software On the computer with the SSD, go to www.crucial.com/clone to download the software that will copy your old drive to your new SSD. This software comes free with Crucial SSDs. 2. Install the software you downloaded Open the file you downloaded and accept all of the prompts. A screen will then pop up. Click Install. After installation is complete, start the application. 3. Prepare to copy (clone) your data You’ll now see several options in the software.
4. Select source and destination drives Your “source” drive is your existing drive (disk). Select it by clicking on it, then click Next. Now select your “destination” drive (your new SSD) and click Next. On the following screen, click Proceed to start copying your data. 5. Wait for your data to copy It’ll take a while for everything to copy, but the Acronis software will keep you updated on the progress. 6.
2. Click on one of the “Download” buttons Download times will vary based on your internet connection, but average 1-3 minutes. 3. Install and run Storage Executive Click on the file you just downloaded. If it doesn’t open right away, double-click on it, then save it to your desktop and open it from there. Follow the onscreen prompts and instructions to install and start using the software. 4. Enable Momentum Cache and make your SSD even faster In the left menu, click on Momentum Cache.
Congratulations! Now that you’re an expert installer, watch out! Your friends and family might start asking you to do their installs ;) Customer Service and Technical Support North and South America Europe http://www.crucial.com/usa/en/support-contact UK: http://uk.crucial.com/gbr/en/support-contact FR: http://www.crucial.fr/fra/fr/aide-contact DE: http://www.crucial.de/deu/de/support-kontakt IT: http://it.crucial.com/ita/it/assistenza-contatti Asia, Australia, and New Zealand ANZ: http://www.crucial.