HOW TO INSTALL A CRUCIAL SSD IN YOUR COMPUTER Installing a Crucial SSD is easy and makes your computer significantly faster! ®
PART 1: PREPARE 1. Gather supplies You will need your system. A screwdriver. A Crucial SSD. A SATAto-USB cable. And your system’s owner’s manual. If you don’t have a SATA-to-USB cable, you can get one in the Crucial SSD Install Kit, which is sold separately. 2. Set the spacer aside As you take your SSD out of its box, you’ll see this – it’s called a spacer, but not all SSD models come with one. Set this aside for now.
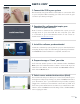
PART 2: COPY 1. Connect the SSD to your system Get started by using the SATA-to-USB cable to connect the SSD to your computer. When handling your SSD, don’t touch its gold connector pins with your fingers. 2. Download the software that copies your old drive to your new SSD Now it’s time to download the software that copies your old storage drive to your new SSD. On the computer your SSD is connected to, go to the website shown on the screen to download it. Crucial.com/clone 3.
6. Wait for your data to copy At this point, it’s time to kick back and relax for a bit, since it’ll take a while for everything to copy. The software might make your computer shut down or restart, which is OK. Once everything has copied over, watch the next video in this series to see what to do next. HELPFUL TIP If your old storage drive is 128GB (for example) and you copy its contents to a 275GB SSD, the SSD may show up in your system as a 128GB drive, even though it’s actually the size that you bought.
4. Open the case Now it’s time to open your system’s case. How you do this really varies from system to system, so consult your owner’s manual for what you need to do. The process is also different on a desktop versus on a laptop, so we’ll show you both. 5. Ground yourself You’ll now see your system’s components and there’s nothing to fear! Simply ground yourself by touching an unpainted metal surface like the ones shown.
9. Reassemble your system Once the SSD is securely seated in the storage bay, put your system back together and reconnect the battery if installing into a laptop. 10. Turn on your computer This next part is the fun part: watch how fast your computer boots up! 11. Have some fun Now try clicking on some of your favorite apps to see how fast they load. This is the power of your new SSD, but you’re not done yet! HELPFUL TIP When you first slot your SSD into the storage drive bay, it might not fit securely.
For desktops Some storage bays and existing hard drives are significantly larger than a standard size SSD. If this is the case in your system, you’ll need a 2.5-inch to 3.5-inch converter to make the SSD fit snug. You can get one of these on www.crucial.com. DID YOU KNOW...? Millions of people around the world have made their computers faster by installing a Crucial SSD. No computer skills are required! PART 4: DOWNLOAD 1. Enable Storage Executive On the computer you installed the SSD in, go to crucial.
4. Enable Momentum Cache and make your SSD even faster In the left menu, click on the Momentum Cache menu option, which will take you to a new screen where you can click the button that enables the feature. This will force your computer to restart, which is normal. Note that Momentum Cache doesn’t work with RAID arrays, but if you don’t know what that means, no need to worry. Once you’ve enabled Momentum Cache, you’re done.
Congratulations! Now that you’re an expert installer, watch out! Your friends and family might start asking you to do their installs ;) Customer Service and Technical Support North and South America Europe http://www.crucial.com/usa/en/support-contact UK: http://uk.crucial.com/gbr/en/support-contact FR: http://www.crucial.fr/fra/fr/aide-contact DE: http://www.crucial.de/deu/de/support-kontakt IT: http://it.crucial.com/ita/it/assistenza-contatti Asia, Australia, and New Zealand ANZ: http://www.crucial.