
User`s guide


142 VEREX Director V4.73 User's Guide 21-0381E v4.7.3
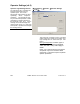
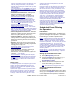
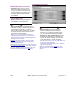
Pick-List (bottom of the form)
- Schedule (bottom of form): This is
where you select a schedule to view
or edit. This area shows a reference
number assigned by the system, and
the name of the selected schedule,
once defined;
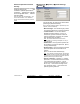
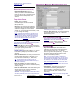
Top of the Form
- Name: A suitable name/description for
the schedule, or its intended use;
Intervals
- Days of the Week (with Associated Time-
Intervals): The days of the week showing the
time intervals for each day. (To add an
interval, right-click the specific day. To adjust
an interval, drag the interval and/or its end-
points to the desired position.)
Tips: You can copy and paste (or delete) time
intervals using the right-click menu. Up to 6 unique
time-intervals can be used as desired throughout the
weekdays in each schedule.
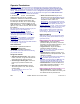
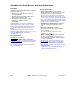
Split Shift
: Be sure to include an interval for after a
meal break—assuming the break is not part of the
'required attendance' times.
Work Shift that Spans Midnight
: It's simplest to use grid
view, entering the start and stop times in the order they
occur (e.g., Start time: 23:00, Stop time: 07:00), and
select the weekdays pertaining to the start
time.
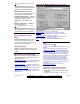
Holiday Schedules
- Start of Holiday: This allows selecting
whether holiday operation will begin at
midnight, or not until this schedule expires
(i.e., for time-intervals that span midnight).
- Schedule on Type 1/2/3 Holidays: How the
schedule will treat each type of holiday (No
access / as regular weekday / 24 hr access,
or as per the times in another schedule).
Tip: Pause the mouse cursor over a Schedule in the
list to view the associated times.
For details on setting up holidays, refer to "Holidays
and Time-Change Dates).
Note: For schedules assigned only
within other
schedules (for use on holidays), this setting will be
ignored.
Schedules (Forms View)