
Software Instruction Manual

TurboVUi Dispatch Software Installation and Configuration Guide
23
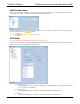
Select Audio Call, Text Message, or Transmit Emergency, and then click the button. Complete the Wizard
prompts to create the new Action.
Following the creation of an Action, associate the Action with an action initiator such as a Toolbar Button or USB PTT
device.
See the Example - Action and Toolbar Button section below for more details on creating Actions and custom Toolbar
Buttons.
Click the button to save all Dispatch Settings.
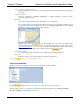
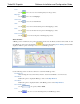
Toolbar Buttons Folder
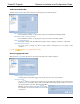
Custom buttons may be added to the Toolbar of the Main Window. When the Toolbar Buttons folder is selected,
the following window will be displayed.
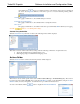
Map button visibility
Choose an option from the drop-down list to show the Map button on the Toolbar of the Main window. This button
provides access to the Map window. This button should be configured to be invisible for Connect Plus systems (and other
installations that are not equipped to handle GPS and Text Messaging due to data handling restrictions).
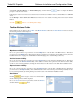
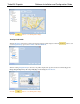
Archive button visibility
Choose an option from the drop-down list to show the Archive button on the Toolbar of the Main window. This button
provides access to the Archive Viewer utility, where database searches can be performed. The Archive Viewer utility
can also be accessed independently by running the ArchiveViewer.exe file located on the TurboVUi installation folder.
Reports button visibility
Choose an option from the drop-down list to show the Reports button on the Toolbar of the Main window. This button
provides access to the Reports utility, where summarized data can be viewed and exported. The Reports utility can also
be accessed independently by running the Reports.exe file located on the TurboVUi installation folder.
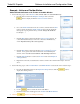
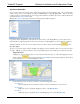
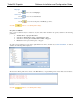
New Button
Click the button to begin to create a new Toolbar button,
and the following window will be displayed.
Choose an Action from the drop-down list, rename the Button,
and then click the button.