Professional Landscaping Tools CS5018 / CS5220 18 or 20” CHAIN SAW IMPORTANT: READ SAFETY RULES AND INSTRUCTIONS CAREFULLY DO NOT THROW AWAY
Table of Contents Content Page Introduction . . . . . . . . . . . . . . . . . . . . . . . . . . . . . . . . . . . . . . . . . . . . . . . . . . . . . . . . . . . . . . . 2 Safety . . . . . . . . . . . . . . . . . . . . . . . . . . . . . . . . . . . . . . . . . . . . . . . . . . . . . . . . . . . . . . . . . . . 3 Know Your Unit . . . . . . . . . . . . . . . . . . . . . . . . . . . . . . . . . . . . . . . . . . . . . . . . . . . . . . . . . . . . 7 Fitting the Bar & Chain . . . . . . . . . . . . . . . . .
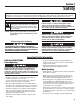
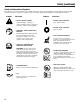
Section 1 Safety The purpose of safety symbols is to attract your attention to possible dangers. The safety symbols, and their explanations, deserve your careful attention and understanding. The safety warnings do not by themselves eliminate any danger. The instructions or warnings they give are not substitutes for proper accident prevention measures. SYMBOL MEANING SAFETY ALERT SYMBOL: Indicates danger, warning or caution. Attention is required in order to avoid serious personal injury.
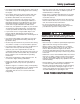
Safety (continued) • Avoid accidental starting. Be in the starting position whenever pulling the starter rope. The operator and unit must be in a stable position while starting. See Starting/Stopping Instructions. Kickback Safety Precautions • Before you start the engine, make sure that the saw’s chain is not contacting anything. Do not cut near electrical cables or power lines.
Safety (continued) • Use caution when handling fuel. Move the chain saw at lest 10 feet (3 m) from the fueling point before starting the engine. • Store the unit in a dry area, locked up, located up high and located out of the reach of children to prevent unauthorized use or damage. • Do not allow other persons to be near the chain saw when starting or cutting with the chain saw. Keep bystanders and animals out of the work area. • Never douse or squirt the unit with water or any other liquid.
Safety (continued) Safety and International Symbols This operator's manual describes safety and international symbols and pictographs that may appear on this product. Read the operator's manual for complete safety, assembly, operating and maintenance and repair information. SYMBOL MEANING • SAFETY ALERT SYMBOL Indicates danger, warning, or caution. May be used in conjunction with other symbols or pictographs.
Section 2 Know Your Unit Chain Saw Components 1 - Choke lever 2 - Throttle trigger 3 - Throttle trigger lockout 4 - Carburetor adjustment screws 5 - Inertial brake lever 6 - Exhaust muffler 7 - Chain 8 - Guide bar 9 - Air filter cover 10 - On/off switch 11 - Fuel tank cap 12 - Starter handle 13 - Oil tank cap 14 - Primer bulb 15 - Decompression valve 16 - Lateral chain tensioner screw 7
Section 3 Fitting the Bar & Chain 1 Check the chain tension frequently when operating the chain saw. Always use protective gloves. With the engine off, follow the ensuing instructions: • Pull the guard (Fig. 1) towards the front handle to check that the chain brake is not on. • Remove the bar nuts (A) and the chain cover (B, Fig. 2). • Remove and discard the plastic shim from the bar studs (C, Fig. 3). • Take the chain tightener pawl (D, Fig.
Fitting the Bar & Chain (continued) 5 • Put down the chain cover, inserting it into its housing and, keeping it pressed against the bar, screw on the chain tightener screw (L, Fig. 5) so that the pawl (D, Fig. 3) goes into the hole (G, Fig. 3) of the bar. • Fit the chain cover and the relative nuts without tightening them. • Tension the chain by means of the tensioning screw (L, Fig. 5). • Hold the tip of the guide bar up and tighten the chain cover nuts securely (Fig. 7).
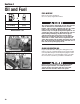
Section 4 Oil and Fuel FUEL MIXTURE 9 Refer to the values in Figure 9. Use a 2% (50:1) oil/gasoline mixture. + UNLEADED GAS 2 CYCLE OIL (2%) 1 GALLON US (3.8 LITERS) 2.56 FL. OZ. (76 ml) 1 LITER 20 ml MIXING RATIO - 50:1 10 Two-stroke engines have high specific horsepower and we therefore recommend the use of wellknown, super gasoline, without lead and an octane rating of no less than 90. When preparing the mixture, only use a high quality oil designed for aircooled two stroke engines.
Section 5 Operation 12A 12B STARTING THE ENGINE 1. Fill the carburetor by pushing primer bulb (A, Fig. 12B). 2. Put the ON/OFF switch (C, Fig. 12A) in the START position. 3. Pressing the push button (E, Fig. 14) opens the decompression valve. It will automatically close at the first start. We suggest to press the push button before every start. 4. Pull the choke lever (D, Fig. 12B). 13 5. Place the chain saw on the ground in a stable position.
Operation (continued) 15 STOPPING THE ENGINE Release the throttle lever and let the engine return to idle. (B, Fig. 15). Turn off the engine, putting the ON/OFF switch (C) in the STOP position. Do not put the chain saw on the ground when the chain is still moving. BREAKING-IN THE CHAIN 16 New chains will stretch and must be tightened frequently. Tension adjustment must only be made when the chain is cool. 1. Turn the chain and lubricate it with additional oil (Fig. 16). 2.
Section 6 Carburetor Adjustment 18 CARBURETOR 19 Before adjusting the carburetor, clean the starter cover (Fig. 18), the air filter (Fig. 19) and warm up the engine. This engine is designed and manufactured in order to comply with the applicable Exhaust Emission Standards. The Exhaust Emission Control System includes the ignition system, the air inlet system and, mainly, the carburetor. In this engine, the carburetor (Fig.
Section 7 Kickback 21 PRECAUTIONS AGAINST KICKBACK Kickback is a dangerous reaction that can lead to serious injury. Do not rely only on the safety devices provided with your saw. As a chain saw user, you must take special safety precautions to help keep your cutting jobs free from accident or injury. KICKBACK WARNINGS Refer to Figures 21, 22, 23.
Kickback (continued) RECOMMENDED BAR & CHAIN COMBINATIONS Chains .325”x.058” Model Bar length Bar description Chain description CS5018 18” .325 490-700-0004 490-700-0008 CS5220 20” .325 490-700-0005 490-700-0009 Section 8 Chain Brake 25 INERTIAL CHAIN BRAKE 26 The inertial chain brake ensures maximum safety when using the chain saw. It protects the operator from dangerous kickback which can occur during working phases. The chain brake can be actuated in two ways.
Section 9 Cutting Techniques (Felling, Limbing Bucking) 29 31 30 32 OPERATING INSTRUCTIONS Always follow the safety precautions. The chain saw must only be used for cutting wood. It is forbidden to cut other types of material. Vibrations and kickback vary with different materials; the safety requirements and regulations would not be respected. Do not use the chain saw as a lever for lifting, moving or splitting objects. Do not lock it over fixed stands.
Cutting Techniques (continued) 36 33 34 35 Now, make your felling cut on the opposite side of the trunk. Start the cut about 4-5 cm (2”) higher than the center of the notch (3 - Fig. 30). Always leave a hinge (A, Fig. 31 and 32) which allows you to control the direction the tree falls in. Put a wedge into the felling cut, before the tree starts to move, to prevent the chain saw guide bar from getting stuck.
Section 10 Maintenance 37 39 38 Always wear protective gloves and eye protection during maintenance operations. Do not carry out maintenance when the engine is hot. A sharp chain produces well-defined chips. When your chain starts to produce sawdust, it is time to sharpen the chain. CHAIN SHARPENING After sharpening the cutters 3-4 times, it is important to check the height of the depth gauges.
Maintenance (continued) 40 GUIDE BAR The guide bar has a sprocket at its base that must be lubricated with grease using a lubrication syringe (Fig. 40). Reverse the guide bar every 8 working hours to ensure uniform wear. Keep the bar groove and lubrication hole clean using the bar groove cleaner (Fig. 41). Check the bar rails frequently for wear. If they are sufficiently worn, remove the burs and square-up the rails using the flat file (Fig. 42). 41 Never mount a new chain on a worn sprocket (Fig. 43).
Maintenance (continued) 45 FUEL FILTER Check the fuel filter periodically. Replace it if it is too dirty (Fig. 45). OIL PUMP (automatic / adjustable) Flow adjustment is pre-set by the manufacturer. Oil flow can be adjusted by the operator according to specific requirements. This is accomplished by the special adjusting screw (Fig. 46). Oil flow occurs only when the chain is moving. 46 Never use or operate with used oil.
Maintenance (continued) 50 CHAIN BRAKE Always wear safety glasses when performing maintenance on your saw. 51 52 If the chain brake does not work properly, remove the bar clamp (chain cover) to inspect. Clean brake mechanism and related parts, removing woodchips, dust, excessive oil and foreign material. Use a brush or low volume compressed air. Inspect for excessive wear (Fig. 50), damage to the band or actuator assembly.
Section 11 Specifications ENGINE* Engine Type.......................................................................................................................................... Air-Cooled, 2-Cycle Displacement ......................................................................................................................................................... 51.7 cm3 Power..............................................................................................................................
EPA Emission Control Warranty Statement Your Warranty Rights and Obligations The Environmental Protection Agency and Cub Cadet LLC (Cub Cadet) are pleased to explain the emission control system warranty on your 2002 and later small off-road engine. New small off-road engines must be designed, built and equipped to meet stringent anti-smog standards.
MANUFACTURER’S LIMITED WARRANTY FOR: The limited warranty set forth below is given by Cub Cadet Commercial LLC with respect to new merchandise purchased and used in the United States, its possessions and territories. Cub Cadet Commercial LLC warrants this product against defects in material and workmanship for a period of two (2) years commencing on the date of original purchase and will, at its option, repair or replace, free of charge, any part found to be defective in material or workmanship.