
Operator`s manual


29se c t i O n 7 — se r v i c e
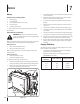
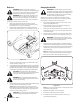
Remove and retain the lock nuts from each end of the front 6.
front of cutting deck, with the angled ends facing upward..
Insert the ends of the front hanger through the holes in 7.
the front hanger bracket and secure with the two lock nuts
NOTE: Do not fully tighten the lock nuts at this point.
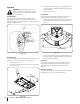
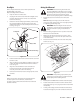
Routing the PTO Belt
Working from the front of the tractor, route the belt around
the pulley. Carefully feed the belt downward and route it in
NOTE: The small belt keeper found on the right-hand mule
drive pulley does not have to be removed in order to route
the belt past it and onto the pulley.
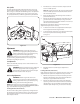
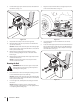
Feed the belt rearward, toward the deck drive pulley found 2.
on the cutting deck.
Working on the left side of the tractor, insert a / -inch drive
ratchet wrench, set to loosen, into square hole found on the
idler bracket.
4.
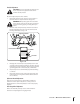
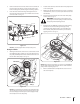
WARNING! Avoid pinching injuries. Never place
your fingers on the idler spring or between the belt
and a pulley while installing the belt.
5.
belt is seated, slowly allow the wrench to pivot forward,
NOTE:
pulleys while completing steps 2-5.
Refer to the Maintenance & Adjustments section to level 6.
the deck if required.
Mule Drive
Pulleys
PTO Clutch
Figure 7-8
Figure 7-9
Figure 7-7