Safe Operation Practices • Set-Up • Operation • Service • Troubleshooting Operator’s Manual All Wheel Drive Model Series N Table of Contents Safe Operation Practices......................................... 2 Service......................................................................11 Assembly & Set-Up................................................... 6 Troubleshooting......................................................13 Controls & Operation...............................................
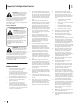
1 Important Safe Operation Practices WARNING! This symbol points out important safety instructions which, if not followed, could endanger the personal safety and/or property of yourself and others. Read and follow all instructions in this manual before attempting to operate this machine. Failure to comply with these instructions may result in personal injury. When you see this symbol. HEED ITS WARNING! 4. Never allow children under 14 years of age to operate this machine.
26. 27. 28. Only use parts and accessories made for this machine by the manufacturer. Failure to do so can result in personal injury. When starting engine, pull cord slowly until resistance is felt, then pull rapidly. Rapid retraction of starter cord (kickback) will pull hand and arm toward engine faster than you can let go. Broken bones, fractures, bruises or sprains could result. If situations occur which are not covered in this manual, use care and good judgement.
and materials can harm the environment. 29. According to the Consumer Products Safety Commission (CPSC) and the U.S. Environmental Protection Agency (EPA), this product has an Average Useful Life of seven (7) years, or 140 hours of operation. At the end of the Average Useful Life have the machine inspected annually by an authorized service dealer to ensure that all mechanical and safety systems are working properly and not worn excessively. Failure to do so can result in accidents, injuries or death.
(OK) Figure 1 Slope Gauge ne d a s h e d li 15° Slope 15° USE THIS SLOPE GAUGE TO DETERMINE IF A SLOPE IS TOO STEEP FOR SAFE OPERATION! To check the slope, proceed as follows: 1. Remove this page and fold along the dashed line. 2. Locate a vertical object on or behind the slope (e.g. a pole, building, fence, tree, etc.) 3. Align either side of the slope gauge with the object (See Figure 1 and Figure 2 ). 4. Adjust gauge up or down until the left corner touches the slope (See Figure 1 and Figure 2). 5.
2 Assembly & Set-Up Thank You models. We reserve the right to change product specifications, designs and equipment without notice and without incurring obligation. Thank you for purchasing this product. It was carefully engineered to provide excellent performance when properly operated and maintained. If applicable, the power testing information used to establish the power rating of the engine equipped on this machine can be found at www.opei.org or the engine manufacturer’s web site.
. The rope guide is attached to the right side of the upper handle. Loosen the wing knob (a) which secures the rope guide and perform the following (See Figure 2-4): a. Hold blade control against upper handle. b. Slowly pull starter rope handle from engine and slip starter rope into the rope guide. c. Grass Catcher (If Equipped) 1. Follow steps below to assemble the grass catcher (if needed). Make certain bag is turned right side out before assembling (warning label will be on the outside).
Adjustments Handle Pitch (If Equipped) Set-Up Cutting Height If equipped, the pitch of the handle can be adjusted as follows: Gas and Oil Fill-Up Dual Lever 1. Refer to the Engine Operator’s Manual for additional engine information. The front cutting height adjustment lever is located above the right front wheel. The rear cutting height adjustment lever is located above the left rear wheel. 1. Remove wing nuts (a) and carriage bolts (b) from handle. See Figure 2-11.
3 Controls & Operation Dual Lever Drive Control (Rear Wheel Drive Lever) Blade Control Dual Lever Drive Control (Front Wheel Drive Lever) Electric Starter Push Key* Rear Mulch Plug* Recoil Starter Rear Discharge Door Rear Cutting Height Adjustment Lever Grass Catcher* Deck Wash* Side Discharge Chute* Bumper* * If Equipped Mulch Plug* Front Cutting Height Adjustment Lever Figure 3-1 Controls and Features Blade Control The blade control is attached to the upper handle of the mower.
Operation Dual Lever Drive Controls Using Your Lawn Mower NOTE: Do not engage the dual lever drive controls while starting the engine. Be sure lawn is clear of stones, sticks, wire, or other objects which could damage lawn mower or engine. Such objects could be accidently thrown by the mower in any direction and cause serious injury to the operator, others, or the equipment.
4 Service Maintenance General Recommendations • Always observe safety rules when performing any maintenance. • The warranty on this lawn mower does not cover items that have been subjected to operator abuse or negligence. To receive full value from warranty, operator must maintain the lawn mower as instructed here. • Deck Wash (If Equipped) Clean underside of the mower deck after each use to prevent build-up of grass clippings or other debris. Follow steps below for proper cleaning.
Blade Care 8. WARNING: When removing the cutting blade for sharpening or replacement, protect your hands with a pair of heavy gloves or use a heavy rag to hold the blade. Periodically inspect the blade adapter for cracks, especially if you strike a foreign object. Replace when necessary. Follow the steps below for blade service. 1. Allow the engine to run until it is out of fuel. Do not attempt to pour fuel from the engine. Disconnect spark plug wire. Refer to Engine Operator’s Manual.
5 Troubleshooting Problem Engine fails to start Engine fails to start with electric starter (Electric Start Units Only) Engine runs erratic Engine overheats Cause Remedy 1. Blade control disengaged. 1. Engage blade control. 2. Spark plug boot disconnected. 2. Connect wire to spark boot. 3. Fuel tank empty or stale fuel. 3. Fill tank with clean, fresh gasoline. 4. Engine not primed (if equipped with primer). 4. Prime engine as instructed in the Engine Operator’s Manual. 5. Faulty spark plug.
Problem Remedy Occasional skips (hesitates) at high speed 1. Spark plug gap too close. 1. Adjust spark plug gap. Refer to Engine Operator’s Manual. Idles poorly 1. Spark plug fouled, faulty, or gap too wide. 1. Reset gap or replace spark plug. 2. Dirty air cleaner. 2. Refer to Engine Operator’s Manual. 1. Cutting blade loose or unbalanced. 1. Tighten blade and adapter. Balance blade. 2. Bent/damaged blade or blade adapter. 2. See an authorized service dealer. 1. Wet grass. 1.
Notes 6 15
MTD LLC, P.O.