INSTRUCTION & RECIPE BOOKLET Cuisinart® Electric Pressure Cooker CPC-400 Series For your safety and continued enjoyment of this product, always read the instruction book carefully before using.
IMPORTANT SAFEGUARDS 14. Use of accessories not specifically recommended by Cuisinart may cause damage to unit. 15. Do not use outdoors. 16. Do not use under hanging cabinets; steam from pressure release may cause damage. When using electrical appliances, especially when children are present, basic safety precautions should always be taken, including the following: 17. Do not fill unit over 2⁄3 full (Max line).
SPECIAL CORD SET INSTRUCTIONS CONTENTS Important Safeguards................................................2 Special Cord Set Instructions....................................3 Parts and Features.....................................................3 Before First Use.........................................................4 Instructions for Use....................................................4 Operating Instructions................................................5 Pressure Cooker Functions................
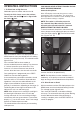
BEFORE FIRST USE 2. Insert cooking pot into pressure cooker and add food and liquids as the recipe directs. NOTE: The total volume of food and liquid must not exceed (11 cups/Max fill line) the capacity of the cooking pot (figure 3). For foods such as dried vegetables and beans, or rice and grains, the total volume must not exceed (8 cups) capacity (figure 4). NOTE: Overfilling may clog the pressure limit valve, which can cause excess pressure to develop.
OPERATING INSTRUCTIONS YOU SHOULD NEVER ATTEMPT TO OPEN THE LID WHILE PRESSURE COOKING. 1. To Select Low or High Pressure Automatic Keep Warm Add food to pressure cooker and close the lid. When LED display reaches 00, the pressure cooker automatically shifts to Keep Warm. The yellow Keep Warm light will turn on and the cooker will beep several times to indicate cooking is complete. To verify the lid is closed, ensure the red float valve is down and the lid icon is aligned with the closed icon.
If using a pressure function after Brown or Sauté, press MENU again and select Low or High Pressure function. Refer to “To Select Low or High Pressure” in Operating Instructions, Section 1. released, the red float valve (pressure indicator) will drop and the lid will be unlocked, allowing lid to be rotated clockwise to the open icon and removed. 2. Quick Pressure Release – Following pressure cooking, you will hear a series of beeps when the time is up. The unit will then transition to Keep Warm.
PRESSURE COOKER FUNCTIONS 2. Pressure Control The correct pressure level is automatically maintained during the cooking cycle. 1. Low Pressure 3. Pressure Limit Control The pressure limit valve will release air automatically when the pressure inside exceeds the preset pressure. 2. High Pressure 3. Brown – This preset temperature allows cooking over high heat, without the lid, before pressure cooking.
CLEANING AND MAINTENANCE careful not to damage the inside coating. Never use harsh chemicals or scouring pads or metal utensils. 1. Unplug the power cord before cleaning. NOTE: If scouring is necessary, use a nonabrasive cleaner or liquid detergent with a nylon pad or brush. 2. Clean the outer body with a soft cloth, such as a paper towel or microfiber cloth. Do not immerse the outer body in water or pour water into it. 10.
TROUBLESHOOTING Symptom Lid does not close. Cannot open the lid after pressure is released. Air escapes from the rim of the lid. Air escapes from the red float valve. The red float valve will not rise. Unit shuts off when START is pressed to begin pressure cooking. Possible Reasons Solutions The sealing ring assembly is not properly installed in lid. Re-install the sealing ring assembly as instructed in INSTRUCTIONS FOR USE, #3 page 4. The red float valve is seized by the push rod.
LIMITED THREE-YEAR WARRANTY (U.S. & CANADA ONLY) warranty expressly excludes any defects or damages caused by attempted use of this unit with a converter, as well as use with accessories, replacement parts or repair service other than those authorized by Cuisinart. This warranty does not cover any damage caused by accident, misuse, shipment or other than ordinary household use. This warranty excludes all incidental or consequential damages.
TIPS AND HINTS COOKING TIME CHARTS: • Many family favorites can be easily adapted for preparation in your Cuisinart® Electric Pressure Cooker – soups, stews, side dishes, and more. • The amount of liquid needed is much less than for traditional cooking methods. Poultry and Meats....................................................12 Vegetables................................................................13 Rice and Grains........................................................
POULTRY & MEATS Food Cooking Time Pressure Release Method Chicken Whole – up to 4 pounds 24 to 28 minutes Quick Pressure Release Chicken Breast, bone in, 3 pounds 8 to 10 minutes Quick Pressure Release Boneless Chicken Breast, 3 pounds 5 to 6 minutes Quick Pressure Release Thighs/Legs, bone in, 3 pounds 9 to 12 minutes Quick Pressure Release Thighs/Legs, boneless, 3 pounds 8 to 10 minutes Quick Pressure Release Pot Roast, Bottom Round, 3 to 3½ pounds 60 to 90 minutes Natural Pressure Rel
VEGETABLES Vegetables should be well washed and peeled, if necessary. Vegetables cook very quickly – be sure to use Quick Pressure Release immediately after audible beep sounds. If vegetables require more cooking, turn pressure cooker off, and cover to steam the vegetables until preferred texture is reached. Add ½ cup water or liquid for cooking. If pressure cooking frozen vegetables, 1 to 2 minutes additional cooking time and longer steaming time may be needed.
RICE AND GRAINS Grains (1 cup) Cooking Time Minutes (High Pressure) Liquid Needed Release Method Barley (pearl) 3 cups 20 to 25 Quick Brown Rice 2 cups 20 Natural Bulgur 2 cups 6 Quick Farro (whole grain) 3 cups 18 Quick Quinoa 1½ cups 5 Quick Steel-Cut Oats 3 cups 5 Natural White Rice (long grain) 1½ cups 4 to 6 Quick Wild Rice 3 to 4 cups 22 Quick DRIED BEANS AND LEGUMES • Before cooking dried beans, pick over and discard any broken or shriveled beans or bits of dirt a
RECIPES audible beep sounds, allow pressure to release naturally. Steel-Cut Oats..........................................................15 Chicken Stock..........................................................15 Vegetable Stock.......................................................16 Quick Chicken Soup................................................16 Lentil Soup...............................................................17 Summer Minestrone.................................................
Vegetable Stock While this recipe uses whole vegetables, scraps can also be added. Store carrot peels, celery leaves and ends, onion skins, mushroom stems and herbs in an airtight container in the freezer. Add to the veggie stock ingredients to enhance a flavorful, vegetarian stock.
Summer Minestrone the soup, slowly add in the tempered egg mixture. Sprinkle with freshly ground black pepper and garnish with a pinch of chopped parsley or dill before serving. Dried beans cook in a fraction of the time in the Cuisinart® Pressure Cooker – perfect for a quick bean soup like the recipe below. Nutritional information per serving (1 cup): (for Quick Chicken Soup) Calories 379 (56% from fat) • carb. 11g • pro. 30g fat 23g • sat. fat 7g • chol. 0mg • sod. 135mg calc.
Vegetarian Bean Chili 4. Taste and adjust seasoning as desired. Nutritional information per serving (1 cup): Calories 247 (10% from fat) • carb. 44g • pro. 14g fat 3g • sat. fat 0g • chol. 0mg • sod. 728mg calc. 117mg • fiber 14g The smokiness of the chipotle not only adds a lot of flavor (and some heat), but an unexpected meatiness to the dish, making this a filling, but healthy, chili.
Artichokes with Three Sauces The oil can be stored at room temperature for 24 hours, or in the refrigerator for up to 1 week (bring to room temperature before serving). Perfect artichokes, ready in just 7 minutes! The best part is that these can be made in advance and served at room temperature with any one of our suggested sauces. Nutritional information per serving (2 teaspoons): Calories 82 (98% from fat) • carb. 0g • pro. 0g • fat 9g sat. fat 1g • chol. 0mg • sod. 12mg • calc.
Mushroom Risotto ingredients thicken and start to emulsify, continue processing, using a gentle up-anddown motion, until thick and all the ingredients are incorporated. Fresh mushrooms star in this simple yet flavorful risotto. Makes about 6 cups (6 entrée servings, 12 first-course servings) 3. I f sauce is too thick, blend in warm water, 1 teaspoon at a time, until desired consistency is achieved (approximately 2 tablespoons water total). 4. T aste and adjust seasoning as desired.
Black Beans and Rice ½ A quick version of the classic Cuban side dish. and tender stems roughly chopped cup low-sodium chicken broth 1. Put the olive oil in the cooking pot of the Cuisinart® Pressure Cooker. Select Sauté. Add the garlic clove and simmer slightly until barely golden. Stir in the salt and crushed red pepper.
completely released, the red indicator will drop, minutes. Plus, a touch of sweetness and Asian flavors will appeal to even the pickiest eaters. Makes 2 to 3 servings 4. Remove lid and stir together, taste and adjust seasoning as desired.
6 1 ½ ½ 8 ounces baby potatoes (1½ to 2 inches) corn ear, cut into 1-inch discs cup water pound frozen large shrimp littleneck clams, scrubbed 2. Put the oil into the cooking pot of the Cuisinart® Pressure Cooker. Select Brown. Once the oil is hot, brown the chicken in 2 batches, about 5 minutes per side. Remove and reserve. Add the chopped onion, red pepper and garlic. Stir well, scraping any brown bits from the bottom of the pot. Sauté vegetables until fragrant, about 5 minutes.
1 1 1 1 2 ½ 1 1 1 1 1 cut into 1-inch pieces ½ pound sweet potatoes, peeled and cut into 1-inch pieces 1 large carrot, peeled cut into ½-inch pieces ½ cup green peas, fresh or frozen Fresh cilantro, chopped, for garnish Basmati rice, for serving 1. Put ½ tablespoon of the ghee or oil into the cooking pot of the Cuisinart® Pressure Cooker. Select Brown. While oil is heating, season chicken on both sides with a pinch each of the salt and pepper. Brown the chicken, in batches, about 5 minutes per side.
liquid overnight. Before using, shred meat into 1½- to 2-inch long shreds with fork or hands. Nutritional information per serving (1 cup): Calories 379 (21% from fat) • carb. 28g • pro. 41g fat 9g • sat. fat 3g • chol. 114mg • sod. 583mg calc. 63mg • fiber 6g 4. When the meat is shredded, make the sofrito. Put oil into the cooking pot and select Brown. Once the oil is hot, briefly brown the beef in batches, about 3 minutes per batch.
Pressure Cooker. Stir together the pineapple juice, water, ketchup and chipotle; add to the cooking pot with the pork. Mix all ingredients together well. 2. Return the browned pork chops to the pot and add the apricot jam, broth, garlic and thyme sprigs. Secure the lid and select High Pressure. Set the time for 8 minutes. When the audible beep sounds, use Quick Pressure Release. Once pressure is completely released, the red indicator will drop. 2. Secure the lid and select High Pressure.
“Baked” Apples 6. Once pressure is released completely, the red indicator will drop. These are perfect when served on their own, but even more decadent with a dollop of whipped cream or a scoop of vanilla ice cream. 7. Remove lid. Serve warm. Nutritional information per apple: Calories 285 (28% from fat) • carb. 53g • pro. 2g fat 9g • sat. fat 5g • chol. 20mg • sod. 26mg calc.
NOTES: 28
©2019 Cuisinart 7475 N. Glen Harbor Blvd.
MANUAL DE INSTRUCCIONES & LIBRO DE RECETAS Olla a presión eléctrica Cuisinart® Serie CPC-400 Para su seguridad y para disfrutar plenamente de este producto, siempre lea cuidadosamente las instrucciones antes de usarlo.
MEDIDAS DE SEGURIDAD IMPORTANTES 13. No permita que el cable cuelgue del borde de la encimera o de la mesa, ni que tenga contacto con superficies calientes. 14. El uso de accesorios no recomendados por Cuisinart puede dañar el aparato. 15. No lo utilice en exteriores. Al usar aparatos eléctricos, especialmente en presencia de niños, siempre debe tomar precauciones básicas de seguridad, entre ellas las siguientes: 16. No haga funcionar el aparato debajo de un armario/gabinete; el vapor puede dañarlo. 17.
USO DE EXTENSIONES ÍNDICE El cable provisto con este aparato es corto, para reducir el riesgo de que alguien se enganche o tropiece con un cable más largo. Medidas de seguridad importantes...........................2 Uso de extensiones....................................................3 Piezas y características..............................................3 Antes del primer uso..................................................4 Instrucciones de uso..................................................
ANTES DEL PRIMER USO ingredientes no debe exceder 11 tazas (2.5 L) o la línea “MAX” (Fig. 3). En el caso de vegetales/ legumbres deshidratados, frijoles, arroz, granos y cereales, el volumen de ingredientes no debe exceder 8 tazas (1.9 L) (Fig. 4). NOTA: sobrellenar la olla puede atascar la válvula reguladora de presión y causar una peligrosa acumulación de presión dentro de la olla. NOTA: siempre agregue ½ taza (120 ml) o más de líquido junto con los ingredientes.
INSTRUCCIONES DE OPERACIÓN temporizador se pondrá en marcha. Si el mensaje “[- -]” aparece en la pantalla LED, esto significa que no hay suficiente agua en la olla. 1. Cómo elegir el nivel de presión La válvula indicadora de presión (indicador rojo) permanecerá alzada durante toda la cocción. Colocar los ingredientes en la olla y cierre la tapa.
saltear (“SAUTÉ”); la función elegida empezará a parpadear. poco. Dependiendo de la cantidad de alimentos y líquido dentro de la olla, esto puede demorar de 12 a 40 minutos. Nota: la cocción continua durante este tiempo. Por eso, se recomienda usar este método de descompresión después de cocinar cortes de carne más duros y algunos artículos más sustanciosos. Después de la descompresión, la válvula indicadora de presión volverá a su posición original y se podrá abrir la tapa.
para terminar de cocinar los alimentos hasta que consigan la textura deseada. 3. Método combinado: en algunas de nuestras recetas, 6. KEEP WARM (mantener caliente) – Este modo mantiene los alimentos calientes durante hasta 12 horas después de la cocción. usamos un método combinado (natural/rápido) de descompresión para que los alimentos sigan cocinándose por un tiempito más. Para usar el método combinado, permita que el vapor salga naturalmente durante el tiempo indicado, y luego abra la válvula.
LIMPIEZA Y MANTENIMIENTO 9. La olla es apta para lavavajillas. Para lavar la olla a mano, utilice agua jabonosa tibia y séquela. Tenga cuidado de no dañar el revestimiento antiadherente. Nunca utilice productos químicos fuertes o estropajos/ utensilios metálicos. 1. Desenchufe el aparato antes de limpiarlo. 2. Limpie la carcasa del aparato con un paño suave, tal como un paño de microfibra o una toallita de papel humedecida. No sumerja la carcasa del aparato en agua, ni vierta agua en ella.
RESOLUCIÓN DE PROBLEMAS Problema La tapa no se cierra. La tapa no se puede abrir aún después de la descompresión. Aire se está escapando por la orilla de la tapa Aire se escapa de la válvula indicadora de presión (indicador rojo). La válvula indicadora de presión (indicador rojo) no sube. La unidad se apaga al oprimir el botón START para empezar la cocción Posibles causas Soluciones El anillo sellador no está debidamente instalado. Vuelva a instalar el anillo sellador (pieza n.
GARANTÍA LIMITADA DE TRES AÑOS (VÁLIDA EN LOS EE.UU. Y EN CANADÁ SOLAMENTE) reparaciones no autorizados por Cuisinart, así como los defectos o daños causados por el uso de un convertidor de voltaje. Esta garantía no cubre el uso comercial o industrial del producto, y no es válida en caso de daños causados por mal uso, negligencia o accidente. Esta garantía excluye todos los daños incidentales o consecuentes.
CONSEJOS Y SUGERENCIAS TABLAS DE TIEMPO DE COCCIÓN • Puede adaptar muchas de sus recetas favoritas, p. ej., sopas, estofados y mucho más, para cocinarlas en su olla a presión Cuisinart®. Pollo/Aves y carnes..................................................12 Vegetales..................................................................13 Arroz y cereales........................................................14 Frijoles secos y legumbres......................................14 Recetas......................
POLLO/AVES Y CARNES Alimento Tiempo de cocción Método de descompresión Pollo Entero – hasta 4 libras (1.8 kg) 24 a 28 minutos Rápido Pechuga con hueso – 3 libras (910 g) 8 a 10 minutos Rápido Pechuga deshuesada – 3 libras (910 g) 5 a 6 minutos Rápido Muslos/piernas, con hueso – 3 libras (910 g) 9 a 12 minutos Rápido Muslos/piernas, sin hueso – 3 libras (910 g) 8 a 10 minutos Rápido Paleta/Pulpa contra (“bottom round”) – 3 a 3½ libras (1.35 a 1.
VEGETALES Siempre lave y pele (de ser necesario) los vegetales antes de cocinarlos. Los vegetales se cocinan muy rápidamente; recuerda liberar el vapor, empleando el método de descompresión rápido, inmediatamente después de escuchar el pitido que indica el final de la cocción. Si los vegetales requieren cocinarse más, apague la olla y cierre la tapa; seguirán cocinándose al vapor. Siempre agregue ½ taza (120 ml) de líquido para cocinar vegetales.
ARROZ Y CEREALES Granos (1 taza/ aprox.
RECETAS 1. Poner todos los ingredientes en la olla de la olla a presión. Cerrar la tapa y elegir el modo HIGH PRESSURE (presión alta). Fijar el temporizador en 5 minutos. Después del pitido que indica el final de la cocción, emplear el método de descompresión natural para liberar el vapor. Avena escocesa.................................................. 15 Caldo de pollo..................................................... 15 Caldo de vegetales.............................................
Sopa de pollo rápida Nota: si no tiene mucho tiempo, el caldo se puede preparar en 30 minutos, pero el sabor es mejor mientras sea más larga la cocción. La olla a presión Cuisinart® permite preparar una base sabrosa para sopa de pollo en 25 minutos sin usar potenciadores de sabor, tales como cubos de caldo salados.
hasta que los vegetales estén tiernos y fragantes. * Para preparar sopa de pollo con fideos, agregar 1 taza (150 g) de fideos de huevo junto con los vegetales rebanados e incrementar el tiempo de cocción en 5 minutos. 2. Agregar la hoja de laurel, las lentejas y el caldo. Cerrar la tapa y elegir el modo HIGH PRESSURE (presión alta). Fijar el temporizador en 8 minutos. Después del pitido que indica el final de la cocción, emplear el método de descompresión natural para liberar el vapor.
2 cucharaditas de chile en polvo ¼ cucharadita de comino en polvo ¼ cucharadita de canela en polvo 1 lata de 28 onzas (795 g) de tomates picados, sin jugo 2 cucharadas de concentrado de tomate 1 chipotle en adobo, licuado, más 1 cucharadita de adobo 2 tazas (475 ml) de caldo de vegetales Queso Cheddar o Monterey Jack rallado, para decorar Cilantro fresco, para decorar presión. Cerrar la tapa y elegir el modo HIGH PRESSURE (presión alta). Fijar el temporizador en 35 minutos.
1 hoja de laurel 4 tazas (945 ml) de caldo de vegetales ½ cucharadita de pimienta negra recién molida 2 cucharadas de perejil fresco picado 1. Poner el aceite de oliva en la olla de la olla a presión. Elegir el modo SAUTÉ (saltear). Cuando el aceite esté caliente, agregar las zanahorias. Revolver hasta que estén ligeramente suaves. Agregar el ajo, las setas, la sal y el tomillo. Saltear por aprox. 5 a 8 minutos, hasta que las setas hayan soltado la mayoría de su jugo y el ajo esté fragante.
Mantequilla de limón-tomillo conseguir la consistencia deseada (aprox. 2 cucharadas de agua en total). 4. P robar y ajustar la sazón al gusto. Servir inmediatamente, o bien mantener caliente a baño María hasta el momento de servir. La mantequilla derretida cubre a la perfección las hojas de alcachofa y el toque de limón realza el sabor de esta deliciosa salsa.
4. Después de la descompresión, el indicador rojo bajará. Sacar la tapa y agregar las arvejas y el queso. Información nutricional por porción de 2 cucharadas: Calorías 49 (67% de grasa) • Carbohidratos 3g Proteínas 1g • Grasa 4g • Grasa saturada 1g Colesterol 0mg • Sodio 58mg Calcio 12mg • Fibra 1g 5. Retirar las ramitas de tomillo, probar y ajustar la sazón al gusto. Servir inmediatamente.
Habichuelas con chalotes y piñones 5. Sacar la tapa, revolver, ajustar la sazón al gusto y servir. Este plato de acompañamiento es lo suficientemente elegante como para una fiesta, pero tan simple que puede prepararlo todos los días.
1 cebolleta (“green onion”), en rodajas finas, para decorar al servir a la mitad 2 dientes de ajo, rebanados ½ cucharadita de sal kosher ½ taza (120 ml) de caldo de pollo ¼ taza (15 g) de hierbas frescas picadas (su favorita o puede combinar perejil, menta, romero, tomillo o eneldo) 1. Sazonar el salmón con la sal y la pimienta. En un tazón pequeño, revolver el agua, la miel, la salsa de soya, el ajo y el jengibre, y luego colocar esta mezcla y los filetes de salmón en la olla de la olla a presión.
reservar. Agregar la cebolla, el pimiento y el ajo. Revolver bien y raspar el fondo de la olla con un cucharón de madera para despegar los residuos de pollo. Saltear por aprox. 5 minutos hasta que los vegetales estén fragantes. Agregar los tomates, el resto de la sal y la páprika, y cocinar por un par de minutos antes de agregar el arroz. la tapa y elegir el modo LOW PRESSURE (presión baja). Fijar el temporizador en 5 minutos.
1 cucharada de aceite de oliva 1 zanahoria mediana, finamente picada 1 rama de apio, finamente picada 1 cebolla pequeña, finamente picada 1 diente de ajo, finamente picado 2 cucharadas de concentrado de tomate ½ taza (120 ml) de vino rojo seco 1 taza (235 ml) de caldo de res 1 hoja de laurel 1 taza (250 g) de zanahorias “baby” 1 libra (455 g) de papas Cambray (papas pequeñas) 1 taza (145 g) de arvejas congeladas Perejil picado, para decorar cortado en pedazos 1 zanahoria grande, en trocitos ½ taza (70 g)
elegir el modo HIGH PRESSURE (presión alta). Fijar el temporizador en 75 minutos. Después del pitido que indica el final de la cocción, emplear el método de descompresión natural para liberar el vapor. hervir. Cuando el líquido esté hirviendo, agregar, removiendo, la mezcla de mantequilla y harina y cocinar hasta que el líquido haya espesado. Echarlo sobre la carne y los vegetales.
Chuletas de cerdo con salsa de durazno-albaricoque 1 palito de canela ¾ taza (175 ml) de jugo de piña ¼ taza (60 ml) de agua 13 ∕ taza (80 ml) de salsa de tomate 1 chipotle, finamente picado Para servir: Tortillas para taco Col roja, finamente cortada Piña cortada en cubitos (fresca, no de lata) Rábanos, cortados en palitos finos Cilantro fresco, picado grueso Lima Con la olla a presión Cuisinart®, dile adiós a las chuletas de cerdo secas. Además, las cocina en unos minutos.
Budín de arroz 1 pizca de sal kosher 4 cucharadas (55 g) de mantequilla sin sal, en pedacitos 4 manzanas medianas a grandes, de sabor dulce-agrio ½ taza (120 ml) de agua ½ taza llena (100 g) de azúcar rubia (azúcar de caña integral) ¿Cree que le falta algo? Agréguele crema batida dulce y algo de nueces picadas antes de servir.
NOTAS: 29
NOTAS: 30
©2019 Cuisinart 7475 N. Glen Harbor Blvd.