
Installation Guide


INSTALLATION WALKTHROUGH:
For more information log onto www.curtmfg.com, & for helpful towing tips log onto www.hitchinfo.com
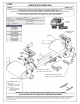
Parts List
DESCRIPTIONPART NUMBERQTYITEM
CARRIAGE BOLT7_16 - 14 x 1 1_4 CARRIAGE21
.250 x .88 x 2.25" SQUARE HOLE SPACERCM-SP222
HEX FLANGE NUT7/16-1423
7/16" FISHWIRE7_16 FISHWIRE24
MUFFLER
EXISTING
FASTNERS
EXISTING
WELD NUTS
DESIGNED FOR USE WITH
BALL MOUNT # D-55001 / 45501
PASSENGER SIDE
FRAME RAIL
EURO MOUNT OPTION AVAILABLE
#45571 (1 7/8" BALL) & #45572 (2" BALL)
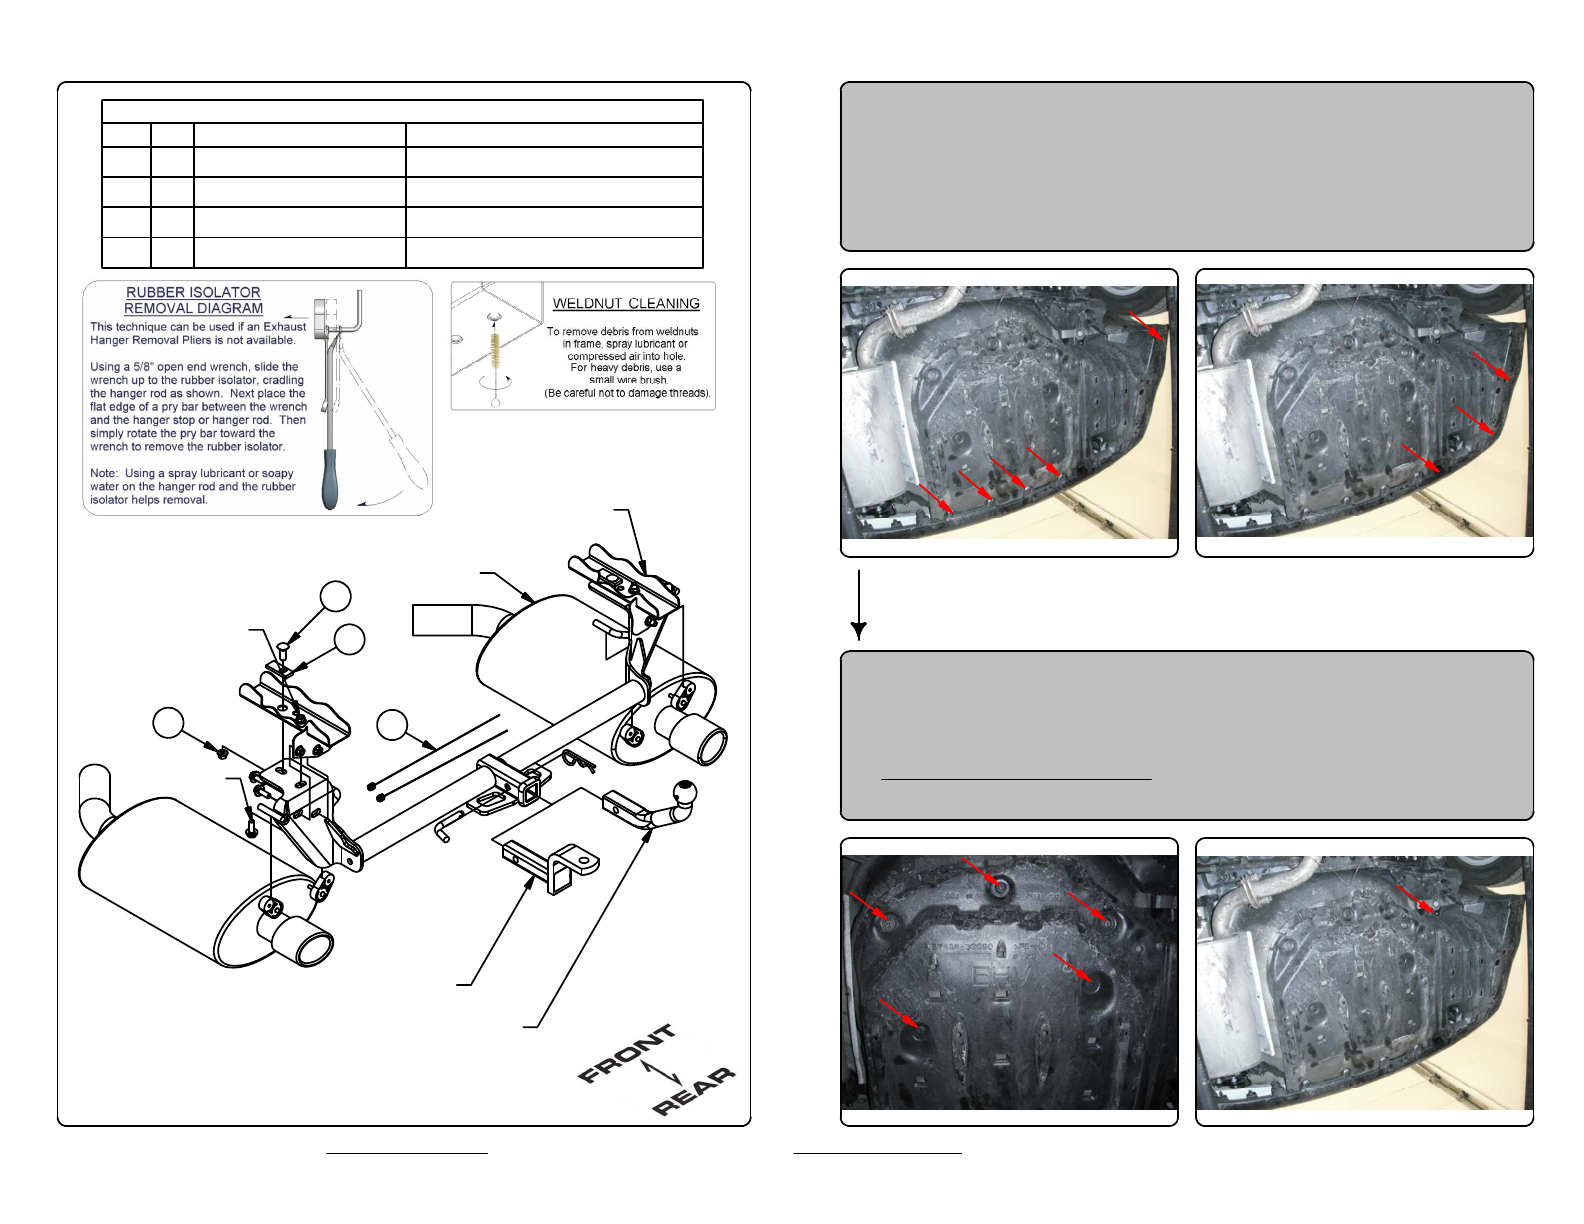
1. Start removing the underbody panel by removing the 4 screws
(5 screws on single exhaust models) that fastens it to the
bumper fascia using a 10mm socket.
2. Remove the 2 plastic push-button fasteners (3 fasteners on
single exhaust models) with a flat blade screw driver.
3. Unthread the 3 plastic nuts with a 10mm socket, towards the front
of the vehicle and 2 plastic nuts in the center of the panel with a
12mm socket.
4. Single exhaust models only, remove 1 screw attaching the
underbody cover to the driver side frame rail with a 10mm socket.
4
1
2
3