
Installation Guide

3
4
5
7
12
2
1
6
Figure 1
8
10
12
2
11
1
9
Figure 2
10
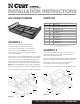
ATV CARGO CARRIER
warning: never exceed your vehicle manufacturer's recommended towing capacity
InsTAllATIOn InsTRuCTIOns
Item# Qty Description
1 1 Cargo carrier
2 1 ATV rack (the existing rack)
3 2 Mounting plate, 3"
4 2 Mounting plate, 11.75"
5 2 Mounting plate, 5.4"
6 12 Bolt, M8*50
7 12 Flat washer, M8
8 8 Mounting bracket
9 8 Bolt, M6*75
10 16 Flat washer, M6
11 8 Lock nut, M6
12 2 Square tube plug
PARTs lIsT
As sEMBlY 1
Unpack and layout all parts. Identify all parts
according to Figures 1 and 2 and the parts list.
Position the cargo carrier (#1) so it is centered on
the rear rack of the ATV. NOTE: The rack extension
of the ATV may have to be removed before the cargo
carrier can be installed.
Position any two sets of mounting plates (#3, #4 or #5) under
the ATV rack so the mounting plate's holes line up with the
holes of the cargo carrier. Insert M8*50 bolts (#6) through
washers #(7), rear flat rack and into the mounting plates.
Leave the bolts loose until all of the bolts have been installed.
NOTE: If the mounting plates do not work, refer to 'Assembly 2'.
Align cargo carrier evenly on the ATV rack and tighten all bolts.
Insert the square tube plugs (#12) into square tube openings.
As sEMBlY 2
Position the mounting brackets (#8) so when the bolts are
installed they will be on both sides of a frame rail of the
cargo carrier (#1) and the ATV rack.
Using mounting brackets (8), M6*75 bolts (#9), flat washers (#10)
and lock nuts (#11), secure the rear flat rack to the ATV rack.
Repeat Steps 1 and 2, spacing the mounting brackets
out evenly over the surface of the cargo carrier.
Insert the square tube plugs (#12) into square tube openings.
PAGE 1 • 18101-INS-R1 • 1.800.798.0813 • NEED ASSISTANCE? • CuRTMFG.COM