
Installation Guide
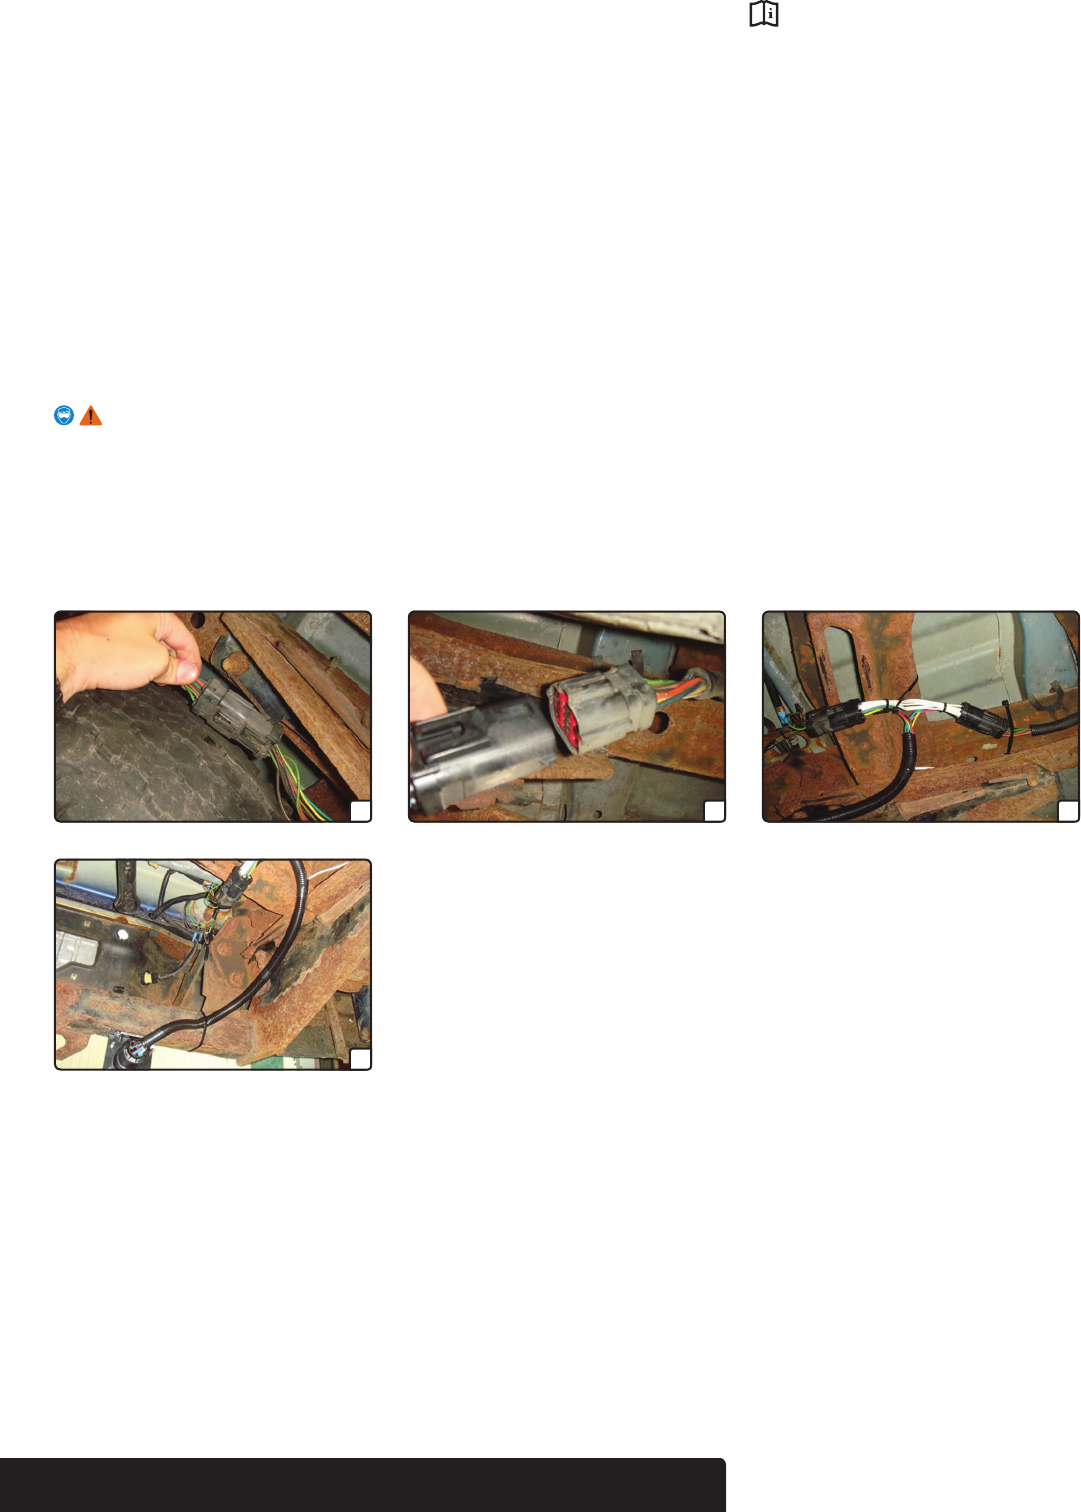
A B C
D
Step 1
Locate the vehicle wiring harness connectors under the
rear of the vehicle, inside the driver side frame rail. The
connector ends will be similar to those on the custom
wiring connector. Separate the connectors taking care
not to damage the locking tabs.
Step 2
Insert the custom wiring connector between the separated
connectors.
Step 3
Locate a suitable grounding point near the connector such as
an existing screw with nut in the vehicle frame or drill a 3/32"
pilot hole for the provided screw. The area should be free of
rust, dirt and paint. Secure the white ground wire using the ring
terminal and provided screw.
WARNING: Check for miscellaneous items that may be
hidden behind or under any surface before drilling to avoid
damage and / or personal injury.
Step 4
Plug the 7-way socket into the harness. Mount in an accessible
location using a bracket or electrical box (not included). Secure
any loose wires.
Step 5
In the engine compartment, disconnect the negative battery
cable. On the driver side, locate the vehicle power distribution
box and the trailer tow relay block attached to it. Open the
cover(s) to access the relays and fuses.
Step 6
Consult the owner manual to locate the TRAILER TOW
ELECTRIC BRAKE and TRAILER TOW BATTERY CHARGE
fuse locations. Insert the provided 30amp maxi-fuses.
Step 7
Consult the owner manual to locate the TRAILER TOW BACKUP
LAMP RELAY and the TRAILER TOW BATTERY CHARGE
RELAY locations. Insert the provided relays.
Step 8
Reconnect the negative battery cable
and reinstall all items removed during install.
INSTALLATION
/
SAFETY INSTRUCTIONS
55242-INS-RA • PAGE 2