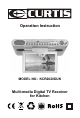
Operation Instruction MODEL NO.
Table of Contents I Precautions 1 II Accessories 2 III Description of Appearance 3 IV Description of Remote Controller 6 V Basic port Connect 9 VI Operation Instruction for Alarm Clock Radio System 10 VII DVB-T Digital TV Receiver Instruction 12 VIII Analog TV receiving operation 14 IX DVD Operation Instruction 17 X Troubleshooting 24 XI Technical Parameters 25
I Precautions Storage 1. Keep this product away from extremely hot or cold places. The storage temperature ranges from -20 to 60 and the working temperature from -5 to 40 . 2. Do not use this product at damp environment like bathtubs, wash basins, washtubs, as well as basements, swimming pools or similar places 3. Protect TFT Display from bumping. 4. Do not push on or scrub this product with sharp objects. Maintenance 1. Disconnect all cables of this device at first before cleaning. 2.
II Accessories Knighthead Screws Op er a Mu ltim 2 MO DE L NO .
III Description of Appearance 1. DVD/TV/AUX: Mode Switch key. In power-on state, press this key to switch between DTV/ATV/DVD/AUX. 2. FM/AM: Radio Mode key. In power-on state, press this key to enter the FM/AM Mode Switch of RADIO system. 3.
Power-off Setting function. Press this key in sleep state to cancel this state; in alarm state, press this key to start snooze function (interval time is 8 minutes), and the screen will show "SNOOZE" symbol. 6. EQ: Sound Effect key. Press this key in power-on state, you can set the sound effect as Rock Jazz Popular Classical Normal in turns. 7. TIMER: Timer Setting key.
13. OK: OK key. In the DTV and DVD state, press this key to confirm the selected item. 14. VOL-: Volume Decreasing key. In power-on state, press this key to decrease volume; when entering analogue adjusting menu, press this key to adjust analogue decrease; in the DTV and DVD state, press this key to select left. 15. VOL+: Volume Increasing key.
25. TV Antenna Input. 26. External video Input. 27. External Audio Left Channel Input. 28. External Audio Right Channel Input. 29. External DC Power socket (Optional). 30. Power Cable. 31. FM Antenna. IV Description of Remote Controller 1. POWER: Standby/ Power off key. 1 Press it to switch between Power-on 2 3 4 5 and Standby, when the alarm sounds, press this key to close alarm. 2. FM/AM: FM/AM switch key. In power-on 6 state, press this key to enter the FM/AM Mode Switch of RADIO system. 3.
and minutes of the current time, AL1, AL2(the number of current hour or minute will flash), then press "SKIP/TUNER" key to adjust. When these two alarms are set at the same time, alarm 1 is effective but alarm 2 isn't. 6. 0-9, -/--: Number key, Channel Directly Selecting key. In TV mode, press these keys to select preset TV programs. 7. MENU: Menu key. Press this key to enter the corresponding main menu. 8. VOL+/ /VOL-/ : Volume Adjusting Direction key.
18. A-B: A-B Screen Repeat key. 19. SLOW: Slow key (Only in DVD state). 20. SLEEP: Sleep Timing Power off key. Press this key to set the system power-off at different times. 21. OPEN: Eject key. 22.
34. EPG/ANGLE: In DTV state, it is the Electronic Program Menu key. Press this key to enter electronic program menu interface; in DVD state, it is Angle Switch key. 35. TEXT: Text Information key. In DTV state, press this key to start text function to check the text information. 36. INFO: Program Information Display key. In DTV state, press this key to display the current program information. 37. SUBTITLE: Subtitle key.
VI Operation Instruction for Alarm Clock Radio System 1 .Time setting (CLOCK on remote) Hour setting Press for 3 seconds (CLOCK on remote) Press one time Minute setting (CLOCK on remote) Press one time Alarm 1 hour setting (CLOCK on remote) Press one time Alarm 1 minute setting (CLOCK on remote) Press one time Alarm 2 hour setting (CLOCK on remote) Press one time Alarm 2 minute setting 2. Alarm setting (standby status) a " b " " (AL1.SET key on remote) press to choose Alarm/Radio/TV.
3. Snooze/Turn off alarm While the alarm ring, press SNOOZE to pause, it will ring again after 8 minutes. While the alarm ring, press POWER to stop, it will ring at this time next day. 4. Sleep time setting Press SLEEP key to choose sleep time to be (90, 80, . ..... 10) minutes. 5. Calculagraph Press TIMER key, then press SKIP+/-(TUNE+/-) to adjust time of calculargraph: Then press TIMER key to confirm. 6. Radio a. Press FM key to switch to the radio state. b.
VII DVB-T Digital TV Receiver Instruction 1. Automatic installation guide For first use or when the program list doesn't exist, system will implement quick installation guide after connecting power. Please follow the screen prompt, press "OK" key to scan automatically as shown in the following picture: 2. TEXT(Text Information) When playing program, press "TEXT" to open text information (Requiring program support) 3.
Menu Function Operation Instruction Submenu Organiser "Program information list": Enter "Service Organiser", press to browse program information, following the prompt, you can press the red key to delete the program in channel list, press green key to move current program order in channel list, press to move; press yellow key to edit the current program name, press direction key to select keyboard letter and number, press "ENTER" key to complete input, after editing, press green key to save it and back
VIII Analog TV receiving operation Press DVD/TV/AUX to enter ATV mode, display options as follows: PICTURE SYSTEM PRESET MAIN MENU PICTURE SYSTEM PRESET 1. PICTURE Press to select Picture item. Press , Bright, Contrast, Saturation and Reset displays on the screen as illustrated below: PICTURE BRIGHT CONTRAST SATURATION RESET 50 50 50 Press to select the Bright item. Press to adjust the analog quantity of Bright.
2. STSTEN Press to select System item, press then (language), (picture mode), (Image Flip) and Blue back displays on the screen as illustrated below: SYSTEM BLUE BACK ENGLISH 16:9 1 ON Use direction key to adjust selected item. 3.
Note 1. Auto Search Start from Program No. 0. 2. When receive signal under Manul Search, the indication frequency stop means the optimum position for signal storage. If channel under weak signal is received, the channel storage system will automatically identify it as no signal. 3. You can press and hold SEARCH key for 3 seconds on remote control to enter Auto Search. 4. Notes on Sound System: 6.0M means I, 6.5M stands for DK(L), 5.5M is BG, please set the Sound System at local one. 5. Color system A.
IX DVD Operation Instruction 1. Instruction for basic operation 1>Play/Pause 1) After the disc be read, the disc types information of DVD, VCR or CD could be displayed on TFT screen. 2) Some disc will play automatically when tray is in. 3) When playing DVD or some VCD2.0 disc, the menu will emerge, you could select the option by pressing direction key or digital keys, then press OK to confirm. Finally the player will play according to your selections.
2. Special function operation instruction 1>Selection of caption language While playing, you could select your favor caption language by press SUBTITLE key directly or pressing SETUP key to enter system menu to change caption language. Please refer to system menu operations. Note: 1) Some disc only contain one language. 2) If you cannot find your favor caption language by pressing SUBTITLE key continually, that means the disc does not contain such caption language at all.
6>Menu Some DVD discs have complex contents such as multi-subtitle, multiaudio, or multi-angle. In these cases, you can use the DVD menu to select audio language, subtitle language, and video angle. 1) Press MENU during playback to display the DVD menu. 2) Press MENU again resumes to normal playback of the scene when MENU key was first pressed. 3) Use the arrow keys to select favor item, then press OK or to confirm. Or directly press the numeric keys to select the item.
DVD disc Info Display CD disc Info Display VCD disc Info Display Title selecting If the disc include many Title or chapter, press "SEARCH" use direction key or digit number key to select title, chapter and time. Play CD CD track select Playing CD, all track can be select and play: 1. Use the number keys on remote control to enter the number of the track while playing. 2. For example, to select track 12, press -/--, then 2.
Viewing JPEG files JPEG files list Current selected file Preview picture JPEG file list in the current folder The operation method of viewing JPEG files is similar as the operation method of playing MP3, the above picture will appear after insert JPEG disc. 1. The image zoom function is available while displaying JPEG file. 2. Press Left arrow, the picture rotate 90 at anti-clockwise, press Right arrow, the picture rotate 90 at clockwise.
3. System menu setup To setup the mainframe system, Press SETUP to enter system menu. Then you could setup the DVD player for Lock, Display, Audio, Language and Default etc. 1. Use left/right key to select item on the main option list. The item list appear. 2. Use up/down key to select desired item, then press OK to enter. Press left/right key to set the value. Press OK to return option list. 3. After setup, press SETUP key or key to exit system setup menu.
The default of this DVD player MENU SYSTEM SETUP ITEM DEFAULT TV SYSTEM TV TYPE NTSC/PAL/AUTO 4:3PS/4:3LB/16:9 USE NUMBER KEYS TO ENTER A NEW PIN, THEN SYSTEM WILL START LOCK FUNCTION.
X Troubleshooting The following phenomenon does not indicate failures. Before you contact us for repair, please check your device according to the approaches below. Problems Causes No picture or sound Power wire is not properly connected; the functioning power source is not recognized; or there're breaks in the power wire. No signal Check whether the antenna is located well; Check the parameter of image or region is set correctly; if not, please set or search again.
XI Technical Parameters DVD Technical parameters Laser wave length: DVD 650nm; CD 780nm Optical pickup: DV34 (SANYO) Compatible disc: MPEG-4, DVD, VCD, CD, MP3, WMA, JPEG CD, CD-R, CD-R/W, DVD+R/-R(nonsupport DIVX 3.
Speaker Output Power: more than1.2W than 10%) Power Consumption: less than 20W Dimensions: 360mm 290mm 78mm Weight: about 2900g 2CH(when Distortion is less Note: Batteries only power the system clock. When main power is off, clock and memory remains the same and the TV receiver stops playing. Because system clock is powered by batteries, the time display will be still correct when the TV receiver is reconnected to main power and begins to play.
Warning This operation instruction is only intended for reference. No further notice is available to any modification of all information contained therein. Due to continuing improvements, the features and design are subject to change without notice. Warning No repairable components exist in the machine. Don't try to dismantle and improve the monitor, and the high voltage in the machine may cause danger. Maintenance and adjustment of the monitor is subject to professionals.