User’s Manual MPK4066UK V2.0 Reminder: Thank you for selecting our product. In order to ensure correct operation, please read this manual carefully.
1. Instruction (1) We try to ensure the correctness and the completeness of this manual, but mistakes and omissions may still exist. (2) Our company is not responsible for any data loss caused by malpractice of software, wrong repair or other accident, or any indirect loss herein arising. (3) Revision to the software and hardware or user manual is not subject to further notification, and our company boasts the finial interpretation right to this manual.
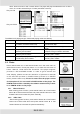
Contents 1. Instruction ............................................................................................................1 2.Precaution ..................................................................................................................3 3.System requirement .................................................................................................3 4.Introduction.................................................................................................................
2. Precaution (1) Do not use this player when driving, riding or operating any other vehicles as it may lead to traffic accidents, which is illegal in some regions. Even when walking on the road, especially crossing the roads, listening with high volume is also hazardous. Please pay special attention or stop using this player in places with potential hazard. (2) Before powering on the player, please plug in the earphone to avoid damaging the earphone and for the maintenance of the player.
4. Introduction 4.1 Features (1) Support formats such as MP3 WMA WAV SMV JPG BMP This product supports playback of music files, photo browsing and movie playing with high quality. (2) Folder management Easy to choose the folder or music file to play. (3) Build-in 1.44"CSTN color LCD There is a build-in 1.44" color screen, which can display photo and movie clearly. (4) Removable disc This product can be connected to PC with USB cable and serve as a removable disc.
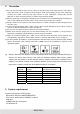
4.3 Battery charge This product adopts build-in rechargeable Li battery. You can connect the mp3 player to PC or use USB adapter to charge the battery. This icon will be displayed at the upper left corner of the screen. The following pictures indicate the charging status of the battery: (1) When the battery is charging, the icon will be changing from an empty battery to a full one to indicate the process.
(includes sub-folders), it will build the play list sorted by letter order by scanning the first 500 files which are stored in the first 30 folders. So please do not use too many folders and sub-folders to store the music files. 4.5.3 (1) Remove from USB port Double click the icon of safely remove hardware on the task column, and the relevant dialog box will be displayed. (2) On the picture of safely remove hardware dialog box, select the item of “USB mass storage device” and click “stop” button.
4.6 LCD display 4.7 Menu 4.7.1 Main menu (1) MUSIC: Select MUSIC in the main menu, the device will enter music sub-menu. (2) PHOTO: Select PHOTO in the main menu, the device will enter photo sub-menu. (3) MOVIE: Select MOVIE in the main menu, the device will enter movie function. (4) VOICE: Select VOICE in the main menu, the device will enter voice playback function. (5) MIC. RECORD: Select MIC. RECORD in the main menu, the device will enter microphone record function.
4.8.2 (1) Power off player When the player is powered off, the following statuses will be saved, which includes: current mode, music elapse time, user settings. (i.e. volume, EQ, and timing off and play mode etc.) (2) If the player is powered off normally (i.e. the user shut it off or it is shut off according to the setting), the above-mentioned modes will be saved. If the player is powered off by pressing reset button, the above-mentioned modes will not be saved.
down- button to enter or exit a certain folder. The player will play the selected music or all the music in a certain selected layer of folder (subfolder inclusive). Play one file Play one folder The difference of playing songs in folders and playing under root directory Play mode Under root directory In folder and its subdirectory. Normal Repeat one Repeat all Random Rand.&Rep. Play all the songs under root directory and in folders one time and then stop. Repeat play the current song.
5.2.3 Thumbnail After entering photo function, press rewind button or fast forward button to select thumbnail display and press play button to start displaying photo in thumbnail form. 5.3 Movie Press rewind button or fast forward button in main menu to select Movie function and press play button to enter Movie play. (1) This player supports the playing of movie files in SMV format.
b. Select and double click video2smv.exe program to enter as indicates in the following figure: c. Click “Add” to select the files that need to be converted. You can set the size and quality at the same time. The screen resolution of this player is 128x128 pixel, so please set the size less than 128*128 pixel. The higher quality produces larger SMV file size and vice versa. The higher the quality setting value, the clearer the picture will be and vice versa.
e. When there is Finish appears in the column of Status, it means the conversion is finished. You may close the windows and transfer the formatted movie with SMV format to the player. Attention : If you can use the windows media player to play the video files in your PC, and the video file type is supported by video2smv, it will be able to be converted to SMV format.
Locked state Current function V o Power level Leftover record time Sampling rate Bit rate Elapse record time Format Record progress Record state Name of record file (2) (3) (4) (5) V002.WAV 7 recording sampling rate: user can set the sampling rate of recorded file. The higher the sampling rate, the better recording quality will gain. The lower the sampling rate, the more common quality will gain with longer recording duration.
5.7 Settings Press rewind button or fast forward button in the main menu to select Settings menu and press play button to enter Settings menu, which includes language setting, EQ setting, play mode setting, recording format setting, contrast setting, timing off setting and resume default value setting. 5.7.1 Language Press rewind button or fast forward button in language setting menu to select language and press play button to confirm.
5.7.6 Timer off Press rewind button or fast forward button in timing off setting menu to select timing off and press play button to confirm. Long press play button or press power button to skip this setting. The sub menus of timing off are: stop off, sleep off and backlight off. (1) Stop off: Disable, 15 SEC, 30 SEC, 1 MIN, 2 MIN, 5 MIN, 10 MIN and 30 MIN. (2) Sleep off: Disable, 10 MIN, 15 MIN, 30 MIN, 60 MIN, 90 MIN, 2 HR and 3 HR.
7. Trouble shooting If there is no picture displayed after the player is connected to PC and cannot serve as storage disc or cannot be powered on after the battery is fully charged, please refer to the following steps to update the software in the player. (1) Download the most updated software from the attached CD (if any) or from the website and implement the setup.exe files in the folder to complete the installation.
Lecteur de MP3 Manuel MPK1066 MPK2066 MPK4066 MPK1066UK MPK2066UK MPK4066UK
Mise à la décharge de l’appareil L’appareil ne doit jamais être mis à la décharge municipale. Veuillez consulter la réglementation locale concernant l’élimination des produits électroniques. z Toutes les informations données dans ce manuel peuvent être modifiées à tout moment sans avis spécial.
Consignes de sécurité z Afin d’éviter des accidents, vous ne devez en aucun cas utiliser le lecteur pendant que vous conduisez une voiture ou d’autres véhicules. Par ailleurs, cela est interdit par certaines ordonnances juridiques. Même en tant que piéton, vous vous exposez à des risques pendant que vous traversez une rue. Evitez toutes les mises en danger susceptibles de se produire à cause d’un volume sonore extrêmement haut.
réellement disponible de la mémoire Flash à cause d’un microprogramme dont la taille varie. Important Rechargez immédiatement la pile dès qu’un symbole de pile vide est affiché à l’écran. Sinon, l’appareil s’éteint automatiquement. Dans ce cas, tous les réglages sont sauvegardés. Débranchez correctement l’appareil du PC pour éviter des pertes de données. La durée d’utilisation d’une charge de pile peut varier des indications du fabricant en raison des conditions de service différentes.
Configuration requise z CPU : Pentium 200 MHz ou plus évoluée z OS : Windows98SE/ME/2000/XP/Vista z RAM : 128 Mo ou plus sont recommandés z HDD : plus de 120 Mo de capacité libre sur le disque dur z Lecture de CD-ROM z Interface USB Contenu de l’emballage Veuillez contrôler si l’emballage contient les composants suivants. S’il manque quelque chose, veuillez contacter votre revendeur.
Avant l’utilisation du lecteur Pilotes Windows2000/XP/ME/Vista Le lecteur travaille avec Windows2000/XP/ME/Vista appareil Plug-and-Play et n’a besoin d’aucun pilote. comme Windows98SE Des pilotes doivent être installés pour Windows98SE. Ne raccordez en AUCUN cas le MP-370 au PC avant d’avoir terminé l’installation. Insérez le CD contenu dans la livraison dans votre lecteur de CDROM ou téléchargez les gestionnaires depuis notre site Web. Double-cliquez sur SETUP.
Débranchement correct du lecteur depuis le PC Windows2000/XP 1. Cliquez avec le bouton gauche de la souris sur l’icône dans le coin inférieur droit de l’écran. 2. Cliquez sur le message « Retirer Périphériques de stockage de masse USB – lecteur (X:) en toute sécurité » dans la fenêtre déroulante. 3. Débranchez le lecteur lorsque cela vous est demandé. Windows98 Assurez-vous que le transfert des données est terminé avant de déconnecter le lecteur.
Chargement de la pile L’appareil est équipé d’une pile aux ions de lithium rechargeable. Celle-ci est chargée par l’intermédiaire du PC à l’aide de la liaison USB. Le lecteur devrait être chargé avant la première utilisation. Pour la recharge, il faut brancher le plus grand connecteur du câble USB au PC et le plus petit connecteur au lecteur. L’opération de recharge commence juste après. Vous apercevez un symbole de pile animé.
Fonctions des touches Ecran LCD 1.44" sélection de l’élément précédent sélec.
Mise sous/hors tension Mise sous tension : Appuyez sur la touche image. / jusqu’à ce que vous aperceviez une Mise hors tension : jusqu’à ce que vous aperceviez le Appuyez sur la touche / message de déconnexion à l’écran.
Vue d’ensemble des commandes Fonction Description Reproduction/ Pause Appuyez sur la touche ou la pause. Arrêt Appuyer sur le bouton reproduction.
Reproduction de musique Appuyez sur la touche /M jusqu’à ce que le menu principal soit affiché. Vous sélectionnez le mode « Musique » avec les touches ou . La touche /M vous permet d’accéder au sous-menu de la « Musique »: Tout Lire et Périph. Interne. Tout Lire Sert à reproduire tous les fichiers de musique sur le lecteur. Périph. Interne Active la liste de reproduction.
Différence pendant la reproduction dans le répertoire racine et dans des dossiers ainsi que dans leurs sous-répertoires Dans des dossiers et dans leurs sous-répertoires. Mode lecture Dans le répertoire racine Normal Tous les titres de musique dans le répertoire racine et dans les dossiers qui y sont ramifiés sont joués une fois. Ensuite, la reproduction est stoppée. Tous les titres de musique dans le dossier actuel sont joués une fois. Ensuite, la reproduction est stoppée.
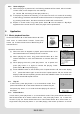
Observateur d’images Vous contemplez des photos de la manière suivante : 1. Appuyez sur la touche /M jusqu’à ce que le menu principal soit affiché. 2. Sélectionnez l’option « Photo » avec la touche ou et confirmez la sélection avec la touche /M. 3. La touche /M vous permet d’accéder au sous-menu de la « Photo »: Manuel, Diaporama et Onglet. Le lecteur soutient l’affichage des photographies dans le format JPG et dans le format BMP.
Ecoute de films 1. Appuyez sur la touche /M jusqu’à ce que le menu principal soit affiché. 2. Appuyez sur la touche ou afin de sélectionner le menu vidéo et confirmez la sélection avec la touche /M. 3. Appuyez sur la touche ou afin de sélectionner une certaine vidéo (Film) pour la reproduction. Démarrez la reproduction avec la touche /M. Vous trouverez des informations plus détaillées à ce sujet dans la vue d’ensemble des commandes. Le lecteur soutient la reproduction des films dans le format SMV.
b.Démarrez le fichier video2smv.exe par un double clic : c. Cliquez sur « Add » et sélectionnez les fichiers à convertir. Il est possible de positionner simultanément la résolution et la qualité. La résolution du lecteur est aux alentours de 128x128 pixels ; c’est pourquoi vous ne devriez pas choisir une résolution supérieure à 128x128 pixels. Une plus haute qualité mène à des fichiers de taille plus importante, mais aussi à de meilleures représentations à l’écran.
d.Cliquez sur « Convert » pour démarrer la conversion. La conversion est interrompue par un clic sur « Stop ». e. Si l’expression « Finish » est affichée dans le champ d’état, cela signifie que la conversion est terminée. Il est possible de fermer la fenêtre et de transmettre les fichiers convertis vers le lecteur. Important : la conversion dans le format SMV est possible si vous pouvez contempler des vidéos sur votre PC et si le format est soutenu par video2smv.
Enregistrement vocal 1. Appuyez sur la touche /M jusqu’à ce que le menu principal soit affiché. 2. Sélectionnez l’option de menu « Voix » avec la touche et appuyez sur /M, pour accéder au mode vocal. V002.WAV Les fonctions suivantes sont disp onibles dans le mode vocal : reproduction d’enregist rements au microphone reproduction de fichiers WAV (ADPCM) qui ont été mémorisés dans le dossier VOICE du lecteur.
Enregistrement vocal Appuyez sur la touche /M jusqu’à ce que le menu principal soit ou et affiché. Sélectionnez l’option « Enreg. MIC » avec appuyez sur la touche /M. Ou exercez une pression prolongée dans tous les modes sur A-B/REC pour enregistrer par le microphone. 1. L’icône clignotante montre l’enregistrement en cours. La touche /M (icône ) permet d’interrompre l’enregistrement et de le continuer. L’enregistrement est terminé avec le bouton / .
Suppression de fichiers Appuyez sur la touche /M jusqu’à ce que le menu principal soit affiché. Vous sélectionnez le mode « Supprimer » avec les touches ou . La touche /M vous permet d’accéder au sous-menu de la « Supprimer »: Suppr. Une et S uppr.Tout . Importante : Des fichiers effacés ne peuvent pas être récupérés ! Supprimer un fichier Vous choisissez le fichier à effacer avec la touche ou . Appuyez sur la touche /M pour confirmer.
exercez une pression prolongée sur la touche /M ou si vous actionnez le bouton / , vous quittez l’option de menu et vous commutez vers le prochain niveau de me nu supérieur. Langue Equilibreur (ÈQ.) Mode lecture Para. Enreg. Contraste Langue dans laquelle le texte est affiché à l’écran : Anglais, Hollandais, Français, Allemand, Italien, Portugais, Espagnol, Hébreux, Polonais, Hongrois, Russe Normal, Rock, Jazz, Classical, Pop, Ultra Bass, Blues, Club, Dance, F. Bass & Treb.
Minute. Dés. Réinit. Arrêt Dés. 15 Sec., 30 Sec., 1 Min., 2 Min., 5 Min., 10 Min., 30 Min., Disable (désactivé) Sommeil Dés. 10 Min., 15 Min., 30 Min., 60 Min., 90 Min., 2 h., 3 h., Disable (désactivé) Rétroé. Dés. 1 Min., 5 Min., 10 Min., 30 Min., 60 Min. et Always On (Toujours on) Avec « Oui », le pré-réglage d’usine est rétabli ; le lecteur es t remis automatiquement sur l’état initial. À propos de Appuyez sur la touche /M jusqu’à ce que le menu principal soit affiché.
Fonction de remise à zéro (reset) Si le comportement de service du lecteur est anormal (cela ne se produit usuellement que dans des cas très rares), vous pouvez réinitialiser le lecteur dans l’état normal avec un petit objet cylindrique. Dans ce cas, le lecteur ne doit être connecté ni au PC, ni à un adaptateur de réseau.
Spécification Désignation Spécification Capacité 1 Go, 2 Go, 4 Go Type de pile Pile aux ions de lithium intégrée et rechargeable Durée de service Jusqu’à 10 heures (musiques), jusqu’à 4 heures (vidéo) Bloc d’alimentation USB (non comprise dans le contenu de la livraison) Ecran à cristaux liquides 5 V / 0,5 A Ecran LCD couleurs 1.