
User manual

Page 15 of 43 Cyber-Rain Manual Software Version 3.00
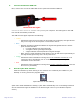
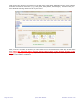
4. Connect the Wireless USB Link
Now, connect one end of the USB cable to the Cyber-Rain Wireless USB link.
Connect the other end to an available USB port on your computer. The LED lights on the USB
Link should momentarily illuminate.
The USB Link LED lights represent the following:
• Yellow
o Illuminates when the access point is connected to the USB port, this light should
stay on as long as the access point is connected to the PC.
• Blue
o Number of lights illuminated indicates the signal strength between the access
point and the controller.
0-1 light indicates low signal strength.
2-3 lights indicate good signal strength.
4 lights indicate excellent/maximum signal strength.
o Note: during normal operation these lights to turn off and back on periodically to
test signal strength as long as the PC is powered on.
• Green
o Illuminates when information is being sent to the controller from the PC. It is
normal for this to periodically turn on as the PC needs to periodically send
information to the controller.
• Red
o Illuminates when information is being sent from the controller to the PC. This will
also turn on periodically.
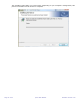
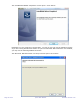
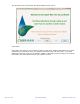
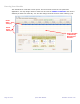
5. Run the Cyber-Rain Software.
Start the software by either clicking on the shortcut icon created by the installer on your
desktop or running it from the program menu:
Cyber-Rain icon on the desktop
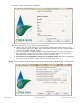
(Note: after initial installation & startup, Cyber-Rain automatically runs in the background and
can be accessed through the taskbar on the bottom right corner of your Windows explorer
screen.)
Insert Connector
Illuminated LED
Lights