CyberLink Power2Go User's Guide
Copyright and Disclaimer All rights reserved. No part of this publication may be reproduced, stored in a retrieval system, or transmitted in any form or by any means electronic, mechanical, photocopying, recording, or otherwise without the prior written permission of CyberLink Corporation.
Contents Introduction ....................................................1 Welcome................................................................................................1 Lastest Features ............................................................................1 Power2Go Versions ............................................................................2 Supported ................................................................................................3 Media Supported File Types .....
CyberLink Po w er2Go Editing Disc Preferences ............................................................................26 Burning Video to............................................................................26 Disc Burning................................................................................................27 a DVD Folder Photo ....................................................29 Gallery Disc Creating....................................................................................
Multisession ................................................................................................46 Discs Power2Go ....................................................47 Settings Viewing................................................................................................47 the Info Tab Configuring ................................................................................................47 Data Settings Configuring ................................................................
Intro ductio n Chapter 1: Introduction This chapter introduces the CyberLink Power2Go program and includes an overview of its newest features. It also outlines the available Power2Go versions, lists the supported media types, and reviews the recommended system requirements. No te : this document is for reference and informational use only. Its content and the corresponding program are subject to change without notice. Welcome Welcome to the CyberLink family of digital media tools.
CyberLink Po w er2Go Extended Disc Image Format Support Support for the RDF disc image format. Extended Codec Support* Support for imported videos with the H.264 and AAC codecs. WaveEditor 2* Includes the latest version of this audio editing program, which includes multi-track mixing and CD creation. No te : * optional feature in CyberLink Power2G o. Check the version table for detailed versioning information.
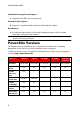
Intro ductio n WaveEditor Yes Yes -- -- -- Disc Encryption Yes Yes Yes Yes Yes Photo Gallery Disc Yes Yes Yes -- Yes Updating Power2Go Software upgrades and updates (patches) are periodically available from CyberLink. CyberLink Power2Go automatically prompts you when either is available. To update your software, do this: 1. Click the button to open the Upgrade Information window. 2.
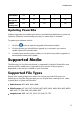
CyberLink Po w er2Go Supported Disc Types CyberLink Power2Go supports the burning of the following disc types: CD: CD-R/RW DVD: DVD-R/RW, DVD-R/RW DL, DVD+R/RW, DVD+R/RW DL, DVD-RAM Blu-ray Disc: BDXL, BD-R, BD-R DL, BD-RE, BD-RE DL System Requirements The system requirements listed below are recommended as minimums for burning. You may find that your system, while meeting these recommended minimums, requires expanded capacity during specific burning tasks.
Po w er2Go Wo rkspace Chapter 2: Power2Go Workspace This chapter provides a complete overview of CyberLink Power2Go workspace and the available modes of the program. CyberLink Power2Go has several windows that vary slightly in appearance. However these windows have several consistent features that make your burning experience more convenient.
CyberLink Po w er2Go CyberLink Power2Go Modes The CyberLink Power2Go program can run in one of two modes: Power2Go Desktop Burning Gadget Mode Power2Go Full Program Mode The Power2Go Desktop Burning Gadget mode is the simpler of the two modes, allowing you to burn discs in just two steps. The Power2Go Full Program Mode provides access to all of the burning features and disc utilities available in the program.
Po w er2Go Wo rkspace Gadget Icon Power2Go Function The Audio CD gadget. Drag and drop music files on this icon to burn an audio CD to disc that plays on a conventional CD player. The Video Disc* gadget. Drag and drop video files on this icon to burn them to a disc. The Copy Disc gadget. Click on in this gadget to copy the contents of one disc on to another. For detailed information on copying discs, see Copy Disc. No te : * optional feature in CyberLink Power2G o.
CyberLink Po w er2Go Windows start menu. Burning with the Desktop Burning Gadget To burn a disc with the Desktop Burning Gadget, do this: 1. Locate the files on your computer that you want to burn. 2. Drag and drop all of the files you want on your disc to the appropriate Desktop Burning Gadget icon, i.e. music files to the Audio CD gadget, video files to the Video Disc gadget, etc. 3. Click on process.
Po w er2Go Wo rkspace Start Program When System Starts: select to auto launch the Desktop Burning Gadget whenever you turn on your computer. CyberLink Virtual Drive: click to launch the CyberLink Virtual Drive window where you can mount image files and more. See Power2Go Virtual Drive for more information. Erase Disc: select to erase a re-writable disc that is currently in the disc drive. About: select to display CyberLink Power2Go version information. Help: select to open this help file.
CyberLink Po w er2Go The Music Disc task allows you to burn audio files in the MP3*, WMA, or WAV format to a CD or DVD. You can also extract audio from video files for burning or create a traditional audio CD. See Music Disc for more information. In the Video Disc* task window you can create a professional looking movie disc on a CD*/DVD that contains your video files. This feature also allows the burning of DVD folders to a disc. See Video Disc for more information.
Po w er2Go Wo rkspace is a useful tool that can help you find the media you want to burn to a disc quickly. The search pane may have any of the following three tabs: Browse, Filter, and Media. No te : you can also enter in k eywords in the search media field to search for files in a specific folder on your computer. Browse Tab On the Browse tab you can navigate through the drives and folders on your computer.
CyberLink Po w er2Go Power2Go User Preferences CyberLink Power2Go offers several preferences to suit the program to your working methods. To view the program’s preferences, select Project > Preferences from the menu. General Preferences On the General tab, set the general preferences as follows: Temporary directory: allows you to set a working directory that CyberLink Power2Go uses to save temp files during the burning process.
Po w er2Go Wo rkspace Power2Go language display to be the same as the default language of your operating system. User defined: select this option and then select the language from the dropdown list that you want CyberLink Power2Go to use.
Data Disc Chapter 3: Data Disc The Data Disc option allows you to burn data files to a CD, DVD, or Blu-ray Disc. Data files can include almost any kind of document or digital file. You can also create a secured data disc if you are burning content sensitive or import files to a disc. Creating and Burning Data Discs To burn a data disc, do this: 1. In the new task window, click the Data Disc option and then select the type of disc (CD, DVD, Blu-ray Disc) you want to create. The Data Disc window opens.
CyberLink Po w er2Go Burning a Secured Data Disc The secured data disc option allows you to burn password-protected data files to a CD, DVD, or Blu-ray Disc. You can also burn secured data disc with encrypted file names. The encrypted file names are hidden from users, unless they enter the correct password. You can choose to secure all or only some of the files on a data disc. Burning Secured Data Discs To burn a secured data disc, do this: 1.
Data Disc to the files you want to include on your disc. Select the files or folders you want to burn and then drag and drop them to either the secured data area (indicated in pink) or the regular non-secured data area (indicated in blue). No te : you can also click the button to add the data files or click the create a folder in the last disc area you selected. button to 8. Once you have added all of the content that you want to burn, click the Burn now button. 9.
CyberLink Po w er2Go No te : if the CyberLink Secure Browser does not automatically launch when you insert a secured data disc, try navigating to the disc in W indows Explorer and then double-click on the disc in the drive to launch it manually. 2. Enter your password and then click OK to display the CyberLink Secure Browser window. No te : if you selected to H ide the file nam e s o n a se c ure d disc when creating the disc, double-click on the secured folder in the list view to view the files. 3.
M usic Disc Chapter 4: Music Disc The Music Disc option allows you to create an MP3 or WMA CD/DVD with your music files, or create a traditional audio CD that plays back on a regular CD player. Burning an Audio CD or MP3/WMA Music Disc To burn an audio music CD or MP3/WMA music disc, do this: 1. In the new task window, click the Music Disc option and then select the type of music disc you want to create (Audio CD, WMA CD, MP3 CD, WMA DVD, MP3 DVD). The Music Disc window displays. 2.
CyberLink Po w er2Go No te : select the A uto shut do w n afte r burning option if you want CyberLink Power2G o to automatically shut down your computer once it has successfully burned your disc. 7. When the burning is complete, select one of the following options in the window that opens: Click View Log to view the burning log. The log opens in your default TXT editor, where you can view and save it. Click OK to close the window. No te : * optional feature in CyberLink Power2G o.
Video Disc Chapter 5: Video Disc The Video Disc* option allows you to burn video files to CD or DVD, along with a stylish disc menu. You may also burn a DVD folder to a disc. No te : * optional feature in CyberLink Power2G o. Check the version table for detailed versioning information. Burning a Video Disc When you select the Video CD (VCD) Disc* or DVD-Video Disc* option in the new task window, the create disc window displays.
CyberLink Po w er2Go Properties, E - Disc M enu Preview Window , F - Burn to Disc, G - Preview Disc M enu, H - Disc M enu Properties, I - M enu Na viga tion Controls, J - Toggle Ca pa city Displa y, K - Disc Content No te : * optional feature in CyberLink Power2G o. Check the version table for detailed versioning information. The steps to create and burn a video disc may vary depending on your requirements.
Video Disc Selecting Disc Menu Templates CyberLink Power2Go provides you with several stylish pre-designed menu templates that you can choose from. These menus are already customized for you and may include such features as motion and menu music. No te : if you do not want to include a menu on your final disc, select the No M e nu template on the M e nu Pre fe re nc e s tab. Select a menu template to preview it. Select Apply to apply the highlighted menu page style to the specified menu page.
CyberLink Po w er2Go click on click to edit or replace the menu’s background music. to remove the current background music from the menu. Adding/Editing Disc Menu Music If you are using background music in your disc menu, click the perform the following functions: button to No te : the final duration of your disc menu’s back ground music is dependent on the time entered in the Duratio n field in the Playback M ode Settings window, not the length of music file used.
Video Disc click to preview the first play video. Setting Disc Playback Mode Click the button to set how the disc plays back in a disc player. Select from one of the available playback modes in the list. In the Playback Mode Settings window you can set the following: choose from one of the three available playback modes based on the available descriptions. Your disc will follow the selected behavior when inserted or play is pressed on your disc player.
CyberLink Po w er2Go Editing Disc Preferences Before you burn a disc you should configure your disc preferences, including disc and video file format, audio format, etc. Click on the Disc Preferences tab to configure your disc’s preferences. The following preferences are available on the Disc Preferences tab: Disc Format the format of your disc was determined by the option you selected on the new task page (Video CD (VCD) Disc/DVD-Video Disc).
Video Disc Configuring Burn Settings Before you burn to a disc for the first time, it is advised that you click on to set your burning settings. After you configure these settings, CyberLink Power2Go uses the same settings each time you burn until you change them. Erasing Discs If you are using a rewritable disc, you can erase content that has data previously recorded on it. This allows you to reuse the same discs over and over without the need to continually buy new discs. Click on the disc.
CyberLink Po w er2Go 6. Select Perform write simulation if you want CyberLink Power2Go to simulate the burning process first to ensure the burn will finish successfully. 7. Click Burn to start the burning process. 8. When burning is complete, select an option in the window that opens: Click View Log to view the burning log. The log opens in your default TXT editor, where you can view and save it. Click OK to close the window.
Pho to Gallery Disc Chapter 6: Photo Gallery Disc With the Photo Gallery Disc* option you can use your photos to create a dynamic slideshow that is burned as a stand-alone photo showcase application on a CD, DVD, or Blu-ray Disc. The photo gallery runs on any computer with the included viewer, and can include photo descriptions and an external URL on the disc. No te : * optional feature in CyberLink Power2G o. Check the version table for detailed versioning information.
CyberLink Po w er2Go 6. Click on the Gallery tab and then configure the photo gallery disc settings as follows: Gallery title: enter in a title for your photo gallery. The title displays on your disc after it is burned. Custom Logo: click on the Custom Logo button to customize the logo used in your photo gallery, as follows: Don't include logo in photo gallery: select this option if you don’t want to include a logo in your created photo gallery.
Pho to Gallery Disc Include external URL: if you want to include a web site link on the photo gallery disc, select this option, click Edit, and then enter the web site Name and URL (http://) in the fields provided. Click the Preview button if you want to view what your photo gallery disc will look like once it is burned to a disc. Click Export to create the stand-alone photo gallery application in a folder on your hard drive. 7.
CyberLink Po w er2Go Viewing Photo Gallery Discs Once you create a photo gallery disc, to view it all you need to do is insert the disc into a computer’s disc drive. The photo gallery viewer will play the disc automatically. If your disc does not play automatically or you exported the application to your drive, just browse to the CL_Gallery.exe on the disc/hard drive and double click it to view the photo gallery.
System Reco very Chapter 7: System Recovery The System Recovery* feature in CyberLink Power2Go is a computer system backup and recovery solution that helps protect your computer, and its data, against unforeseen events, such as virus attacks, system crashes, and hard disk failures. CyberLink Power2Go helps you create and burn a system recovery disc that includes the Windows operation system programs and a backup of all the data files that are currently on your computer.
CyberLink Po w er2Go Restoring Your Computer To restore your computer from a system recovery disc, do this: 1. Insert the first system recovery disc created previously into your computer's disc drive. 2. Restart your computer. 3. The System Recovery Restore wizard will display once your computer has restarted. 4. Click the Next button to proceed, and then Start to begin the restoration process. 5. Follow all the steps in the wizard to restore your computer. 6.
Co py Disc Chapter 8: Copy Disc The Copy Disc function allows you to make an exact copy of a disc. However, you must copy the disc contents onto a blank disc of the same disc type. (You cannot, for example, copy content from a CD onto a DVD.) The Copy Disc function also allows you to save or burn disc images. No te : some discs may not be copied if they are copy-protected or contain errors. Copying Discs With CyberLink Power2Go you can copy and burn the entire contents of a disc onto another disc.
CyberLink Po w er2Go 7. Enter the Number of copies you want to burn. 8. If available, you can use the following options to assist with the burning process: select Perform write simulation if you want CyberLink Power2Go to simulate the burning process first to ensure the burn will finish successfully. if available, select Verify recorded data if you want CyberLink Power2Go to verify that the content was successfully burned to the disc.
Co py Disc in an image file name if required. 6. Choose the file format for the image file (P2I or ISO) from the Save as type drop-down. 7. Click Save to save the disc image. No te : select the A uto shut do w n afte r burning option if you want CyberLink Power2G o to automatically shut down your computer once it has successfully burned your disc. 8. When saving is complete, select an option in the window that opens: Click View Log to view the log.
CyberLink Po w er2Go select Verify recorded data if you want CyberLink Power2Go to verify that the content was successfully burned to the disc. select Enable defect management to have CyberLink Power2Go try to fix any defects on a disc so that content burns correctly. 7. Click Burn to start the burning process. No te : select the A uto shut do w n afte r burning option if you want CyberLink Power2G o to automatically shut down your computer once it has successfully burned your disc. 8.
Disc Utilities Chapter 9: Disc Utilities In addition to the wide range of disc burning functions, CyberLink Power2Go offers some handy utilities for managing your discs, including erasing re-writable discs, ripping audio from music CDs, and converting audio files to other formats. The Disc Utilities window also provides access to creating mixed discs, and the CyberLink Power2Go Virtual Drive. Erasing a Disc If you are using a re-writable disc, you can erase content that was previously recorded onto it.
CyberLink Po w er2Go No te : if you insert a new disc or select a different drive, click ensure the most updated information displays. to refresh and 3. Select the audio tracks that you want to copy to your hard drive. 4. Click the tracks to. 5. In the Settings section, set the Format and Quality of the outputted audio files. 6. Click Go to copy the files to your computer.
Disc Utilities files. The Mixed Mode CD allows you to create a data CD that also contains audio files the in audio CD format. These discs allow you to play the music on your computer with the proper playback software, and also view the data files like a normal data disc. Burning a CD Extra/Mixed Mode CD To burn a CD Extra or Mixed Mode CD disc, do this: 1. In the new task window, select the Disc Utilities option and then CD Extra or Mixed Mode CD. The CD Extra/Mixed Mode CD window opens. 2.
CyberLink Po w er2Go 7. Click Burn when you are ready to burn your disc. No te : select the A uto shut do w n afte r burning option if you want CyberLink Power2G o to automatically shut down your computer once it has successfully burned your disc. 8. When burning is complete, select an option in the window that opens: Click View Log to view the burning log. The log opens in your default TXT editor, where you can view and save it. Click OK to close the window.
Disc Utilities Power2Go Virtual Drive The Power2Go Virtual Drive lets you mount a disc image file and access it as if it is a real disc drive on your computer. Mounting a Disc Image To mount a disc image using the Power2Go Virtual Drive, do this: 1. In the new task window, select the Disc Utilities option and then Virtual Drive. The Power2Go Virtual Drive window displays. 2. Select the Enable virtual drive option. 3.
Additio nal Burning No tes and Features Chapter 10: Additional Burning Notes and Features The following are some additional burning notes and features for CyberLink Power2Go that you may find extremely useful when burning discs. Using the CyberLink ISO Viewer With CyberLink Power2Go you can use the CyberLink ISO Viewer to view disc images in the ISO, P2I (Power2Go image) or RDF format on your computer’s hard drive.
CyberLink Po w er2Go No te : to change the view of the files in the CyberLink ISO Viewer, click click on a file in the CyberLink ISO Viewer and then click default program. . to view it in its to extract files from the image and save them to your computer, select them and then click . if you want to burn the image you are viewing to a disc, click the button. See Burning a Disc Image for more detailed information about burning disc images.
Po w er2Go Settings Chapter 11: Power2Go Settings This chapter outlines the steps for configuring the settings used to burn discs in CyberLink Power2Go. To open the Settings/Information window, click the button in the new task window, select Burning > Settings when creating a disc, or press Ctrl+I on your keyboard. No te : only the Info tab displays if you have not selected a burning task . T he tabs that display and the available options they contain depend on the burning task you select.
CyberLink Po w er2Go destination disc. Configuring Audio CD Settings The Audio CD settings tab displays before burning an audio CD to a disc. On this tab, configure the settings as follows: Enable CD text: select this option if you want to add information about the music disc you are creating. Enter the desired information in the fields provided. Normalize volume in all tracks of the CD: select this option to set the volume of all of the audio tracks on the CD to the same level.
Po w er2Go Settings Auto-generate playlist: select this option if you want CyberLink Power2Go to create a playlist with the songs that will be on your disc. Configuring Library Settings The Library settings tab is available in the settings window when creating a music disc. On this tab, you can set the monitored folders used in the CyberLink Media Library.
CyberLink Po w er2Go Disc name: enter a name for the disc. The disc name appears on a disc player during playback. Use the original date and time: select this option to use each file’s original date and time for the date info used for the files burned on the disc. Use the current date and time: select this option to use the current date and time for the date info used for the files burned on the disc.
Po w er2Go Settings data, or Complete verification to check all of the data individually. The latter requires more time to complete the verification. Enable defect management: select this option to have CyberLink Power2Go try to fix any defects on a disc so that content burns correctly.
Technical Suppo rt Chapter 12: Technical Support This chapter contains technical support information. It includes all the information to find the answers you need to assist you. You may also find answers quickly by contacting your local distributor/dealer. Before Contacting Technical Support Please take advantage of one of CyberLink’s free technical support options: consult the user’s guide or the online help installed with your program.
CyberLink Po w er2Go occurred. Web Support Solutions to your problems are available 24 hours a day at no cost on the CyberLink web sites: No te : you must first register as a member before using CyberLink web support. CyberLink provides a wide range of web support options, including FAQs, in the following languages: Language Web Support URL English http://www.cyberlink.com/prog/support/cs/index.do Traditional Chinese http://tw.cyberlink.com/prog/support/cs/index.do Japanese http://support.jp.
Index Index A Always on top 8 Audio 48 extracting 19 gap between tracks 48 normalizing volume 48 supported formats 3 Audio CD burning 19 settings 48 B Back up 33 Buffer underrun protection 50 Burn 19 audio CD 19 copies 50 data discs 15 discs images 37 DVD folder 27 mixed discs 40 multisession discs 46 music disc 19 photo disc 29 secured data disc 16 settings 50 simulation 50 video disc 21 writing speed 50 C Capacity customize 12 Common settings 49 Copy disc overview 10 D Data backing up 33 Data discs b
CyberLink Po w er2Go Discs auto-split 47 burning images 37 capacity 12 change icon 47 closing 50 date and time 50 defect management 51 erasing 39 multisession 46 naming 50 photo gallery 29 ripping audio 39 supported formats 3 supported types 4 Duration disc menus 24 E Erase discs 27, 39 Extract audio 19 file from image 46 F First play video 24 G Gadget burning tips 8 56 burning with 8 enabling 6, 7 preferences 8 Gallery disc burning 31 H Hardware acceleration 49 I Images burning 37 disabling mounted
Index Mixed disc 40 Mixed mode CD 41 Modes gadget 6 overview 6 Power2Go 9 Mount image 43 MP3 disc settings 48 Multisession discs 46 Music gap between tracks 48 library 49 retrieving song info 12 ripping to hard drive 39 Music disc burning 19 overview 10 N New features 1 NTSC 26 P PAL 26 Photo disc 29 Photo gallery disc 29 burning 29 overview 10 viewing 32 Playlist MP3 disc 48 WMA quality 48 Preferences 12 Preview disc menus 23 Projects saving 11 R Restore 34 S Save disc project 11 Search library setti
CyberLink Po w er2Go U UI language 12 User preferences 12 Utilities overview 10 using 39 V Video disc burning 21 overview 10 settings 49 Videos extracting audio 19 supported formats 3 Virtual drive 43 Volume normalizing 48 W WaveEditor 19, 41 WMA quality settings 48 Write simulation 50 speed 50 58