
Operation Manual
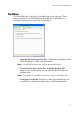
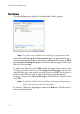
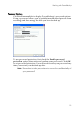
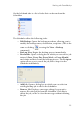
Table Of Contents

CyberLink PowerBackup 2
20
Restoring Data
The second half of the backup equation consists of restoring your
data to a usable state. The data restoration process uses the file
created during the backup process (i.e.: the “backup file”) to put all of
your backed up data back into a specified location for your use.
PowerBackup offers two distinct methods of restoring data: using the
program, or using the Restore tool. Both of these methods are
described in the following sections.
Restoring Data Using PowerBackup
To restore your data in the PowerBackup program after a backup, do
this:
1. Click or use the View > Restoration command to open the
restoration procedure. The Select Source option opens by
default.
2. Select the restoration source from the Restore from drop-down
box.
• Backup file: Restore from an existing backup file. To open a
backup file, click Browse, then locate and open the file you
want to use.
• My Catalog: Restore from existing records of previous
backup jobs.
Note: To delete records from My Catalog, use the Edit > Delete
Catalog Record or Delete All Catalog Records command.
• Disc drive: Restore from a disc.
3. Click Select Destination, then set your restoration destination.
• Original location: Restore to the original location from which
the files were backed up.
• Alternative location: Restore to a new location. To set a new
directory, click Browse, then locate and select the folder you
want to use.
• Single directory: Restore all of the backed up files to a single
new directory. To set a new directory, click Browse, then
locate and select the folder you want to use.