
Operation Manual


Chapter 3: Creating Your Story
111
Note: Use the Original and Output buttons that become available on the
control panel to compare the clips before and after the modification. You can
also select Compare video qualities in split preview to see both
views at the same time.
4. Select Apply to all clips to apply your changes to all the clips in
the workspace.
5. Click to close the option panel.
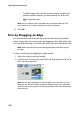
Edit an Image Clip in PhotoNow!
To edit an image in the CyberLink PhotoNow! program, select an image
clip, then click the Edit Image button.
CyberLink PhotoNow! is the quickest way to touch-up your photos. You
can resize, crop, rotate, remove red-eye, adjust the color and brightness
and more. For more information on using the CyberLink PhotoNow!
program, see that program’s online help.
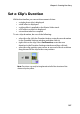
Set a Video Clip’s Interlacing Format
All video clips have an interlacing (TV) format, which specifies how
frames are displayed. Using video clips with conflicting (or incorrect) TV
formats can result in degraded video quality in your final production.
Before you produce your movie, set all of the video clips to the same
format. While CyberLink PowerDirector can normally detect and
suggest the correct format, some interlaced video (such as a video with
very little motion) may be misjudged as a progressive video.
CyberLink PowerDirector automatically produces interlaced video for
DVD, SVCD and DV-AVI. Only change this setting if you are sure that
CyberLink PowerDirector has wrongly set the format.
Note: This is an extremely important step to take before production, as it can
drastically affect final video quality!
To set a video clip’s TV format, do this: