
Operation Manual


Chapter 5: Creating Discs
229
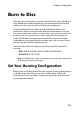
Burn Your Movie to Disc
Burning your movie to disc is the final stage of the create disc process.
Once your disc is burned, you will be able to play it on a disc player to
share with your family and friends.
To burn your movie to disc, do this:
1. Click to open the Burn window.
2. Check the Burn to disc option on the Burn window.
3. Specify your burning options:
• Enter the number of copies you want to make.
• To give the disc a volume label, enter the desired label.
4. Click OK. The task begins immediately. CyberLink PowerDirector
displays the real-time progress.
Note: The burning process may take at least a few minutes, depending on
the length and quality of your video and your computer’s processing power.
Be prepared for a short wait while CyberLink PowerDirector renders your
movie!
5. When the task is completed, a window appears, displaying a
congratulatory message. Click OK to continue.
Note: HD Content captured from HDV camcorders will be converted to
standard definition (SD) format when burning to DVD discs. This is because
DVD accepts only SD format. HD format will be supported on the high
capacity HD DVD and Blu-ray discs when they become available.
Create a DVD Folder
Creating a DVD folder conveniently stores all the files that make up a
movie in your hard drive so that it is ready for burning.
To create a DVD folder, do this:
1. Click to open the Burn window.