
User manual


23 24
Appendix B-Power Device Network Ulity
Overview
The CyberPower Power Device Network Utility is an easy-to-use interface which is
used for establishing IP addresses on CyberPower PDU devices.
Installation
Step 1. Insert the CD labeled “PDU Software Installation CD” into the CD/DVD drive.
Step 2. Select Power Device Network Utility from the installation menu (Shown in
Figure 1.).
Figure 1. Installation Menu
Step 3. Select Next in the software wizard.
Step 4. Choose an installation directory and user settings.
Select Next (Shown in Figure 2.).
Figure 2. Installation folder and settings
Step 5. Select Next to comfirm the settings and install.
Step 6. Select Close to finalize the installation.
Appendix B-Power Device Network Ulity
Pressing Stop will cancel the scan/refresh process.
Note: If your computer has a software firewall installed, you may see a Windows
Security Alert message (Shown in Figure 5.).
In Windows XP SP2, the default firewall alert message is shown as Figure 5. You
need to allow the Power Device Network Utility access through the firewall.
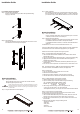
Figure 3. Power Device Network Utility
Getting Started
The Power Device Network Utility scans the network for devices with MAC
addresses that match CyberPower network hardware. Once found, the device(s)
can then be figured with a specific IP address, subnet mask, and gateway address.
This allows the device(s) to function properly on the network and interface with
CyberPower Management Console.
Step
1. Select the appropriate PDU device from the Equipment List (Shown in Figure 4.).
Figure 4. Equipment List
Note: If the PDU does not appear on the list, click the Refresh button to rescan the
network. If it still does not appear, ensure that the PDU is turned on and was
installed correctly.
Launch Program
To launch the Power Device Network Utility and get started, select Programs from the
Start menu in Windows and locate the new folder and icons for Power Device
Network Utility. Select Power Device Network Utility from the program folder (Shown
in Figure 3.).
Figure 5. Windows Security Alert