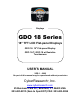
® Displays GDO 18 Series 18" TFT LCD Flat-panel Displays GDO 18: 18" Flat-panel Display GDO 18-T: GDO 18 w/ Resistive Touchscreen USER’S MANUAL VER. 1 • 2002 No part of this manual may be reproduced without permission CyberResearch , Inc. ® www.cyberresearch.com 25 Business Park Dr.
©Copyright 2002 All Rights Reserved. 2002 The information in this document is subject to change without prior notice in order to improve reliability, design, and function and does not represent a commitment on the part of CyberResearch, Inc. In no event will CyberResearch, Inc. be liable for direct, indirect, special, incidental, or consequential damages arising out of the use of or inability to use the product or documentation, even if advised of the possibility of such damages.
Intentionally Blank
PREFACE FCC Compliance Statement Note: This equipment has been tested and found to comply with the limits for a Class B digital device, pursuant to Part 15 of the FCC Rules. These limits are designed to provide reasonable protection against harmful interference when the equipment is operated in a residential installation.
User’s Manual Class B ITE (Following European Standard EN 50082-2) Radio Frequency Interference Statement Warning: This is a Class B product. In a domestic environment, this product may cause radio interference in which case the user may be required to take adequate measures.
User’s Manual Important Safety Instructions Please read the following instructions carefully. This manual should be retained for future use. 1. To clean the LCD monitor screen, first, make sure the monitor is in the Power Off mode. Unplug the monitor from its power source before cleaning it. Do not spray liquid cleaners directly onto the unit. Stand away from the LCD monitor and spray cleaning solution onto a rag. Without applying excessive pressure, clean the screen with the slightly dampened rag. 2.
User’s Manual • The monitor has been dropped or the case has been damaged.
User’s Manual TABLE OF CONTENTS CHAPTER 1 ................................................................................................................................1 The LCD Monitor.........................................................................................1 Your New LCD Monitor.................................................................................1 Unpacking..................................................................................................
User’s Manual TABLE OF FIGURES Figure 1-1: The LCD Monitor Panel and Controls ________________3 Figure 1-2: LCD Monitor’s Rear Ports _________________________4 Figure 1-3: Angle Settings____________________________________6 Figure 1-4: Connecting Power to the LCD Monitor________________7 Figure 1-5: Connecting the LCD Monitor to the PC _______________8 Figure 1-6: Connecting the Stereo Speakers______________________9 Figure 1-7: Connecting the Optional Touchscreen Cable___________10 Figure 2-1: The OSD Mai
CHAPTER 1 The LCD Monitor Your new LCD Monitor Your LCD monitor has been designed to be versatile, ergonomic and user-friendly. The LCD monitor is capable of displaying most standards, from 640 x 480 VGA to 1280 x 1024 SXGA. The digital controls located on the front panel allow the user to easily adjust the monitor’s display parameters. The LCD monitor’s small footprint allows you more room in your workspace for other peripherals.
User’s Manual Using a computer for an extended period of time with a poor workstation set-up and incorrect working habits can cause health problems. The science of ergonomics studies the relationship between health and a suitable working environment. There is a section on ergonomics at the end of this chapter. For more information on ergonomics, contact your nearest computer bookstore, or local library. The Internet also has information on this and other subjects.
User’s Manual Figure 1-1: The LCD Monitor Panel and Controls 1. LCD Screen The RGB LCD monitor screen is capable of producing most display standards. 2. Function Control Buttons These two buttons allow you to select one of the control functions. Press either the upper or lower control button to scroll through the menu items. 3. Adjustment Control Buttons These two buttons allow you to adjust the selected control function to accommodate your specific working environment.
User’s Manual 5. Power-On Indicator This LED indicator lights when the power is on. The LED indicator will blink when the LCD monitor is in Power Saving mode. 6. Monitor Swivel Base The monitor swivel base supports the LCD panel and changes the monitor angles. 7. Stereo Speakers You can connect your PC’s Audio Out port to the LCD monitor’s Audio In port and listen to your PC’s audio output with these speakers. The LCD Monitor — Rear View Figure 1-2: LCD Monitor’s Rear Ports 1.
User’s Manual 2. AC Power Connector Connect the power cable to this AC power connector. 3. PS/2-Type Connector for Touchscreen (optional) Connect this PS/2 6-pin connector to your PC’s RS-232 9-pin serial port connector to use the optional touchscreen. A PS/2 to RS-232 cable is provided with the optional touchscreen package. To install the optional touchscreen driver, see the ELO 18" Touchscreen Guide on the driver CD, or contact CyberResearch 4.
User’s Manual Figure 1-3: Angle Settings Do not force the monitor past its maximum extension in either direction. You could damage the monitor and the monitor stand. Positioning Take a moment to prepare a suitable place to set up your workstation. You need a stable, flat dust-free surface with good ventilation. Even though the LCD monitor has been designed using components that don’t use much power, they still generate quite a bit of heat.
User’s Manual • Do not place the LCD monitor in direct sunlight or near a window. Moisture and direct sunlight exposure can be seriously damaging. Connecting AC Power Please refer to the following instructions for connecting AC power to the LCD monitor. 1. Plug the female end of the power cable into the AC power connector. Plug the male end of the power cord into a wall socket. The plug on the power cable will vary according to the electrical standard in your area. Please refer to Figure 1-4.
User’s Manual Figure 1-5: Connecting the LCD Monitor to the PC 3. If your PC has a graphic card with a 24-pin DVI connector, you should connect it with the digital 24-pin DVI signal cable. 4. Make sure the signal cable head is securely connected to the VGA port of your PC. Tighten the connecting screws to ensure a secure connection. 5. Turn on your computer and LCD monitor.
User’s Manual 2. Connect the other end of the 1.5M sound cable to the LCD monitor’s line-in jack. Please refer to Figure 1-6. Figure 1-6: Connecting the Stereo Speakers 3. You can adjust the sound volume of the stereo speakers by using the speaker volume control function on the OSD (On-Screen Display). Please refer to the next chapter for details. Connecting the Optional Touchscreen Your LCD monitor has an optional touchscreen feature.
User’s Manual Figure 1-7: Connecting the Optional Touchscreen Cable 2. Connect the D-sub 9-pin RS-232 connector end of the PS/2 to RS-232 cable provided with the optional touchscreen package to the 9-pin RS-232 serial port at the back of your PC. Please refer to Figure 1-7. 3. Install the Touchscreen drivers to your PC. 4. Following the Touchscreen driver guide to align your touchscreen positioning. Power Management System The LCD monitor complies with the VESA DPMS (version 1.
CHAPTER 2 The Display Controls The LCD Monitor Display Controls This chapter covers the LCD monitor’s On-Screen Display (OSD). Using the OSD you can adjust the contrast, brightness, display position, display clarity, and color temperature, etc. You can also adjust the stereo speaker volume and set OSD parameters. Please read this chapter carefully to get the most out of your LCD monitor. Adjusting the Monitor’s Display The LCD monitor features an intuitive, menu-driven, On-Screen Display (OSD).
User’s Manual Figure 2-1: The OSD Main Menu The control functions are grouped into seven categories as shown on the Main Menu. Continue pressing the Function buttons to scroll through the menu item. Press the Adjustment buttons to enter the sub-menu of each function group. Each item is covered below. Main Menu BASIC SETTING To control the contrast, brightness, video level, and gamma, etc. POSITION To control the display size, position, clock and phase, etc.
User’s Manual Basic Setting CONTRAST To adjust the contrast level of the display. BRIGHTNESS To adjust the brightness level of the display. VIDEO LEVEL To fine tuning the matching input signal voltage level. Perform this function whenever the graphics card is changed. To select a suitable color representation. GAMMA FRAME TO MAIN MENU To select different border colors (up to 64 colors) when the display is not in full-screen size. Return to Main Menu.
User’s Manual Miscellaneous Menu OSD H-POSITION To adjust the audio volume of the monitor’s speakers. (Only available in the models with built-in speakers.) To adjust the horizontal position of the OSD menu. OSD V-POSITION To adjust the vertical position of the OSD menu. DISPLAY MODE Select this function to display the resolution and frame rate of the current screen display. Select this function to display the firmware version of the monitor. Return to Main Menu.
User’s Manual Press the lower Function Control button (second button) to enable the small Brightness icon. Use the Adjustment Control button to increase (+) or decrease (-) the brightness level. Press the upper Adjustment Control button (third button) to enable the small volume icon. Use the Adjustment Control button to increase (+) or decrease (-) the volume. Press the lower Adjustment control button (fourth buttons) to enable the small port icon.
APPENDIX A Troubleshooting Troubleshooting Procedures This LCD Monitor was pre-adjusted in the factory with standard VGA timing. Due to output timing differences among various VGA cards, you may initially experience an unstable or unclear display when a new display mode or new VGA card is selected. This LCD Monitor Supports Multiple VGA Modes. Refer to Addendum for a listing of the factory preset modes supported by this LCD Monitor.
User’s Manual horizontal dark and light lines appear. The number of lines increases as you press the button. Now press the bottom (or top) Adjustment Control button until the lines disappear and you have a clear display. PROBLEM: There is no LCD Display If there is no display on the LCD, please perform the following steps: 1. Make sure that the power indicator on the LCD monitor is lit, all connections are secure, and the system is running on the correct timing.
19
20
21
22
23
24
25
Intentionally Blank 26
Product Service Diagnosis and Debug CyberResearch, Inc. maintains technical support lines staffed by experienced Applications Engineers and Technicians. There is no charge to call and we will return your call promptly if it is received while our lines are busy. Most problems encountered with data acquisition products can be solved over the phone. Signal connections and programming are the two most common sources of difficulty.
Intentionally Blank 28
Warranty Notice CyberResearch, Inc. warrants that this equipment as furnished will be free from defects in material and workmanship for a period of one year from the confirmed date of purchase by the original buyer and that upon written notice of any such defect, CyberResearch, Inc. will, at its option, repair or replace the defective item under the terms of this warranty, subject to the provisions and specific exclusions listed herein.
Intentionally Blank 30
CyberResearch, Inc. 25 Business Park Drive Branford, CT 06405 USA P: (203) 483-8815; F: (203) 483-9024 www.cyberresearch.