
User's Manual


Introduction
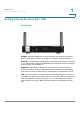
Mounting the Cisco RV 110W
Cisco RV 110W Administration Guide 5
1
Mounting the Cisco RV 110W
You can place your Cisco RV 110W on a desktop or mount it on a wall.
Installation Guidelines
• Ambient Temperature—To prevent the device from overheating, do not
operate it in an area that exceeds an ambient temperature of
104°F (40°C).
• Air Flow—Be sure that there is adequate air flow around the device.
• Mechanical Loading—Be sure that the device is level and stable to avoid
any hazardous conditions.
For desktop placement, place the Cisco RV 110W device horizontally on a flat
surface so that it sits on its four rubber feet.
Wall Mounting
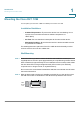
STEP 1 Determine where you want to mount the device and install two screws (not
supplied) that are 2-7/16 in. apart (approximately 61 mm). Mounting screws should
have a head that is approximately 5.5 mm in diameter and 2 mm deep, with a shaft
that is at least15.5 mm long and approximately 3.5 mm wide. (Your wall may
require shorter or longer screws, or drywall anchors.)
Do not mount the screw heads flush with the wall; the screw heads must fit inside
the back of the device.
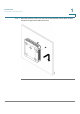
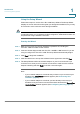
STEP 2 With the back panel pointing up (if installing vertically), line up the device so that
the wall-mount slots on the bottom of the device line up with the two screws.
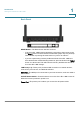
195114
Wall
mount
slots
2-7/16