
User's Manual


Introduction
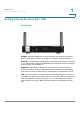
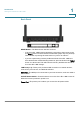
Connecting the Equipment
Cisco RV 110W Administration Guide 8
1
Using the Setup Wizard
Follow these steps to use the Cisco RV 110W Setup Wizard. The Setup Wizard
displays on-screen instructions that guide you through the installation, but you may
find it useful to refer to this document during installation.
NOTE You must connect one PC with an Ethernet cable for the purpose of the initial
configuration. After you complete the initial configuration, administrative tasks can
be performed using a wireless connection.
Starting the Wizard
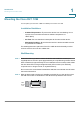
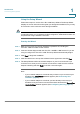
STEP 1 Make sure that all of the network hardware is powered off, including the
Cisco RV 110W and cable or DSL modem.
STEP 2 Insert the CD that shipped with the Cisco RV 110WRV 110W into the PC you are
using to configure the Cisco RV 110W. The Setup Wizard automatically begins.
STEP 3 Click S
Start
to begin the installation.
STEP 4 Click the check box to accept the software license agreement and click N
Next
.
STEP 5 The Setup Wizard verifies the network adapter on your PC is functional. If you
receive an error, view your PC’s network connections to make sure the network
adapter is working and click B
Back
to test the connection again.
Next:
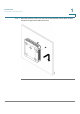
• If your network adapter is functional and you have not yet connected your
hardware, the
Install Router
window appears. (See Connecting Your
Hardware, page 9.)
• If your network adapter is functional, you have already connected your
hardware, and your Internet connection has been detected, the S
Secure Your
Router Settings
window appears. (See Configuring Security, page 14.)