
User's Manual
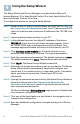
Table Of Contents

8 Cisco Small Business RV130/RV130W Mutlifunction VPN Router
Using the Setup Wizard
The Setup Wizard and Device Manager are supported on Microsoft
Internet Explorer 7.0 or later, Mozilla Firefox 3.5 or later, Apple Safari 3.0 or
later, and Google Chrome 5.0 or later.
To configure the device by using the Setup Wizard:
STEP 1 Power on the PC that you connected to the LAN1 port in Step 3 of
the Connecting the Equipment section. Your PC becomes a DHCP
client of the device and receives an IP address in the 192.168.1.xxx
range.
STEP 2 Launch a web browser window on your PC.
STEP 3 In the address bar, enter the default IP address of the device
192.168.1.1. A site security certificate message appears. Cisco
RV130/RV130W uses a self-signed security certificate. This
message appears because the device is not known to your PC.
STEP 4 Click Continue to this website (or the option shown on your
particular web browser) to continue. The login page appears.
STEP 5 Enter the username and password. The default username is cisco.
The default password is cisco. Passwords are case sensitive.
STEP 6 Click Log In. The Router Setup Wizard is luanched.
STEP 7 Follow the on-screen instructions to set up your device. The Router
Setup Wizard tries to automatically detect and configure your
connection. If it is unable to do so, it might ask you for information
about your Internet connection. Contact your ISP for this
information.
STEP 8 Change the password as instructed by the Router Setup Wizard or
follow the instructions in the Changing the Administrator
Username and Password section. Log into the device with the
new username and password.
The Device Manager Getting Started page appears. It displays the
most common configuration tasks.
STEP 9 Click one of the listed tasks or a task listed in the navigation bar to
complete the configuration.
STEP10 Save any additional configuration changes and log out of Device
Manager.
4