DSL-502G ADSL Ethernet/USB Router User’s Guide (March 2002) 651DSL500055
Wichtige Sicherheitshinweise 1. Bitte lesen Sie sich diese Hinweise sorgfältig durch. 2. Heben Sie diese Anleitung für den spätern Gebrauch auf. 3. Vor jedem Reinigen ist das Gerät vom Stromnetz zu trennen. Vervenden Sie keine Flüssig- oder Aerosolreiniger. Am besten dient ein angefeuchtetes Tuch zur Reinigung. 4. Um eine Beschädigung des Gerätes zu vermeiden sollten Sie nur Zubehörteile verwenden, die vom Hersteller zugelassen sind. 5. Das Gerät is vor Feuchtigkeit zu schützen. 6.
FCC Warning This device complies with part 15 of the FCC Rules. Operation is subject to the following two conditions: (1) This device may not cause harmful interference, and (2) this device must accept any interference received, including interference that may cause undesired operation. This equipment has been tested and found to comply with the limits for a Class B digital device, pursuant to part 15 of the FCC Rules.
TABLE OF CONTENTS ABOUT THIS USER’S GUIDE .................................................................................. IX Before You Start ................................................................................................................................................ ix Requirements for Installation .............................................................................................................................. x Configuration Computer Requirements .......................
WEB-BASED MANAGEMENT .................................................................................29 Accessing the Web Manager .............................................................................................................................. 29 Web Manager Interface..................................................................................................................................... 30 Adding a New Connection Profile..............................................................
Figure 1. Front Panel............................................................................................................................................... 3 Figure 2. Rear Panel................................................................................................................................................ 3 Figure 3. LED Indicators ........................................................................................................................................ 5 Figure 4.
Figure 37. Configuration Maintenance Screen...................................................................................................... 53 Figure 38. Remote Administration Access ........................................................................................................... 54 Figure 39. Router Summary Statistics................................................................................................................... 55 Figure 40. Bridge Summary Screen ........................
DSL-502G ADSL Ethernet Router User’s Guide About This User’s Guide This user’s guide provides instructions on how to install the DSL-502G ADSL Router and use it to connect a computer or Ethernet LAN to the Internet. If you are using a computer with a functioning Ethernet port, you can use the Quick Installation Guide to quickly establish your ADSL connection and access the Internet.
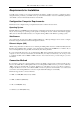
DSL-502G ADSL Ethernet Router User’s Guide Requirements for Installation You will need a computer to set up and use the Router. In addition, it will be necessary to configure the device using information provided by your ADSL service provider. This information is used to establish the parameters of the ADSL connection and identify the Router on the WAN. Configuration Computer Requirements The Router can be configured using a computer that meets the conditions discussed here.
DSL-502G ADSL Ethernet Router User’s Guide xi
DSL-502G ADSL Ethernet Router User’s Guide PPP Connections (RFC 2516 & RFC 2364) For PPPoA or PPPoE connections, a verification process is required before the network connection can be established. Use this section to record the information used for authentication. Account Information (User Name and Password) For PPP connections, a User Name and Password for the user account are needed to connect to the service provider’s network.
DSL-502G ADSL Router User’s Guide Introduction This section provides a brief description of the Router, its associated technologies and a list of Router features. What is ADSL? Asymmetric Digital Subscriber Line (ADSL) is an access technology that utilizes ordinary copper telephone lines to enable broadband high-speed digital data transmission and interactive multimedia applications for business and residential customers.
DSL-502G ADSL Router User’s Guide Router Features The DSL-502G ADSL Ethernet Router utilizes the latest ADSL enhancements to provide a reliable Internet portal suitable for most small to medium sized offices. DSL-502G advantages include: • PPP (Point-to-Point Protocol) Security The DSL-502G ADSL Router supports PAP (Password Authentication Protocol) and CHAP (Challenge Handshake Authentication Protocol) for PPP connections.
DSL-502G ADSL Router User’s Guide Front Panel Place the Modem in a location that allows a view of the LED indicators. To save space you can use the feet to stand the device on either its right or left side. Figure 1. Front Panel Rear Panel All cable connections to the Modem are made at the rear panel. The factory reset button is located here as well. Figure 2.
DSL-502G ADSL Router User’s Guide Cable Connections All cable connections to the Router are made at the rear panel. The factory reset button is located here as well. Ethernet port, connect Ethernet cable here Connect Power Adapter here USB Port ADSL port, connect ADSL cable here Reset button RJ-14 console port used for configuration (requires RJ-14 to RS-232 adapter) Figure 3.
DSL-502G ADSL Router User’s Guide LED Indicators Figure 3 LED Indicators The LED Indicators read as follows: Power Steady green light indicates the unit is powered on. Status Lights steady green during the ADSL negotiation phase & connection stage. ADSL: Link Steady green light indicates a valid ADSL connection. This will light after the ADSL negotiation process has been settled. ADSL: Act Blinking green light indicates an active WAN session.
DSL-502G ADSL Router User’s Guide It may be convenient for you locate the Router near the PC you intend to use for initial configuration of the Router. For initial configuration of the device you may need convenient access to the RS-232 serial port on the rear panel. The RS-232 serial port is intended for use with text-based console management software for the initial configuration and for out-of-band management of the Router.
DSL-502G ADSL Router User’s Guide Hub or Switch to Router Connection Connect the Router to an uplink port (MDI-II) on an Ethernet hub or switch with a straight-through cable. If you wish to reserve the uplink port on the switch or hub for another device, connect to any on the other MDI-X ports (1x, 2x, etc.) with a crossed cable. To Power Source USB Cable Ethernet Cable ADSL Line Figure 4.
DSL-502G ADSL Router User’s Guide 4 First Time Set Up This chapter discusses the steps to first establish the WAN connection. The remaining features not directly concerned with establishing the initial connection are explained in Chapter 5, Web-based Management. It is recommended that you install and configure the Router using one non-networked computer. This allows you to verify that the ADSL service is functioning and that you are able to communicate with the device.
DSL-502G ADSL Router User’s Guide 2. Next, the “Found New Hardware Wizard” dialog box is displayed. 3. Insert the CD that came with the DSL-502G into the CDROM drive. 4. Click “Next” Note: The various versions of Windows have different Hardware Installation Wizards, which may cause the windows on your computer to appear a bit different than those shown in this Guide. Further, the Wizard may function differently in that it may automatically locate and load the driver files.
DSL-502G ADSL Router User’s Guide 7. Click “Next” 8. Look in the “PC USB driver” folder of the CD-ROM drive, as shown below. 9. Highlight “vvbususb.inf.” 10. Click “Open” 11. Click “Next” in the window below, to begin installing the first driver.
DSL-502G ADSL Router User’s Guide 12. Click “Finish” to complete the first part of the USB driver installation. Note: If the “Found New Hardware Wizard” screen (shown below) does not appear automatically after clicking on the “Finish” button in the above window, restart your computer.
DSL-502G ADSL Router User’s Guide 13. The “Found New Hardware Wizard” screen will be displayed again. 14. Click “Next” 15. Select “Search for a suitable driver for my device…” 16.
DSL-502G ADSL Router User’s Guide 17. Select “Specify a location” 18. Click “Next” 19. Look in the “PC USB driver” folder, as shown below. 20. Highlight “VvbEth.inf” 21.
DSL-502G ADSL Router User’s Guide 22. Click “Next” to install the second driver. 23. In Windows 2000, the window at the right may appear. If it does, click “Continue Anyway” For older versions of Windows, you may be asked to insert the Windows CD-ROM that came with your computer.
DSL-502G ADSL Router User’s Guide 24. Click “Finish” to exit the installation wizard. The driver for the DSL-502G ADSL modem is now installed. 25. Finally, you will be asked to restart your computer. Click “Yes” to restart the computer. After the computer restarts, the drivers will be ready for use. Check the USB LED and make sure it is shining solid green.
DSL-502G ADSL Router User’s Guide IP Settings To further simplify things it is recommended that you use the Router’s web-based management software for initial configuration. To communicate with the Router, the manager PC must be connected to it via an Ethernet connection and have a web browser installed. Furthermore, the manager PC must reside within the same subnet as the Router. This can be done easily using the DHCP function of the Router. The Router will act as a DHCP server by default.
DSL-502G ADSL Router User’s Guide 2. In the Control Panel folder, click on Network and Internet Connections. 3. In the Network and Internet Connections folder, click on Network Connections.
DSL-502G ADSL Router User’s Guide 4. In the Network Connections folder, highlight the Local Area Connection icon by clicking on it once. A new option is revealed under Network Tabs in the left side panel. 5. Click on Change settings of the connection under Network Tabs.
DSL-502G ADSL Router User’s Guide 6. In the General Tab of the Local Area Connection Properties menu, highlight Internet Protocol (TCP/IP) under “This connection uses the following items:” by clicking on it once. Click on the Properties button. 7. Select “Obtain an IP address automatically” by clicking once in the circle. Click the OK button. Your computer is now ready to use the Router’s DHCP function.
DSL-502G ADSL Router User’s Guide Access the Web-based Manager The Manager PC can now use a web browser to communicate with the Router. Note: Be sure that the web browser on the Manager PC is not configured to use a proxy server in the Internet settings. In Windows Internet Explorer, you can check if a proxy server is enabled using the following procedure: 1. In Windows, click on the START button, go to Settings and choose Control Panel. 2.
DSL-502G ADSL Router User’s Guide Note: Do not confuse the user name and password used to access the web-based manager with the ADSL account user name and password needed for PPP connections to access the ADSL or network service provider’s network. Logging in will bring up the Router/Bridge Configuration window of the web-based management module. In this window, you will see the D-Link DSL-502G folder is open revealing its contents of three subfolders.
DSL-502G ADSL Router User’s Guide PPPoA Connections The default connection method used by the Router is Point-to-Point-Protocol over ATM (PPPoA). In the PPPoA Configuration window, you must enter the user name and password for network account authentication and verification. When this information is entered, the changes must be saved and the Router restarted. Figure 8.
DSL-502G ADSL Router User’s Guide Click on the OK button on the bottom of the window. A new screen appears: The Save changes and reboot system? message prompt offers two option: A. You can save the configuration changes and restart the device now by clicking OK; or, B. If you want to change the user name and password used to access the Web Manager, select the “Continue and do ‘Save Changes’ later” option and click OK, and go to the System Username and Password menu in the Maintenance folder.
DSL-502G ADSL Router User’s Guide Changing the Connection Protocol The default connection method used by the Router for the WAN connection is PPP over ATM. If you wish to use this method, it is not necessary to change this setting. However, if you will use a static IP address for a “Bridged Ethernet” (RFC 1483) connection, PPP over Ethernet or IPoA you must change the connection method. There are two menus used to change the connection method or connection profile.
DSL-502G ADSL Router User’s Guide PPPoE Connections Although the connection methods differ significantly, from the viewpoint of the ADSL subscriber, there is little difference between the two variations of PPP connections. The information entered for PPPoE connections is the same as that used for PPPoA connections. Once you have changed the connection method to PPPoE, saved the configuration change and restarted the device, you can proceed to enter authentication information used to connect to the WAN.
DSL-502G ADSL Router User’s Guide Click on the OK button on the bottom of the window. A new screen appears: The Save changes and reboot system? message prompt offers two option: A. You can save the configuration changes and restart the device now by clicking OK; or, B. If you want to change the user name and password used to access the Web Manager, select the “Continue and do ‘Save Changes’ later” option and click OK, and go to the System Username and Password menu in the Maintenance folder.
DSL-502G ADSL Router User’s Guide Changing the User Name and Password Before you configure the Router and connect to the WAN you should change the user name and password used to access the web-based manager. Open the Maintenance folder and click on the System Username and Password button to change the manager username and password. Figure 10. User Name and Password Menu 1. Type the current User Name in the entry field provided. Type in the current password in the Old Password entry field.
DSL-502G ADSL Router User’s Guide Connect to WAN Once you have configured the Router, saved changes and restarted it, you can connect the manager PC to the Internet. The procedure is the same for PPPoE and PPPoA connections. Connect with PPP (PPPoE and PPPoA) If you have enabled the Connect on Demand feature, the Router will have established the WAN connection upon restarting.
DSL-502G ADSL Router User’s Guide 5 Web-based Management The DSL-502G offers a web-based (HTML) graphical user interface allowing users to manage the Router from anywhere on the LAN using a standard browser, software such as Netscape Navigator or Microsoft Internet Explorer. The web browser is used for direct communication with the Router using HTTP protocol.
DSL-502G ADSL Router User’s Guide Web Manager Interface Once you have successfully logged on to the web manager, your browser will display the Bridge/Router Configuration menu. If you wish to change the connection method used by the device, please see Changing the Connection Method in the Chapter 4. Figure 12. Router/Bridge Configuration (PPPoA) Folders and Menus The web manager interface is divided into two sections, the left side displays an open folder labeled D-Link DSL-502G.
DSL-502G ADSL Router User’s Guide Adding a New Connection Profile Use the Connection Profile menu to add, change or delete connection profiles. This menu is used to change the VPI/VCI settings for the device. Figure 13.
DSL-502G ADSL Router User’s Guide New Connection Profile Configuration Figure 14. Connection Profile Configuration Use the Connection Profile Configuration menu to change the following parameters: Profile Name Type in a new name for this profile.
DSL-502G ADSL Router User’s Guide IP Address on LAN Use this menu to change the LAN IP address of the Router. Figure 15. Ethernet IP Address Menu The Ethernet IP Address displays the current LAN IP settings of the Router. To change the IP address, type in the new IP Address and Subnet Mask in the spaces provided and click on the OK button. If DHCP is enabled, a screen prompt will appear: If you will continue to use the DHCP function, click the OK button. You will be prompted again to restart the device.
DSL-502G ADSL Router User’s Guide Router Configuration The DSL-502G serving as a router has a different role than it does when it is configured to be a bridge. This section discusses the different menus used for configuration when it serves as a router. The device is configured as a router when using a connection profile characterized by a PPPoE, PPPoA or IPoA connection. PPP Configuration (PPPoE & PPPoA) The first menu displayed is the Router/Bridge Configuration menu.
DSL-502G ADSL Router User’s Guide When you finished making changes to the PPP configuration, click the OK button to save the changes. It will be necessary to restart the Router for the new configuration to go into effect. PPPoE Information This read-only field provides information regarding the status of the Router connection to the WAN. The global IP Address for the Router should be assigned automatically by the network service provider’s PPP server.
DSL-502G ADSL Router User’s Guide To assign the global IP settings manually, type the IP Address, Subnet Mask and Default Gateway IP settings given assigned by your network service provider, and click OK. Clicking OK will bring up the Save and reboot system. Proxy DNS Settings You may use the Router to provide DNS services for work stations on your LAN. To configure on-board DNS, click on the Proxy DNS button. Figure 17.
DSL-502G ADSL Router User’s Guide DHCP Configuration Us e the DHCP Configuration on LAN menu to configure the Router to act as a DHCP server for the LAN. Figure 18. DHCP Configuration Menu Configure LAN DHCP services by defining the following parameters: Start IP Address End IP Address Netmask Default Gateway Type in the base address for the IP pool of unassigned IP addresses. Type in the last address of the contiguous IP address range to be used by the Router for DHCP function.
DSL-502G ADSL Router User’s Guide NAT Configuration Network Address Translation (NAT) is a routing protocol that allows your network to become a private network that is isolated from, yet connected to the Internet. It does this by changing the IP address of packets from a global IP address usable on the Internet to a local IP address usable on your private network (but not on the Internet) and vice-versa. The Router allows up to 128 host IP addresses. NAT has two major benefits.
DSL-502G ADSL Router User’s Guide DMZ IP Address NAT may conflict with certain interactive applications such as video conferencing or playing Internet video games. For these applications, a NAT bypass can be set up using a DMZ IP address. The DMZ IP address is a “visible” address and does not benefit from the full protection of the NAT function. Therefore it is advisable that other security precautions be enabled to protect the other computers and devices on the LAN.
DSL-502G ADSL Router User’s Guide Port Redirection (continued) Figure 21. Redirect Port – Add Menu The Redirect Port window presents eight entry fields: Comment Internet Port Well-known port Local Port Well-known port Protocol Local Computer Assign an appropriate name to the new route. Enter the designated TCP or UDP protocol port number or use a well-know port for the particular protocol packet you wish to redirect. Select one of the well-known ports to redirect incoming packets through that port.
DSL-502G ADSL Router User’s Guide Static Route Configuration Use Static Routing to specify a route used for data traffic within your LAN. This can be used to specify that all packets destined for a particular subnet use a predetermined gateway. Figure 22. Static Route Configuration Table Up to 18 static route configurations can be entered into the table. To eliminate an existing static route configuration, click the Delete button for that configuration.
DSL-502G ADSL Router User’s Guide Static Route Configuration – Modify/Add Figure 23. Static Route Configuration Menu To add or modify a static route, define the following parameters: Name IP Address Subnet Mask Gateway Metric State Provide a name for the static route or subnet (optional). Type in the IP address of the subnet or device where packets are routed. Type in an appropriate subnet mask that allows the static route to function.
DSL-502G ADSL Router User’s Guide Advanced Filter & Firewall One of the most important elements of any network security implementation is the firewall. Packet filtering is a basic firewall security measure and should be used on any network that is exposed to security risk. A packet filter system examines data packets and scrutinizes them in order to control network access. Filtering rules determine whether packets are passed through the Router from either side of the gateway.
DSL-502G ADSL Router User’s Guide Create or Modify Packet Filtering To define new filtering rules or modify an existing one follow these steps: 1. In the first Advanced Filtering and Firewall window, click on the set number you wish to configure to proceed to the Set # window. Figure 25. Filtering & Firewall – Set # Menu In the Set # window, click on the rule number to define or modify that rule. The rule definition menu appears. Figure 26.
DSL-502G ADSL Router User’s Guide For each rule in a set, you may define the following parameters: Comment Pass or Block Type in an appropriate identifying comment for the rule. Select Pass or Block to perform this action on packets as defined below. Direction Select In or Out to pass or block packets coming in or going out of the network. Protocol Select IGMP, TCP, UDP or All to pass or block packets of that protocol type.
DSL-502G ADSL Router User’s Guide RIP To enable RIP or specify use of Version 1 or 2 access the RIP menu. Figure 27. RIP Menu Select to use RIPv1, RIPv2 or On (both versions) for the LAN and WAN interface. To disable both versions of RIP select Off. Click OK to bring up the Save changes and reboot system menu.
DSL-502G ADSL Router User’s Guide Bridge with RFC 1483 Configuration Menu options for the DSL-502G are different when the connection profile specifies Bridge with RFC 1483 since it is acting in the capacity of a bridge rather than a router. You can see from the figure below that there are fewer menu options for device configuration. Most of the menus in the Configuration file are the same and are used in the same way they are used for Router with PPP configuration.
DSL-502G ADSL Router User’s Guide Bridge Configuration Figure 29. Bridge Configuration Menu To change the Encapsulation Method, click LLC or VC mux as specified by your service provider and click the OK button. You will see the Save changes and reboot system? menu. The default encapsulation setting is LLC. This menu may also be used change the connection method in the Connection Profile drop-down menu.
DSL-502G ADSL Router User’s Guide Layer 2 Filtering (bridge mode only) The Layer 2 filtering option is available in the bridge configuration folder, it is not an option when the device is configured as a router. By default, the bridge will pass all packets in either direction. You may specify that certain types of packets be dropped in order to free up bandwidth or improve security. To block a packet type, click in the box so that check mark does not appear in the box and click OK.
DSL-502G ADSL Router User’s Guide Maintenance The Maintenance folder contains the same menus for bridge and router configurations with the exception of the Remote Administration Access option, available only for router configurations. ATM Loopback Test ATM loopback tests are used to verify connectivity and path integrity along a specified ATM circuit. In the test, a cell is sent to an endpoint or to the end of the first segment of the ATM path.
DSL-502G ADSL Router User’s Guide System Username and Password Use this screen to change the username and password used to access the Web Manager. The Web Manager can be accessed remotely from outside the LAN when it is functioning in router mode using the Remote Administration Access menu (described in a later section). Figure 32. User Name and Password Menu 1. Type the current User Name in the entry field provided. Type in the current password in the Old Password entry field.
DSL-502G ADSL Router User’s Guide When the Restart System window appears, click the Restart button. Figure 34. Restart System Window Factory Reset The DSL-502G can be reset to the default configuration for all settings using the Factory Reset option. This will also change the both the LAN and WAN IP address of the device, so these will need to be reconfigured accordingly. Figure 35. Factory Reset Screen To perform a factory reset, click the Factory Reset button.
DSL-502G ADSL Router User’s Guide Update Firmware Use the Update Firmware feature to load the latest firmware for the device. You can obtain the latest version of the DSL-502G firmware by logging onto the D-Link web site at www.dlink.com. Access the D-Link web site by clicking on the D-Link logo in the upper left corner of the browser window. Save the latest firmware version to a file on the Manager PC or accessible server. Figure 36.
DSL-502G ADSL Router User’s Guide Remote Administration Access (Router mode only) The Router can be administered using a PC located outside the LAN. Permission to allow remote management must first be allowed by enabled remote management. Figure 38. Remote Administration Access Enable remote access to the web manager by selecting Yes and clicking OK. The Save changes and reboot? Prompt will appear. Remote Administration is disabled by default.
DSL-502G ADSL Router User’s Guide The contents of the Summary folder differ depending on the mode of operation used by the device. In router mode, the folder offers two additional screens, a DHCP table and a runtime routing table. In addition, the Summary chart contains different information.
DSL-502G ADSL Router User’s Guide Bridge Summary Figure 40. Bridge Summary Screen In bridge mode, the device does not contain information associated with router functions in the Summary screen.
DSL-502G ADSL Router User’s Guide Line Condition In the Line Condition window you can monitor the characteristics of the ADSL connection and confirm that it has been established. Line Condition Protocol Data Path Operation Mode Current data path type Fast or Interleaved Modulation technique used for ADSL connection, G.DMT or G.
DSL-502G ADSL Router User’s Guide Carrier Chart The Carrier Chart illustrates the data rates distributed across the upstream and downstream frequency ranges. Carrier Chart This chart can be used to gauge signal quality for the entire upstream (lower portion) and downstream (upper portion) range of discrete modular tones. The example above displays normal signal function for the full range of frequencies.
DSL-502G ADSL Router User’s Guide DHCP Allocation Table (Router mode only) The DHCP Allocation Table provides a summary of current IP setting allocation for the network. Figure 42. DHCP Allocation Table Information listed in the DHCP Allocation Table includes the following: Index MAC Address IP Address Computer Name Leased Time Index reference number for entry. MAC address of computer or networked device. Assigned IP address of computer or networked device. Name of computer or networked device.
DSL-502G ADSL Router User’s Guide Runtime Routing Table (Router mode only) The Runtime Routing Table provides a summary of dynamic and static routing information for both the LAN and WAN interface. Figure 43.
DSL-502G ADSL Router User’s Guide A Technical Specifications GENERAL STANDARDS: ITU G.992.1 (G.dmt) RFC 1661 (PPP) ITU G.992.2 (G.lite) RFC 1994 (CHAP) ITU G.994.1 (G.Hs) RFC 1334 (PAP) ITU-T Rec. I.361 RFC 2364 (PPP over ATM) ITU-T Rec. I.610 RFC 1631 (NAT) IEEE 802.3 IEEE 802.3u RFC 1877 (Automatic IP assignment) IEEE 802.1d RFC 2516 (PPP over Ethernet) RFC 791 (IP Routing) Supports RFC 2131 and RFC 2132 (DHCP) RFC 792 (UDP) Compatible with all T1.
DSL-502G ADSL Router User’s Guide Physical and Environmental DC inputs: Input: 120V AC, 1.0A, 60Hz Power Adapter: Output: 9V AC, 1A Power Consumption: 10 Watts (Max) Operating Temperature: 0° to 50° C (32° - 122° F) Humidity: 5 to 95% (non-condensing) Dimensions: 137 mm x 183 mm x 31 mm Weight: 455gm (1 lb.
DSL-502G ADSL Router User’s Guide B LAN IP Setup The DSL-502G is designed to provide network administrators maximum flexibility for IP addressing on the Ethernet LAN. The easiest IP setup choice in most cases is to let the Router do it using DHCP, which is enabled by default. This appendix briefly describes various options including DHCP, used for IP setup on a LAN. If you are new to IP networking, the next appendix provides some background information on basic IP concepts.
DSL-502G ADSL Router User’s Guide Please note that when using the default IP address as in the above example, the first three numbers in the IP address must always be the same with only the fourth number changing. The first three numbers define the network IP address (all machines must belong to the same IP network), while the last number denotes the host IP address (each computer must have a unique address to distinguish it on the network).
DSL-502G ADSL Router User’s Guide C IP Concepts This appendix describes some basic IP concepts, the TCP/IP addressing scheme and show how to assign IP Addresses. When setting up the Router, you must make sure it has a valid IP address. Even if you will not use the WAN port (ADSL port), you should, at the very least, make sure the Ethernet LAN port is assigned a valid IP address. This is required for telnet, in-band SNMP management, and related functions such as “trap” handling and TFTP firmware download.
DSL-502G ADSL Router User’s Guide Networks attached to the Internet are assigned class types that determine the maximum number of possible hosts per network. The previous figure illustrates how the net and host portions of the IP address differ among the three classes. Class A is assigned to networks that have more than 65,535 hosts; Class B is for networks that have 256 to 65534 hosts; Class C is for networks with less than 256 hosts.
DSL-502G ADSL Router User’s Guide It is recommended that you choose private network IP Addresses from the above list. For more information on address assignment, refer to RFC 1597, Address Allocation for Private Internets and RFC 1466, Guidelines for Management of IP Address Space. Subnet Mask In the absence of subnetworks, standard TCP/IP addressing may be used by specifying subnet masks as shown below. IP Class Subnet Mask Class A 255.0.0.0 Class B 255.255.0.0 Class C 255.255.255.
DSL-502G ADSL Router User’s Guide D DSL-502G Firmware Upgrade Utility You can update system firmware using the DSL-502G Firmware Upgrade Utility. To upgrade the Router’s firmware, first install the Upgrade Utility software on a computer running a Windows operating system. Install the utility by clicking the file titled setup.exe located on the Installation CD-ROM. It will be installed automatically.
DSL-502G ADSL Router User’s Guide In the new window you will see the MAC address of the Router and the IP address of the PC you are using. The PC and the Router must be on the same subnet for the upgrade to be completed. The upgrade utility will suggest a new IP address to be temporarily assigned to the device during the firmware upgrade procedure. Check the suggested IP address listed for the Router to be sure that it does not conflict with any existing IP addresses on your network.
DSL-502G ADSL Router User’s Guide E Microfilters and Splitters Most ADSL clients will be required to install a simple device that prevents the ADSL line from interfering with regular telephone services. These devices are commonly referred to as microfilters or sometimes called (inaccurately) line splitters. They are easy to install and use standard telephone connectors and cable.
DSL-502G ADSL Router User’s Guide Line Splitter If you are instructed to use a “line splitter”, you must install the device between the Modem and the phone jack. Use standard telephone cable with standard RJ-11 connectors. The splitter has three RJ-11 ports used to connect to the wall jack, the Modem and if desired, a telephone or telephone device. The connection ports are typically labeled as follows: Line - This port connects to the wall jack. ADSL – This port connects to the Modem.
D-Link Systems, Inc. (“D-Link”) provides this limited warranty for its product only to the person or entity who originally purchased the product from D-Link or its authorized reseller or distributor.
Disclaimer of Other Warranties: EXCEPT FOR THE LIMITED WARRANTY SPECIFIED HEREIN, THE PRODUCT IS PROVIDED “AS-IS” WITHOUT ANY WARRANTY OF ANY KIND INCLUDING, WITHOUT LIMITATION, ANY WARRANTY OF MERCHANTABILITY, FITNESS FOR A PARTICULAR PURPOSE AND NON-INFRINGEMENT. IF ANY IMPLIED WARRANTY CANNOT BE DISCLAIMED IN ANY TERRITORY WHERE A PRODUCT IS SOLD, THE DURATION OF SUCH IMPLIED WARRANTY SHALL BE LIMITED TO NINETY (90) DAYS.