AirPremier N Access Point 無線網路基地台
Table of Contents Table of Contents Product Overview ........................................................ 4 Package Contents ................................................... 4 System Requirements ............................................. 4 Introduction .............................................................. 5 Features .................................................................. 7 Wireless Basics ...........................................................
Table of Contents Device Information ........................................... 52 Client Information ............................................. 53 WDS Information ............................................. 54 Stats ................................................................. 55 Ethernet........................................................ 55 ................................................ 56 Log ................................................................... 57 View Log ...
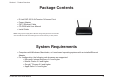
Section 1 - Product Overview Product Package Overview Contents ! "# $ " #%'() AirPremier® N Access Point ! ! * + , : ! "# ;< , = < ! > = ? Note: Using a power supply with a different voltage rating than the one included with the DAP-2310 will cause damage and void the warranty for this product.
Section 1 - Product Overview Introduction , " #%'() [)%Z(( = = \ :\ \ $ = \Z , , " # %'()G : ,# = = $ , = : = \ : = = able to move across the network quickly. , " #%'() = : == Distribution System) with AP, WDS, or Wireless Client mode. $ =J == G " ] == = _ $ \
Section 1 - Product Overview = , X = = , == , == Z , == == , #+ = G , : _ = = , == Z > , = , X :\ , = G = , = == G , == = Z > , = where an employee leaves the company, the network administrator is able to remove the previous employee from the , X = = , $Z
Section 1 - Product Overview Features ! Four different operation modes - Capable of operating in one of four different operation modes to meet your == $ =J == G " , G " G == Z ! Faster wireless networking with the 802.11n standard to provide a maximum wireless signal rate of up to 300 Mbps*. ! Compatible with the 802.11b standard to provide a wireless data rate of up to 11Mbps, allowing you to migrate \ =\= , [)%Z(( [)%Z(( = = \
Section 2 - Installation Wireless Basics D-Link wireless products are based on industry standards to provide high-speed wireless connectivity that is easy to use within your home, business or public access wireless networks. D-Link wireless products provides you with access to the data you want, whenever and wherever you want it. Enjoy the freedom that wireless networking can bring to you. = = \ = : , , =G : : = = G = , = =G
Section 2 - Installation Standards-Based Technology , " #%'() == == X = , [)%Z((:G [)%Z(( G [)%Z(( = =Z The IEEE 802.11n standard is an extension of the 802.11b and 802.11g standards that came before it. It increases , Y == = '))<: = , , %Z?X : =G X ; "< , \Z , = = , = = # , , = , = # \ : : = = _ $ \G , < +?
Section 2 - Installation Wireless Installation Considerations The D-Link AirPremier® N wireless access point lets you access your network using a wireless connection from virtually anywhere within the operating range of your wireless network. Keep in mind, however, that the number, thickness and location of walls, ceilings, or other objects that the wireless signals must pass through, may limit the range. Typical = \ , \ = = : $ ] _ \` = \ ,
Section 2 - Installation Hardware Overview Power Receptacle The supplied power adapter connects here. Power LED This light will be solid green when the unit is powered on. Reset Button A pinhole button located beside the Ethernet socket is used to reset the system or restore the factory default settings. WLAN LED , = , : $ use. Note: After resetting the unit, you will still be able to access the data on your hard drives.
Section 2 - Installation Four Operational Modes == ] ` Create a wireless LAN WDS with AP Wirelessly connect multiple networks while still functioning as a wireless AP WDS Wirelessly connect multiple networks Wireless Client AP acts as a wireless network adapter for your Ethernetenabled device D-Link DAP-2310 User Manual 12
Section 2 - Installation Getting Started (Z ~ : : > ==Z 2. Consult with your cable or DSL provider for proper installation of the modem. 'Z , : " Z , > = ? , \ Z 4. If you are connecting a desktop computer to your network, install a wireless PCI adapter into an available PCI slot on your desktop computer. 5. Install the drivers for your wireless CardBus adapter into a laptop computer.
' # , " #%'()G = , = Layout diagram). , " #%'() , + , : ]= , Network Launch your web browser. \ , > == , " #%'() , == ]http://192.168.0.50) and press Enter. Make sure that the IP addresses of the DAP-2310 and your computer are in the same subnet. Note: If you have changed the default IP address assigned to the DAP-2310, make sure to enter the correct IP address.
' # = == \ , " #%'()G , = J Save and Activate Settings , $ , = = , , = = ] ` \ = = , = = G = , , =Z ~ \ , = = = : Z ; \ located at the top of the page and then click Save and Activate.
' # Basic Settings Wireless Access Point mode Wireless Band: Select 2.4GHz from the drop-down menu. Mode: Select Access Point from the drop-down menu. The other three choices are WDS with AP, WDS, and Wireless Client. Network Name > ] >"` = , (SSID): = = == $ ] `Z , >"= \ setting is dlink.
' # Channel Width: Allows you to select the channel width you would like to operate in. Select 20 MHz if you are not using any 802.11n wireless clients. Auto 20/40 MHz allows you to connect to both 802.11n and 802.11b/g wireless devices on your network. Authentication: Use the drop-down menu to choose Open System, Shared Key, WPA-Personal, WPA-Enterprise, or 802.11x. Select Open System to communicate the key across the network.
' # WDS with AP mode In WDS with AP mode, the DAP-2310 wirelessly connects multiple networks while still functioning as a wireless AP. Wireless Band: Select 2.4GHz from the drop-down menu. Mode: WDS with AP mode is selected from the drop-down menu. Network Name > ] >"` = , = (SSID): = == $ ] `Z , SSID’s factory default setting is dlink.
' # Remote AP Enter the MAC addresses of the APs on your network that will serve as bridges to wirelessly connect multiple networks. MAC Address: Site Survey: Click on the Scan button to search for available wireless networks, then click on the available network that you want to connect with. Authentication: Use the drop-down menu to choose Open System, Shared Key, or WPA-Personal. Select Open System to communicate the key across the network.
' # WDS mode In WDS mode, the DAP-2310 wirelessly connects multiple networks, without functioning as a wireless AP. Wireless Band: Select 2.4GHz from the drop-down menu. Mode: WDS is selected from the drop-down menu. Network > ] >"` = , Name (SSID): = = == $ ] `Z , >"= \ setting is dlink.
' # Site Survey: Click on the Scan button to search for available wireless networks, then click on the available network that you want to connect with. Authentication: Use the drop-down menu to choose Open System, Shared Key, or WPA-Personal. Select Open System to communicate the key across the network. Select Shared Key to limit communication to only those devices that share the same WEP settings. Select WPA-Personal to secure your network using a password and dynamic key changes.
' # Wireless Client mode Wireless Band: Select 2.4GHz from the drop-down menu. Mode: Wireless Client is selected from the drop-down menu. Network Name (SSID): > ] >"` = , = = == $ ] `Z , >"= \ setting is dlink. The SSID can be easily changed to connect to an existing wireless network. SSID Visibility: This option is unavailable in Wireless Client mode.
' # Open System/Shared Key Authentication Encryption: Use the radio button to disable or enable encryption. Key Type*: Select HEX or ASCII. Key Size: Select 64 Bits or 128 Bits. Key Index (1- Select the 1st through the 4th key to be the 4): active key. > $ \= \ Z ~ Key: select one of these keys in the Key Index drop-down menu. **Hexadecimal (HEX) digits consist of the numbers 0-9 and the letters A-F.
' # WPA/WPA2-Personal Authentication WPA Mode: When WPA-Personal is selected for Authentication type, you must also select a WPA mode from the # J AUTO (WPA or WPA2), WPA2 Only, or WPA Only. WPA and WPA2 use different algorithms. AUTO (WPA or WPA2) allows you to use both WPA and WPA2. Cipher Type: When you select WPA-Personal, you must also select AUTO, AES, or TKIP from the drop-down menu. Group Key Select the interval during which the group key will be Update: valid.
' # WPA/WPA2-Enterprise Authentication WPA Mode: When WPA-Enterprise is selected, you must also select a WPA mode from the drop-down J AUTO (WPA or WPA2), WPA2 Only, or WPA Only. WPA and WPA2 use different algorithms. AUTO (WPA or WPA2) allows you to use both WPA and WPA2. Cipher Type: When WPA-Enterprise is selected, you must also select a cipher type from the drop-down J Auto, AES, or TKIP. Group Key Select the interval during which the group key Update will be valid.
' # 802.1x Authentication Key Update Select the interval during which the group Interval: $ \ : ]300 is the recommended value). A lower interval may reduce data transfer rates. RADIUS Server: Enter the IP address of the RADIUS server. RADIUS Port: Enter the RADIUS port. RADIUS Secret: Enter the RADIUS secret.
' # LAN LAN is short for Local Area Network. This is considered your internal network. These are the IP settings of the LAN , " #%'()Z , = = = \ : = = =Z ~ \ , , > == if needed. The LAN IP address is private to your internal network and cannot be seen on the Internet. Get IP Static IP (Manual) is chosen here.
' # Advanced Settings Performance Wireless: Use the drop-down menu to turn the wireless function On or Off. Wireless Mode: The different combination of clients that can be supported include Mixed 802.11n, 802.11g and 802.11b, Mixed 802.11g and 802.11b and 802.11n Only. Please note that when backwards compatibility is enabled for legacy ][)%Z(( j:` =G [)%Z(( wireless performance is expected.
' # Beacon Interval = $ = = :\ == =\ , X == $Z \ = =Z , (25-500): ]100) is recommended. Setting a higher beacon interval can help to save the power of wireless clients, while setting a lower one can help a wireless client connect to an access point faster. DTM Interval " \ > < == = : 1 and 15. The default value is 1.
' # Multi-SSID , = = > =Z > , Basic > Wireless section, you can set the Primary SSID. The SSID’s factory default setting is dlink. The SSID can be easily changed to connect to an existing wireless network or to establish a new wireless network. Enable Multi-SSID: Check to enable support for multiple SSIDs. Band: This read-only value is the current band setting.
' # Priority: WMM (Wi-Fi Multimedia): Encryption: Check the Enable Priority box at the top of this window to enable. Select the priority from the drop-down menu. Select Enable or Disable. When you select Open System, toggle between Enable and Disable. If Enable = = G , { \ \ G { \ X G { \ > Y ](`G { \G { \= = = : Z Key Type: Select HEX or ASCII. Key Size: Select 64 Bits or 128 Bits.
' # VLAN VLAN List , " #%'() = = =Z = : , >"Z < ] = $`G G \j Multiple SSID, and WDS connection can be assigned to VLANs as they are physical ports. Any packet which enters the DAP-2310 without a VLAN tag will have a VLAN tag inserted with a PVID. The VLAN List tab displays the current VLANs. VLAN Status: Use the radio button to toggle between Enable or Disable.
' # Port List , = : = \= , =Z > \ , = $= ] `G , = , " = \ = = = = =Z = _ = = G on the switch for handling VLAN tagged packets as described in the IEEE 802.1Q standard. VLAN Status: Use the radio button to toggle to Enable. Next, go to the Add/Edit VLAN tab to add or modify an item on the VLAN List tab.
' # Add/Edit VLAN The Add/Edit VLAN : = = to let your changes take effect. VLAN Status: VLAN ID: VLAN Name: =Z ; \ , , = , =G $ , Save button Use the radio button to toggle to Enable. Provide a number between 1 and 4094 for the Internal VLAN. Enter the VLAN to add or modify.
' # PVID Setting The PVID Setting : = = : j = : , > == = = = various types of PVID settings. Click the Save button to let your changes take effect. VLAN Status: Use the radio button to toggle between Enable and Disable. PVID Auto Assign Status: Use the radio button to toggle PVID auto assign status to Enable.
' # Intrusion The Wireless Intrusion Protection window is used to set APs as All, Valid, Neighborhood, Rogue, and New. Click the Save button to let your changes take effect. AP List: The choices include All, Valid, Neighbor, Rogue, and New. Detect: Click this button to initiate a scan of the network.
' # Schedule The Wireless Schedule Settings window is used to add and modify scheduling rules on the device. Click the Save button to let your changes take effect. Wireless Schedule: Use the drop-down menu to enable the device’s scheduling feature. Name: Enter a name for the new scheduling rule in , Z Index: Select the index from the drop-down menu.
' # QoS \ ] ` , = , Y = $ :\ X , =Z = = == == = \ , Z = =G , \ == = = , , = = = _ Z = = = : =Z > , , = = == G , , , , , = \ : = Z QoS (Quality of Service): Enable this option if you
' # Name: + , , Priority: = , # = , = \J Background (BK), Best Effort (BE), Video (VI), or Voice (VO). Protocol: = , # Z , = , = :\ , == =J Any, TCP, UDP, Both, IMCP, or Other. Host 1 IP Range: , = == = , , Host 1 Port Range: , = == to TCP, UDP, or Both.
' # AP Array \ = = = Enable Array: AP Array Name: $ , X = = = Z This check box allows the user to enable the AP array function. The three modes that are available are Master, Backup Master, and Slave. APs in the same array will = , = Z , =\ the Master AP to the Slave AP and the Backup Master AP when a Slave AP and a Backup Master AP join the AP array.
' # Wireless Basic Settings Network Name (SSID): , = = $ ] >"`Z SSID Visibility: Select this option to enable SSID Visibility. Auto Channel Selection: Channel Width: Security: Select this option to use Auto Channel Selection. Select this option to specify the Channel Width. Select this option to use Wireless Security.
' # Multiple SSID & VLAN SSID: SSID Visibility: Security: Select this option to use an SSID. Select this option to make the SSID Visible. Select this option to use Wireless Security. WMM: Select this option to use WMM. VLAN: Select this option to use VLAN. Advanced Functions Schedule Settings: QoS Settings: DHCP Server Settings: Log Settings: Time and Date Settings: Select this option to use Scheduled Settings. Select this option to use Quality of Service.
' # , ARP Spoofing Prevention: Gateway IP Address: Gateway MAC Address: = = = > j< == = $Z This check box allows you to enable the ARP spoofing prevention function. Enter a gateway IP address. Enter a gateway MAC address.
' # DHCP Server Dynamic Pool Settings , " == = , , > == , : == = = , $Z "\ Pool allows wireless stations to receive an available IP with lease time control. If needed or required in the network, the DAP-2310 is capable of acting as a DHCP server. Function Enable/ Disable: IP Assigned From: "\ = ]" ` assigns dynamic IP addresses to devices on , $Z , = = =
' # DNS: Domain Name: Lease Time (60-31536000 sec): + , > == , " \= ]" ` = Z , " = = = = = , = www.dlink.com into IP addresses. + , , $G : Z ] Y =J Z $Z Z` The lease time is the period of time before the DHCP server will assign new IP addresses.
' # Static Pool Setting , " == = , > == = , : == = = , = = == = = Y > , Z Function Enable/ Disable: Dynamic Host Configuration Protocol ]" ` == = > == = == devices on the network. This protocol = = $ = new wireless devices to receive IP addresses automatically without the need to manually assign IP addresses.
' # Gateway: WINS: DNS: Domain Name: \ , ? \ == , == $Z Specify the Windows Internet Naming Service ] > ` = == , == $Z INS is a system that determines the IP address of a network computer with a dynamically assigned IP address, if applicable. + , " \= ]" ` = == , == such as www.dlink.com into IP addresses.
' # Current IP Mapping List This window displays information about the current assigned DHCP dynamic and static IP address pools. This information is available when you enable DHCP server on the AP and assign dynamic and static IP address pools. Current DHCP These are IP address pools the DHCP server Dynamic Profile: has assigned using the dynamic pool setting. Host Name: The host name of a device on the network that is assigned an IP address from the DHCP dynamic pool.
' # Filters Wireless MAC ACL Wireless Band: Displays the current wireless band rate. Access Control List: Select Disable = : , = Z Select Accept to accept only those devices with MAC addresses in the Access Control List. All other devices not on the list will be rejected. Select Reject to reject the devices with MAC addresses on the Access Control List. All other devices not on the list will be accepted.
' # WLAN Partition Wireless Band: Displays the current wireless band rate. Link Integrity: Select Enable or Disable. Ethernet to WLAN Access: The default is Enable. When disabled, all data from the Ethernet to associated wireless devices will be blocked. Wireless devices can still send data to the Ethernet. Internal Station Connection: The default value is Enable, which allows stations to inter-communicate by connecting to a target AP.
' # Status Device Information Device , = # \ = \= , Information: = = , " #%'()G , version and the device's MAC address.
' # Client Information Client Information: This window displays the wireless client information for clients currently connected to the DAP-2310. The following information is available for each client communicating with the DAP-2310. SSID: Displays the SSID of the client. MAC: Displays the MAC address of the client. Band: Displays the wireless band that the client is connected to. Authentication: Displays the type of authentication being used.
' # WDS Information WDS Information: This window displays the Wireless Distribution System information for clients currently connected to the DAP-2310. The following information is available for each client communicating with the DAP-2310. Name: MAC: Authentication: Displays the SSID of the client. Displays the MAC address of the client. Displays the type of authentication being used. Signal: Displays the client's signal strength.
' # Stats Ethernet Ethernet Traffic Statistics: This page displays transmitted and received count statistics for packets and bytes.
' # WLAN Traffic Statistics: This page displays wireless network statistics for data throughput, transmitted and received frames, and frame errors.
' # Log View Log View Log: The AP’s embedded memory displays system and network messages including a time stamp and message type. The log information includes but is not limited to the =J = G G == = == with AP, and web login. The web page holds up to 500 logs.
' # Log Settings Log Server/IP Address: Enter the IP address of the server you would like to send the DAP-2310 log to. Log Type: Check the box for the type of activity you Z , , \ =J \= Activity, Wireless Activity, and Notice. Email Notification: , $ : + Z Outgoing Mail Server (SMTP): Select the SMTP server from the drop-down menu. Authentication: Check to enable authentication.
' # Maintenance Administration Settings , $ , = \ , Y =Z D-Link DAP-2310 User Manual = = \ , = , = = = = 58
' # Limit Administrator + , , = = \ = , Limit Administrator VLAN ID: Check the box provided and the enter the = >" , , = be allowed to log in from. Limit Administrator IP: Check to enable the Limit Administrator IP address. IP Range: Enter the IP address range that the administrator will be allowed to log in from and then click the Add button.
' # System Name Settings + , , = = \ = , System Name: The name of the device. The default name is D-Link DAP-2310. Location: The physical location of the device, e.g. 72nd Floor, D-Link HQ.
' # Login Settings + , , Login Name: = = \ = , = = = =Z Enter a user name. The default is admin. Old Password: When changing your password, enter the old password here. New Password: When changing your password, enter the new password here. The password is case-sensitive. z | = , , z Z| , , should be between 0 and 12 characters.
' # Console Settings + , , = = \ = , Status: Status is enabled by default. Uncheck the box to disable the console. Console Protocol: Select the type of protocol you would like to use, Telnet or SSH. Timeout: Set to 1 Min, 3 Mins, 5 Mins, 10 Mins, 15 Mins or Never.
' # SNMP Settings + , , = = \ = , Status: Check the box to enable the SNMP functions. This option is disabled by default. Public Community String: Enter the public SNMP community string. Private Community String: Enter the private SNMP community string. Trap Status: Check the box to enable Trap Status. Trap Server IP: Enter the Trap Server IP address.
' # ! " ! , = = , = Z = , , software used by the access point. This is a useful feature that prevents future bugs and allows for new features to : , = Z = \ "# $ := = , = = : Z Upload Firmware The current firmware version is displayed From Local Hard : , Z D
' # Upload File: Click the Browse button to locate a previously = \ Z = , G $ Upload to apply , = = , " #%'()Z Download Configuration File: Click Download to save the current " #%'() \ Z , \ = , the administrator’s password now, after resetting your DAP-2310, and then updating , = = G , == will be gon
' # Time and Date Current Time: Displays the current time and date settings. Time Zone: Use the drop-down menu to select your correct Time Zone. Enable Daylight Saving: Check the box to Enable Daylight Saving Time. Daylight Saving Dates: Use the drop-down menu to select the correct Daylight Saving offset. Enable NTP Server: Check to enable the AP to get system time from an NTP server. NTP Server: Enter the NTP server IP address.
' # System System Settings Restart the Device: Click Restart to restart the DAP-2310. Restore to Factory Default Settings: Click Restore to restore the DAP-2310 back to factory default settings. Clear Language Pack: Click Clear to remove any loaded language packs.
' # Help Help: Scroll down the Help page for topics and explanations.
Section 6 - Troubleshooting Troubleshooting This chapter provides solutions to problems that can occur during the installation and operation of the DAP-2310. , = = \ , : =Z ] , Y = : = =® } Z > you have a different operating system, the screenshots on your computer will look similar to the following examples.
Section 6 - Troubleshooting ! \ > = =J ! ? Start > Settings > Control Panel. Double-click the Internet Options Icon. From the Security tab, click the button to restore the settings to their defaults. ! $ , Connection tab and set the dial-up option to Never Dial a Connection. Click the LAN Settings button. Make sure nothing is checked. Click OK. ! ? , Advanced tab and click the button to restore these settings to their defaults. Click OK three times. ! = \ : :
Appendix B - Networking Basics Networking Basics Check your IP address After you install your network adapter, by default, the TCP/IP settings should be set to obtain an IP address from a " = ] Z Z == ` \Z \ \ > ==G = , = = : Z Click on Start > Run. In the run box type cmd and click OK. At the prompt, type and press Enter. This will display the IP address, subnet mask, and the default gateway of your adapter. If the address is 0.0.0.
Appendix B - Networking Basics Statically Assign an IP address If you are not using a DHCP capable gateway/router, or you need to assign a static IP address, please follow the steps : J Step 1 Windows® %)))J $ Start > Settings > Control Panel > Network Connections Windows® } J $ Start > Control Panel > Network Connections Windows Vista®J $ Start > Control Panel > Network and Internet > Network and Sharing Center > Manage network connections Step 2 Right-click on the Local Area Conne
Appendix B - Networking Basics Set Primary DNS the same as the LAN IP address of your router ](%Z([Z)Z(`Z , \ " = \ \ enter a DNS server from your ISP. Step 5 Click OK twice to save your settings.
Federal Communication Commission Interference Statement This equipment has been tested and found to comply with the limits for a Class B digital device, pursuant to Part 15 of the FCC Rules. These limits are designed to provide reasonable protection against harmful interference in a residential installation. This equipment generates, uses and can radiate radio frequency energy and, if not installed and used in accordance with the instructions, may communications.
help. FCC Caution: Any changes or modifications not expressly approved by the party responsible for compliance could void the user's authority to operate this equipment. This device complies with Part 15 of the FCC Rules. Operation is subject to the following two conditions: (1) This device may not cause harmful interference, and (2) this device must accept any interference received, including interference that may cause undesired operation.
㻵㼚㼐㼡㼟㼠㼞㼥㻌㻯㼍㼚㼍㼐㼍㻌㼟㼠㼍㼠㼑㼙㼑㼚㼠㻦㻌 㼀㼔㼕㼟㻌㼐㼑㼢㼕㼏㼑㻌㼏㼛㼙㼜㼘㼕㼑㼟㻌㼣㼕㼠㼔㻌㻾㻿㻿㻙㻞㻝㻜㻌㼛㼒㻌㼠㼔㼑㻌㻵㼚㼐㼡㼟㼠㼞㼥㻌㻯㼍㼚㼍㼐㼍㻌㻾㼡㼘㼑㼟㻚㻌㻻㼜㼑㼞㼍㼠㼕㼛㼚㻌㼕㼟㻌㼟㼡㼎㼖㼑㼏㼠㻌㼠㼛㻌㼠㼔㼑㻌 㼒㼛㼘㼘㼛㼣㼕㼚㼓㻌㼠㼣㼛㻌㼏㼛㼚㼐㼕㼠㼕㼛㼚㼟㻦㻌㻔㻝㻕㻌㼀㼔㼕㼟㻌㼐㼑㼢㼕㼏㼑㻌㼙㼍㼥㻌㼚㼛㼠㻌㼏㼍㼡㼟㼑㻌㼔㼍㼞㼙㼒㼡㼘㻌㼕㼚㼠㼑㼞㼒㼑㼞㼑㼚㼏㼑㻘㻌㼍㼚㼐㻌㻔㻞㻕㻌㼠㼔㼕㼟㻌㼐㼑㼢㼕㼏㼑㻌 㼙㼡㼟㼠㻌㼍㼏㼏㼑㼜㼠㻌㼍㼚㼥㻌㼕㼚㼠㼑㼞㼒㼑㼞㼑㼚㼏㼑㻌㼞㼑㼏㼑㼕㼢㼑㼐㻘㻌㼕㼚㼏㼘㼡㼐㼕㼚㼓㻌㼕㼚㼠㼑㼞㼒㼑㼞㼑㼚㼏㼑㻌㼠㼔㼍㼠㻌㼙㼍㼥㻌㼏㼍㼡㼟㼑㻌㼡㼚㼐㼑㼟㼕㼞㼑㼐㻌㼛㼜㼑㼞㼍㼠㼕㼛㼚㻚㻌 㻯㼑㻌㼐㼕㼟㼜㼛㼟㼕㼠㼕㼒㻌㼑㼟㼠㻌㼏㼛㼚㼒㼛㼞㼙㼑㻌㽫㻌㼘㼍㻌㼚㼛㼞㼙㼑㻌㻯㻺㻾㻙㻞㻝㻜㻌㼐㻓㻵㼚㼐㼡㼟㼠㼞㼕㼑㻌㻯㼍㼚㼍㼐㼍㻌㼍㼜㼜㼘㼕㼏㼍㼎㼘㼑㻌㼍㼡㼤㻌㼍㼜㼜㼍㼞㼑㼕㼘㼟㻌㼞㼍㼐㼕㼛㻌 㼑㼤㼑㼙㼜㼠㼟㻌㼐㼑㻌㼘㼕㼏㼑㼚㼏㼑㻚㻌㻿㼛㼚㻌㼒㼛㼚㼏㼠㼕㼛㼚㼚㼑㼙㼑㼚㼠㻌㼑㼟㼠㻌㼟㼡㼖㼑㼠㻌㼍㼡㼤㻌㼐㼑㼡㼤㻌㼏㼛㼚㼐㼕㼠㼕㼛㼚㼟㻌㼟㼡㼕㼢㼍㼚㼠㼑㼟㻦㻌㻔㻝㻕㻌㼘㼑㻌㼐㼕㼟㼜㼛㼟㼕
㼑㼚㼢㼕㼞㼛㼚㼚㼑㼙㼑㼚㼠㻌㼚㼛㼚㻌㼏㼛㼚㼠㼞㽿㼘㽴㻚㻌㻯㼑㼠㻌㽴㼝㼡㼕㼜㼑㼙㼑㼚㼠㻌㼐㼛㼕㼠㻌㽵㼠㼞㼑㻌㼕㼚㼟㼠㼍㼘㼘㽴㻌㼑㼠㻌㼡㼠㼕㼘㼕㼟㽴㻌㼍㼢㼑㼏㻌㼡㼚㻌㼙㼕㼚㼕㼙㼡㼙㻌㼐㼑㻌㻞㻜㻌㼏㼙㻌 㼐㼑㻌㼐㼕㼟㼠㼍㼚㼏㼑㻌㼑㼚㼠㼞㼑㻌㼘㼍㻌㼟㼛㼡㼞㼏㼑㻌㼐㼑㻌㼞㼍㼥㼛㼚㼚㼑㼙㼑㼚㼠㻌㼑㼠㻌㼢㼛㼠㼞㼑㻌㼏㼛㼞㼜㼟㻚㻌 㻌 㼀㼔㼕㼟㻌 㼐㼑㼢㼕㼏㼑㻌 㼔㼍㼟㻌 㼎㼑㼑㼚㻌 㼐㼑㼟㼕㼓㼚㼑㼐㻌 㼠㼛㻌 㼛㼜㼑㼞㼍㼠㼑㻌 㼣㼕㼠㼔㻌 㼍㼚㻌 㼍㼚㼠㼑㼚㼚㼍㻌 㼔㼍㼢㼕㼚㼓㻌 㼍㻌 㼙㼍㼤㼕㼙㼡㼙㻌 㼓㼍㼕㼚㻌 㼛㼒㻌 㼇㻞㼉㻌 㼐㻮㻚㻌 㻭㼚㼠㼑㼚㼚㼍㻌㼔㼍㼢㼕㼚㼓㻌㼍㻌㼔㼕㼓㼔㼑㼞㻌㼓㼍㼕㼚㻌㼕㼟㻌㼟㼠㼞㼕㼏㼠㼘㼥㻌㼜㼞㼛㼔㼕㼎㼕㼠㼑㼐㻌㼜㼑㼞㻌㼞㼑㼓㼡㼘㼍㼠㼕㼛㼚㼟㻌㼛㼒㻌㻵㼚㼐㼡㼟㼠㼞㼥㻌㻯㼍㼚㼍㼐㼍㻚㻌㼀㼔㼑㻌㼞㼑㼝㼡㼕㼞㼑㼐㻌 㼍㼚㼠㼑㼚㼚㼍㻌㼕㼙㼜㼑㼐㼍㼚㼏㼑㻌㼕㼟㻌㻡㻜㻌㼛㼔㼙㼟㻚㻌 㼁㼚㼐㼑㼞㻌㻵㼚㼐㼡㼟㼠㼞㼥㻌㻯㼍㼚㼍㼐㼍㻌㼞㼑㼓㼡㼘㼍㼠㼕㼛㼚㼟㻘㻌㼠㼔㼕㼟㻌㼞㼍㼐㼕㼛㻌㼠㼞㼍㼚㼟㼙㼕㼠㼠㼑㼞㻌㼙㼍㼥㻌㼛㼚㼘㼥㻌㼛㼜㼑㼞㼍㼠㼑㻌㼡㼟㼕㼚㼓㻌㼍㼚㻌㼍㼚㼠㼑㼚㼚㼍㻌㼛㼒㻌㼍㻌 㼠㼥㼜㼑㻌㼍㼚㼐㻌㼙㼍㼤
㻯㼍㼚㼍㼐㼍㻚㻌 㻰㼍㼚㼟㻌 㼘㼑㻌 㼎㼡㼠㻌 㼐㼑㻌 㼞㽴㼐㼡㼕㼞㼑㻌 㼘㼑㼟㻌 㼞㼕㼟㼝㼡㼑㼟㻌 㼐㼑㻌 㼎㼞㼛㼡㼕㼘㼘㼍㼓㼑㻌 㼞㼍㼐㼕㼛㽴㼘㼑㼏㼠㼞㼕㼝㼡㼑㽫㻌 㼘㻓㼕㼚㼠㼑㼚㼠㼕㼛㼚㻌 㼐㼑㼟㻌 㼍㼡㼠㼞㼑㼟㻌 㼡㼠㼕㼘㼕㼟㼍㼠㼑㼡㼞㼟㻘㻌㼕㼘㻌㼒㼍㼡㼠㻌㼏㼔㼛㼕㼟㼕㼞㻌㼘㼑㻌㼠㼥㼜㼑㻌㼐㻓㼍㼚㼠㼑㼚㼚㼑㻌㼑㼠㻌㼟㼛㼚㻌㼓㼍㼕㼚㻌㼐㼑㻌㼟㼛㼞㼠㼑㻌㼝㼡㼑㻌㼘㼍㼜㼡㼕㼟㼟㼍㼚㼏㼑㻌㼕㼟㼛㼠㼞㼛㼜㼑㻌㼞㼍㼥㼛㼚㼚㽴㼑㻌 㽴㼝㼡㼕㼢㼍㼘㼑㼚㼠㼑㻌 㻔㼜㻚㼕㻚㼞㻚㼑㻚㻕㻌 㼚㼑㻌 㼐㽴㼜㼍㼟㼟㼑㻌 㼜㼍㼟㻌 㼘㻓㼕㼚㼠㼑㼚㼟㼕㼠㽴㻌 㼚㽴㼏㼑㼟㼟㼍㼕㼞㼑㻌 㽫㼘㻓㽴㼠㼍㼎㼘㼕㼟㼟㼑㼙㼑㼚㼠㻌 㼐㻓㼡㼚㼑㻌 㼏㼛㼙㼙㼡㼚㼕㼏㼍㼠㼕㼛㼚㻌 㼟㼍㼠㼕㼟㼒㼍㼕㼟㼍㼚㼠㼑㻚㻌 (IC:㻠㻞㻝㻢㻭㻙㼃㻭㻡㻞㻡㻭㻞㻛㻌 4216A-AP2310A1 / Model: DAP-2310A1) 㻸㼑㻌 㼜㼞㽴㼟㼑㼚㼠㻌 㽴㼙㼑㼠㼠㼑㼡㼞㻌 㼞㼍㼐㼕㼛㻌 㻔㻵㻯㻦㻌 㻹㼛㼐㽳㼘㼑㻦㻌 㻰㼃㻭㻙㻡㻞㻡㻭㻞㻕㻌 㼍㻌 㽴㼠㽴㻌 㼍㼜㼜㼞㼛㼡㼢㽴㻌 㼜㼍㼞㻌 㻵㼚㼐㼡㼟㼠㼞㼕㼑㻌㻯㼍㼚㼍㼐㼍㻌㼜㼛㼡㼞㻌㼒㼛㼚㼏㼠㼕㼛㼚㼚㼑㼞㻌㼍
㼑㼠㻌㼘㼑㻌㻯㼍㼚㼍㼐㼍㻌㽴㼠㼍㼎㼘㼕㼑㼟㻌㼜㼛㼡㼞㻌㼡㼚㻌㼑㼚㼢㼕㼞㼛㼚㼚㼑㼙㼑㼚㼠㻌㼚㼛㼚㻌㼏㼛㼚㼠㼞㽿㼘㽴㻚㻌 㻸㼑㻌 㼜㼞㼛㼐㼡㼕㼠㻌 㼑㼟㼠㻌 㼟㾆㼞㻌 㼜㼛㼡㼞㻌 㼡㼚㻌 㼒㼛㼚㼏㼠㼕㼛㼚㼚㼑㼙㼑㼚㼠㻌 㼠㼑㼘㻌 㼝㼡㼑㻌 㼐㽴㼏㼞㼕㼠㻌 㼐㼍㼚㼟㻌 㼏㼑㻌 㼙㼍㼚㼡㼑㼘㻚㻌 㻸㼍㻌 㼞㽴㼐㼡㼏㼠㼕㼛㼚㻌 㼍㼡㼤㻌 㼑㼤㼜㼛㼟㼕㼠㼕㼛㼚㼟㻌㻾㻲㻌㼜㼑㼡㼠㻌㽵㼠㼞㼑㻌㼍㼡㼓㼙㼑㼚㼠㽴㼑㻌㼟㼕㻌㼘㻓㼍㼜㼜㼍㼞㼑㼕㼘㻌㼜㼑㼡㼠㻌㽵㼠㼞㼑㻌㼏㼛㼚㼟㼑㼞㼢㽴㻌㼍㼡㼟㼟㼕㻌㼘㼛㼕㼚㻌㼝㼡㼑㻌㼜㼛㼟㼟㼕㼎㼘㼑㻌㼐㼡㻌㼏㼛㼞㼜㼟㻌 㼐㼑㻌 㼘㻓㼡㼠㼕㼘㼕㼟㼍㼠㼑㼡㼞㻌 㼛㼡㻌 㼝㼡㼑㻌 㼘㼑㻌 㼐㼕㼟㼜㼛㼟㼕㼠㼕㼒㻌 㼑㼟㼠㻌 㼞㽴㼓㼘㽴㻌 㼟㼡㼞㻌 㼘㼍㻌 㼜㼡㼕㼟㼟㼍㼚㼏㼑㻌 㼐㼑㻌 㼟㼛㼞㼠㼕㼑㻌 㼘㼍㻌 㼜㼘㼡㼟㻌 㼒㼍㼕㼎㼘㼑㻌 㼟㼕㻌 㼡㼚㼑㻌 㼠㼑㼘㼘㼑㻌 㼒㼛㼚㼏㼠㼕㼛㼚㻌㼑㼟㼠㻌㼐㼕㼟㼜㼛㼚㼕㼎㼘㼑㻌 ẍᶳ嬎婆怑䓐⎘䀋⛘⋨ 䴻✳⺷娵嫱⎰㟤ᷳỶ≇䌯⮬柣暣㨇炻朆䴻姙⎗炻℔⎠ˣ⓮嘇ㆾἧ䓐侭⛯ᶵ⼿ 㑭冒嬲㚜柣䌯ˣ≈⣏≇䌯ㆾ嬲㚜⍇姕妰ᷳ䈡⿏⍲≇傥ˤ Ỷ≇䌯⮬柣暣㨇ᷳἧ䓐ᶵ⼿⼙枧梃凒⬱ℐ⍲⸚㒦⎰㱽忂ᾉ烊