D-Link D-ViewCam Central Management Software for SecuriCam Manual Version 1.
Contents A. D-ViewCam Installation………………………………..…………………………………………….. 3 1. D-ViewCam Main Functions……………………………………………………………………... 3 2. Installation…………………………………………………………………………………………...3 2.1. Basic Requirement for Installing D-ViewCam………………………………………………………………. 3 2.2. Minimum Requirement for Multiple Camera Configurations……………………………………………….3 3. B. D-ViewCam System Structures…………………………………………………………………. 3 Running the Installation Wizard…………………………………………………………………….. 4 1.
8.4. Image Quality…………………………………………………………………………………………………... 34 8.5. Configuring Preset Point (Support Pan/Tilt models only) ………………………………………………….34 8.6. Motion Detection……………………………………………………………………………………………….. 35 8.7. Sensor Setting…………………………………………………………………………………………………. 36 8.8. Relay Setting…………………………………………………………………………………………………… 36 8.9. Alarm Action……………………………………………………………………………………………………. 37 8.10. Placing Device to eMap……………………………………………………………………………………….. 40 8.11.
A. 1. D-ViewCam Installation D-ViewCam Main Functions This software includes the following main programs: (A) Admin – This program allows you to configure the system and the device, and set up alarms and user privileges.
B. 1. Running the Installation Wizard Installation Procedure 1.1. Basic Operation 【 Step1.】 Run Installation Wizard Please insert the D-ViewCam Installation CD into your CD-ROM drive. The D-ViewCam installation menu will start up automatically from the CD, simply access the CD from Windows and click on the autorun.exe program to access the installation menu shown left. Click Install D-ViewCam Software to begin the installation process. 4 V1.
【 Step2.】 The Installation Wizard is preparing the setup and check the version. 【 Step3.】 Begin the Installation Wizard Click Next to begin the installation process. 【 Step4.】 Confirm the Content of the License Agreement Please read the license statement and select Yes to continue the installation. 5 V1.
【 Step5.】 Choose the Destination Location for Program Click “Browse” to specify the destination folder Click Next to continue. 【 Step6.】 Input folder path to store recorded files and storage Confirm the record path and storage size for Schedule recording, Alarm recording and Manual Record folder. And also confirm the record path for Snapshot and Backup folder respectively. [Note] Recording video over a long period of time will consume large amounts of disk space.
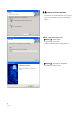
【 Step8.】 Review Your Setting Review all of the configuration settings that you have set. Click Next to accept these settings and continue. 【Note】The D-ViewCam installation process may take several minutes to complete. 【 Step9.】 Setup Status 【 Step10.】 The Setup is Completed Click Finish to complete the setup. 7 V1.
1.2. Modify Current Installation If you already have installed D-ViewCam in your system, a pop-up window will appear with options of Reinstall and Remove. 1.2.1. Reinstall to repair v1.10 【 Step1.】 Setup Status Show installation process status Installation Status appears after selecting Reinstall. 【 Step2.】 The Setup is Completed Click Finish to complete the setup. 8 V1.
1.2.2. Select Reinstall upgrade 【 Step1.】 Select Reinstall and click Next. 【 Step2.】 Select reserve data of D-View Cam v1.00 or not If you plan to upgrade v1.10 from v1.00, you may further decide if you want to reserve data of v1.00. Would you like to save the data and configuration files before continue (1) If select Yes, then all data of v1.00 will be kept in v1.10, the upgrade? and process the following steps. (2) If select No, then all the Admin configuration need to reconfigure, and repeat the B1.
【 Step5.】 The Setup is Completed Click Finish to complete the setup. 10 V1.
1.3. Select Remove to Uninstall 【 Step1.】 Select Remove Select “OK” to remove D-ViewCam and all features from your system. Select “Cancel” if you do not wish to remove the Select “OK” to remove D-ViewCam and all features from your system. program. 【Note】 Uninstall process will remove all saved data and configuration files. 【 Step2.】 Show uninstall 【 Step3.】 Uninstall Status process status Uninstall is Completed Click Finish to complete the uninstall. 11 V1.
2. Installation Procedure 2.1. Windows XP Service Pack 2 Firewall Configuration Windows XP Service Pack 2 has build-in firewall; please make sure that D-Link D-ViewCam control service and video proxy are unchecked in Exception Program. 2.2. 3 rd-party Personal Firewall Configuration rd If your computer has other 3 -party personal firewall, like antivirus, it might block some of D-ViewCam service, please manually permit D-ViewCam service. Detail steps please refer to following description: 2.2.1.
C. 1. System Admin Program Running the System Admin Program (Method 1) 【 Step1.】 Run the System Admin Program Select Programs > D-Link D-ViewCam > Admin 【 Step2.】 System Logon Use ‘Admin’ as the default user name and click OK to continue the login. If this is the first time you login, use Admin as default user name and leave the password blank, then click OK to log into the system. 【Note】It is recommended to set the Admin password when login the account for the first time.
3. System Admin Interface The System Admin screen is divided into three areas: ( a ) The Menu Bar area ( b ) The System Setup area ( c ) The eMap Interface area If your system did not display the screen properly, please check if your display resolution is set at 1024 x 768. D-ViewCam does not support font sizes that are larger than 96dpi. The Menu Bar buttons will change according to different Administration function.
4. System Management Overview Select SystemAdm icon in system setup, you will see the button in Menu Bar change accordingly. Button Tip/Use To Button Tip/Use To e-mail Setting: to specify the e-mail Holiday Setting: to specify the calendar outbound server for sending security alert.
4.2. Holiday Setting 4.2.1. Overview By selecting Holiday button from Manu Bar, you could specify any calendar holiday that may affect the security system settings. User could enable alarm service full day during these holidays if you check “Holiday” box in C8.9 4.2.2. Holiday is cycling on year base The Holiday setting will apply to all following calendar years automatically. You can leverage the holiday Export function and revise the holiday accordingly. 4.2.3.
4.3. General Setting General Setting option from the Manu Bar. 4.3.1. Path Display the “Disk Usage” and “Free Space” of the disk assigned to store recorded data for Schedule, Alarm, Manual Record and Snapshot. The user can also configure the path of the Backup DB. . 4.3.2. Storage Set the maximum disk space allocated for recording image data. (1) The storage allocation should be more than and less 1 GB than the Free Space indicates on the screen.
4.4. System Alarm 4.4.1. Overview By selecting Alarm button from the Manu Bar, the admin will have the capability to turn on system alerts to notify administrator or related user. 4.4.2. System alert type: (1) Hard Disk Space exceeded the “Threshold” (90% of allocation) (2) Camera disconnected (3) Recording Path Error when schedule or alarm or manual recording Alarm Setting please refers to C 8.10 for detail. 4.4.3. Alarm reminding sound There are 4 sound effects for the alarm reminder. 18 V1.
4.5. Rotation for Camera Split screen 【 Step1.】 Open Rotation Setting Select By selecting Rotation button from the Manu Bar, you may configure the rotation sequence and interval for split screen. Live Video Display will start to rotate when the number of camera is greater than the display screen. Change camera rotate sequence 【 Step2.】 Set sequence Click Up or Down to change the camera rotation sequence. 【 Step3.
5. User 5.1. Overview The User function in the System Setup area is provided for you to manage users' privileges. Button Tip/Use To The default users (Admin, User1, User2, User3, User Setting: to modify the users’ data and User4) are created during the installation. You may change the Admin password, and add, delete, or modify Users. The maximum number of Users, Remove User: to delete user from the user including the Admin, is 5.
5.2. Modify User 【 Step1.】 Open User Setting Select the User icon in the System Setup area, then click User Setting button in the Menu Bar to modify the users’ data. 【 Step2.】 User Belonging Setting The Admin User Belongs Tab setting cannot be modified. However, general users can be assigned to the administrator group in User Belongs. 【Note】Alphanumeric characters defined for text box as follows: Full Name < 30,E-Mail < 128 ,Password < 20 5.3. Add User 【 Step1.
【 Step4.】 Assign a User to a Group Select the User Belongs tab to designate a user to a group. Select the group name by moving arrow to “Selected group” or “Unselected group”. Click OK to continue. 22 V1.
6. eMap eMap is a hierarchical tree-structured management tool that visually presents the devices in your security system. To configure a new system, select eMap icon in the System Setup to bring up the Area button in the Menu Bar. Select the created area under the eMap branch and use the corresponding menu options to add a camera. Or to upload a background picture to the eMap Interface. 6.1.
6.2. Button overview When you select eMap icon, Menu Bar will display the following functions: Button Tip/Use to Add Area: This button allows you to add a new area under eMap branch. Remove All Area: This button allows you to remove all areas and devices that are under the eMap branch.
6.3. Adding Area 【 Step1.】 Adding an Area Select eMap icon from the System Setup and then click Add Area button from the Menu Bar. An Area Setting window will pop up. 【 Step2.】 【 Step3.】 Type in a name to Area Name text box. Click OK to save the setting. Example: If you enter「Area 1」, the 「Area 1」 will be displayed under the eMap tree of the System Setup area. You can repeat Step 1 to Step 3 to create more areas. The maximum number of characters that can be put in is 30.
6.5. Save Area and Camera Setting This function is to give users more flexibility to arrange their camera, the configuration of image, sensor and relay under camera. It can be saved to a configuration file (*.dvs), which includes: Area setting, map file, device ratio, configurations in Camera Setting, Image Alarm Setting, Preset, eMap location, and sensor alarm setting. NOTE: This function is also compatible to load D-ViewCam v1.0 configuration file (*.ini). The INI file only saves camera settings.
6.6. Load Area and Camera Setting 【 Step1.】 Open Load Camera Select eMap icon and click Load Setting button from the Menu Bar. 【 Step2.】 choose configuration file Click Browse to select configuration file. 【 Step3.】 Load data Click Load to load it. 【Note】The IP, Port NO, Location of loaded camera should be unique. It is advised to add new camera other than Load Device if it’s IP, Port NO or Location is currently in use. 【Note】If the file you load is *.ini, please specify one area first. 27 V1.
6.7. Uploading a Map (Customize the background image) 【 Step1.】 Upload an Map Select load Map button in the Menu Bar. An Upload eMap window will pop up 【 Step2.】 Choose an Image File Click Browse to navigate the image file, and then click Upload button. 【 Step3.】 Save an Uploaded eMap Once the image has been completely uploaded, a “Successfully Saved” message will appear. 【Note】 The supported image format are bmp,jpg and gif. 6.8.
7. Adding Camera 7.1. Add a Network Camera Click Add camera button from the Menu Bar to bring up the Camera Setting window. Choose a camera model, type the information into the text box as follows: (1) MAC Address: Fill in MAC address of your camera. You will find MAC address on the device label, which is located at the bottom or rear side of your device. (2)IP Address: Enter the valid IP address of the camera you wish to connect to. (3)Port No.: Enter the HTTP port of the camera.
8. Editing Camera Configurations When select Camera icon in System Setup area, the buttons display in Menu Bar as follows: Button Tip/Use To Camera Setting: to configure IP, MAC Address, Port Number, User Name, Password associated to a selected camera. It displays the information set in Add Camera button for further modify. For detail, please refer to Content C 7. Remove Camera: to remove the configuration of a selected camera including the image, sensor and relay.
Remove Sensor: to remove the configuration of a selected camera sensor. Sensor Alarm: to set sensor alarm action corresponding to the digital input alarm of selected sensor. Relay Setting: to configure the setting of selected camera relay. (Digital Output) Remove Relay: to remove the configuration of the selected camera relay. 31 V1.
8.1. Basic Configuration: Image Setting You can configure FPS of alarm/scheduled recording in this window, and activate schedule recording by specifying time period on weekly basis, as well as activate schedule recording when motion is detected. By this way you can effectively reduce the recording size. 【 Step1.】 Select a Camera Select the Image icon of a camera in the System Setup area and click Configure button from the Menu Bar to bring up the Image setting window. 【 Step2.
8.2. Image Orientation 【 Step1.】 【 Step2.】 Select Image icon for Image Setting Select Orientation Way Click on the right of Image Orientation dropdown list to support different camera mounting methods 【Note】 (1) For camera models DCS-900, 900W, or G900, you have to restart Monitor program to activate this setting. (2) For other D-Link models, it takes 20 seconds for the camera to automatically reconnect. 8.3. Cycling “Schedule Recording” 【 Step1.
8.4. Image Quality 【 Step1.】 Select the Image icon for Image Quality. 【 Step2.】 Quality Configuration You can adjust the contrast, hue, brightness, saturation and compression rat from this window; user may drag the scroll bar to right or left direction for your viewing preference and get real time quality by clicking Save button, then all the above setting will be effective automatically. If click Default button, then all the above setting will be restored to default.
8.6. Motion Detection 8.6.1. Build-in Motion Detection This function is applicable to DCS-900, 900W, and G900. 【 Step1.】 Configure Motion Detection Select the Image icon to be configured. Click Detection button from the Manu Bar. A Motion Detection window pops up. 【 Step2.】 Set Detection Areas A red square follows mouse movement, click to place the red square to the area of motion detection. 【 Step3.】 Cancel Detection Area Click to deselect a specified area.
8.7. Sensor Setting 【 Step1.】 Select Sensor(Digital Input) Select the Sensor icon in System Setup area, then click Sensor Setting button from Manu Bar to open the configuration window. 【 Step2.】 Edit Location Name. CAMxx-sensor appears by default, you may enter a unique, brief description that identifies the installed location. The maximum Number of characters can be entered is 23. 【 Step3.】 Save Setting Click OK button to save location data 8.8. Relay Setting 【 Step1.
8.9. Alarm Action 8.9.1. To Activate Alarm Action – Image, Sensor 【 Step1.】 Start Alarm Action Select the Image icon and click the Alarm button in Manu Bar to bring up the window. 【 Step2.】 Select “Alarm Activation” Click to select whether you want to trigger alarm in “Disable”, “Always”, or “Schedule” status. It is disabled by default. You can change to “Always” to turn it on, or “Schedule” to activate based on the schedule setting. 【 Step3.
8.9.2. To Activate Alarm Action - System Alarm Action activate when program startup. You may add action of Email, DO ON, DO OFF (Detail please refer to Alarm Action List Table) 8.9.3. Alarm Action – General Setting 【 Step1.】 “ Alarm Type” is default and corresponding to icon selected. 【 Step2.】 【 Step3.】 Select Alarm Action Select “Alarm Action” from the dropdown list. 【 Step4.】 Select “Breach Device”, and enter information to “Remark” field.
. 8.9.5. Alarm Action – Alarm Recording 【 Step1.】 Select “Recording” in “ Alarm Action” field. 【 Step2.】 Select “Breach Device”, and enter “Remark” 8.9.6. Alarm Action – Email 【 Step1.】 Select “Email” in “Alarm Action” field. 【 Step2.】 Select “Breach Device”, and enter “Remark” Select camera form “Breach Device” field and enter a brief description in “Remark” field to describe this alarm. Email will attached with two snapshot image files if you select camera other than ”text only” 【 Step3.
8.9.8. 【Examples】 1. Set alarm triggered by Cam01-image and records the video of Cam01-image: Select Cam01-image icon in System setup Area and click Alarm button from Menu bar, then select “Alarm action” by Recording and “Breach Device” by “Cam01-image”. 2. Set alarm triggered by Cam01-sensor and records the video of Cam02-image: Select Cam01-sensor icon in System setup Area and click Alarm button from Menu bar, then select “Alarm action” by Recording and “Breach Device” by “Cam02-image”. 3.
8.11. Backup Recorded Files Backup recorded files button is designed to archive the schedule recorded file to other HD. Select Image icon from and click Backup button from the Manu Bar. You could backup one folder at a time and should manually delete the back-upped file in your HD to release the storage. 41 V1.
D. 1. Monitor Running Monitor Program (Method 1) 【 Step1.】 Run Monitor Program Select Programs > D-Link D-ViewCam > Monitor 【 Step2.】 System Logon If this is first time you login, use Admin, User1~User4 as user name and leave password blank, and then click OK to log into the system. 【Note】The default password is blank. It is recommended to assign one. If you are Admin, please go to System Admin Program/User management function to assign it. 2.
3. Monitor Program Overview The User Interface has been classified into the following seven functions: Display Selection Video display area PT control interface System control Alarm setting Alarm notification log eMap 【Note】Most of the configuration in System Admin program will be effective automatically in Monitor program, except : (1) Update setting by select camera button in display area or split screen: New preset point, alarm interval, delete device, image orientation of DCS-900, 900W, and G900.
4. Display Selection vs. Video Display After login to Monitor program you may display live video of single camera or multiple cameras by clicking button on Display Selection Area. The pause button is to stop live video if you have PC performance or bandwidth concern. 44 V1.
4.1. Button Overview Button Use To Camera Button with Camera Recording Indicator: this background color of number turns from gray to red color to denote the camera is in recording status. Camera Button with Camera Selected Indicator: if a camera is selected to display live video on Video Display Area, the camera icon turns from green to red color. Click this button will bring up the allocated eMap in Monitor Program too.
5. PT Control Interface (DCS-5300, 5300W, 5300G, 6620, 6620G only) 5.1.1. 5.1.2. Center PT Click on the PT control interface to pan or tilt the camera. 5.1.3. Click on the center button to move the camera to the home position. 5.2. Button Overview Button Use To PT control: PT interface consist of control icons which allow user to pan/tilt the camera to 4 directions manually.
6. System Control 6.1. Button Overview Button Use To Snapshot: to take still image from live video Manual Record: to record live video manually in Monitor program. Other recording method, such as schedule recording or alarm recording should be configured in Administrator program Playback: to query and playback all recorded file Image Resolution: to switch image resolution between QVGA and VGA Zoom In: to zoom-in the image Zoom Out: to zoom-out the image 6.2. Snapshots 【 Step1.
【 Step2.】 Save a Snapshot Click the Save to save the still image in your computer. 6.3. Manual Recording 6.3.1. Manual Recording-Basic Operation 【 Step1.】 Start Manual Recording Click the Record button. The icon of the button will change from a circle to a square. 【 Step2.】 Recording index The manual recording status will be displayed in the Process Bar. The Recording Time will be displayed at the bottom right of the screen. Note: the Recording Time will recount every 15 minutes. 【 Step3.
6.4. Playback The Playback button allows you to playback recorded video through the “Schedule Recording”, “Alarm Recording” or “Manual Recording”. This function also provides additional features for exporting video files to the AVI format. The playback speed can be specified under the scroll bar. 6.4.1. Basic Operation 【 Step1.】 Open the Playback w indow Select “Schedule recording“, “Alarm recording” or “Manual Recording”, and then select “Camera Location“, “Query Date“ and ”Time”. Click the Query.
7. Alarm Setting 7.1. Button Overview Button Use to Alarm On: to enable the Alarm Off: to disable the alarm setting (both Digital Input & MD) of Administrator Program alarm setting (both Digital Input & MD)of Administrator Program Alarm Query: to query all alarm related data and export to a report Relay Setting: to remote control Relay (Digital Output) to on or off status. Cancel Alarm: to dismiss alarm warning in Monitor Program 7.2. Alarm Query 【 Step1.
7.3. Turning On Alarms 7.3.1. Turn Off Alarms You can turn off alarms when your security staff is on duty to handle event. To do this, click the OFF button to turn off all alarm settings in the Administration program. 7.3.2. Turn on Alarms Use this function when your security staff is off duty and you need D-ViewCam to automatically handle events. To turn on all alarm settings, click the ON button. 7.4. Disabling an Alarm 【 Step1.
E. Restore DB (Data Base) This function is designed for keeping D-ViewCam DB in case your computer crashes and loses DB. DB restore function has to be set by two segments: 1. Auto Backup DB DB backup is executed (1) at 2:00 am each day and (2) when starting D-Link D-ViewCam program. The backup path is configurable in General Setting window -> Backup DB Path.
F. FAQ D-Link D-ViewCam Features 1. Why use the D-Link D-ViewCam Intelligent Solution? D-Link D-ViewCam is the optional video surveillance system software that provides advanced security monitoring and device management functions to use with D-Link Internet cameras. This software uses the IP technology to provide remote access to system controls, live video feeds and archived recordings. 2.
split the screen to show videos from multiple cameras. To switch the display from one camera to another, you can either manually select a camera, or have the system automatically display videos from all cameras in a rotating manner. 7. How are video images stored? Video images are compressed into MJPEG or MPEG4 format, and then stored on your computer hard disk or a designated network storage device. 8.
13. What’s the purpose of keep DB while installation? D-Link D-ViewCam can reserve DB while upgrade software from v1.00 to v1.10, so that all the data and configuration will be kept in new version. 14. What’s the purpose of backup DB? D-Link D-ViewCam provides DB automatically backup function, so that you can restore DB if the DB is corrupted due to computer crashing. 15.
1. Keep Blocking D-Link D-View Cam 2. Control / Service / VideoProxy Windows pop up to ask you whether you want to keep blocking some of the program as suggested, click Keep Blocking and go to the next page. 3. Go to Window s Firew all From Start > Settings > Control Panel > Network and Internet Connections, and select “Windows Firewall”. 4. Review Exceptions Programs and 5.
19. What about firewalls of Nod 32 which has to manually permit D-ViewCam installation? If you use D-Link D-ViewCam on computers with Nod32 with personal firewall, please configure the firewall after you have installed D-ViewCam as following steps: 1. Click NOD32 antivirus system icon on the task bar to open it. 2. Select IMON->Setup->Miscellaneous->Exclusion->Edit-> Add to add C:\Program Files\D-Link D-View Cam\Exes\Admin.exe, Control.exe, Monitor.exe, VideoProxy.exe to the Exclude applications w indow .
insecure, you need to turn off Internet Security or disable Personal Firewall first in order to save image configure/ image quality of DCS-900 Bx and DCS-G900, and turn on Internet Security or enable Personal Firewall again to secure your system. 21.
27. How do I turn off all alarms temporally without change any configuration which previously set? Click the ON button to change its display to OFF. This button is located in the system control area of the Monitor Program. After you’ve done this, all alarm settings are turned off. 28.
34. What format can I transfer my recorded video file to? D-Link D-ViewCam supports AVI transferring service. The compression format depends on your computer system’s capability. For example, D-ViewCam will look to see if Codec software is installed in your computer. For details, please refer to your User’s Manual section D 6.4. 35. Do I have to login to the Monitor Program again every time I’ve made some changes to the settings using the Admin Program? No.