D-Link ™ DGS-1016D DGS-1024D 16/24-Port 10/100/1000Mbps Gigabit Ethernet Switch Manual Building Networks for People RECYCLABLE (November 2005) P/N: 6DGS1024D.
D-Link DGS-1016D/DGS-1024D Unmanaged Gigabit Ethernet Switch Information in this document is subject to change without notice. © 2005 D-Link Computer Corporation. All rights reserved. Reproduction in any manner whatsoever without the written permission of D-Link Computer Corporation is strictly forbidden. Trademarks used in this text: D-Link and the D-LINK logo are trademarks of D-Link Computer Corporation; Microsoft and Windows are registered trademarks of Microsoft Corporation.
CONTENTS PREFACE IV NOTES, NOTICES, AND CAUTIONS ............................................................IV SAFETY INSTRUCTIONS .............................................................................. V Safety Cautions ................................................................................... v General Precautions for Rack-Mountable Products......................... vii Protecting Against Electrostatic Discharge ......................................
D-Link DGS-1016D/DGS-1024D Unmanaged Gigabit Ethernet Switch Preface The DGS-1016D/DGS-1024D Manual is divided into sections that describe the system installation and operating instructions with examples. Section 1, Introduction - A description of the physical features of the Switch, including LED indicators, ports and panel descriptions. Section 2, Installation – A description of the physical installation of the Switch, mounting the Switch in a equipment rack and powering on the Switch.
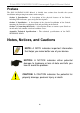
D-Link DGS-1016D/DGS-1024D Unmanaged Gigabit Ethernet Switch Safety Instructions Use the following safety guidelines to ensure your own personal safety and to help protect your system from potential damage. Throughout this safety section, the caution icon ( ) is used to indicate cautions and precautions that you need to review and follow. Safety Cautions To reduce the risk of bodily injury, electrical shock, fire, and damage to the equipment, observe the following precautions.
D-Link DGS-1016D/DGS-1024D Unmanaged Gigabit Ethernet Switch Safety Instructions (continued) • To help avoid damaging your system, be sure the voltage selection Switch (if provided) on the power supply is set to match the power available at your location: – 115 volts (V)/60 hertz (Hz) in most of North and South America and some Far Eastern countries such as South Korea and Taiwan – 100 V/50 Hz in eastern Japan and 100 V/60 Hz in western Japan.
D-Link DGS-1016D/DGS-1024D Unmanaged Gigabit Ethernet Switch General Precautions for RackMountable Products • • Observe the following precautions for rack stability and safety. Also refer to the rack installation documentation accompanying the system and the rack for specific caution statements and procedures. Systems are considered to be components in a rack. Thus, "component" refers to any system as well as to various peripherals or supporting hardware.
D-Link DGS-1016D/DGS-1024D Unmanaged Gigabit Ethernet Switch Safety Instructions (continued) • • • • • • • Always load the rack from the bottom up, and load the heaviest item in the rack first. Make sure that the rack is level and stable before extending a component from the rack. Use caution when pressing the component rail release latches and sliding a component into or out of a rack; the slide rails can pinch your fingers.
D-Link DGS-1016D/DGS-1024D Unmanaged Gigabit Ethernet Switch Protecting Against Electrostatic Discharge Static electricity can harm delicate components inside your system. To prevent static damage, discharge static electricity from your body before you touch any of the electronic components, such as the microprocessor. You can do so by periodically touching an unpainted metal surface on the chassis. You can also take the following steps to prevent damage from electrostatic discharge (ESD): 1.
SECTION 1 Introduction Switch Description Switch Features Ports Front-Panel Components LED Indicators Power Input on Rear Panel Switch Description The 16-port DGS-1016D and 24-port DGS-1024D Switches provide dedicated 10, 100 or 1000 Mbps Ethernet bandwidth on each port. The ports will automatically detect the speed, duplex and MDI/MDIX status of the device it is connecting to, and adjust these settings accordingly.
Switch Features The DGS-1016D 16-Port and DGS-1024D 24-port Switches do not require any management. Both Switches are designed for easy installation, flexibility and high performance. Connect devices to the Switch as the scale and volume of network traffic increases.
Gigabit Ethernet Technology Gigabit Ethernet is an extension of IEEE 802.3 Ethernet utilizing the same packet structure, format, and support for CSMA/CD protocol, full duplex, flow control, and management objects, but with a tenfold increase in theoretical throughput over 100-Mbps Fast Ethernet and a hundredfold increase over 10-Mbps Ethernet.
which packets from various applications are mapped to and assigned a priority. The illustration below shows how 802.1P priority queuing is implemented on the Switch. The eight IEEE 802.1P priority levels defined by the standard are mapped to the four class queues used in the Switch. Mapping QoS on the Switch The picture above shows the default priority setting for the Switch. Class-3 has the highest priority of the four priority queues on the Switch.
• Priority 7 is assigned to the Switch's Q3 queue. The Switch uses strict priority for Scheduling. Strict priority-based scheduling, any packets residing in the higher priority queues are transmitted first.
Front-Panel Components Note: The Switch illustrations used for this manual depict only the model DGS-1016D Switch. On the front panel of the Switch you will see the following.
Cable Diagnostic Upon booting up the Switch, a Cable Diagnostic is used to detect three problems that may prevent successful connection. This feature operates only on ports that are connected to 1000Mbps devices. If there are problems on a port connected to a Gigabit Ethernet device (1000Mbps), try restarting the Switch and watch the speed (100/1000Mbps) LED indicators to determine is the problem is a fault in the cable or connecting hardware.
LED Indicator Description Power This lights green while the Switch is receiving power. Link/Act A steady green light indicates the corresponding port is connected and a valid link is established. This will blink green when there is activity on the port. 100Mbps/1000Mbps The speed indicator will light green if the corresponding port is connected and operating at 1000Mbps. An amber light indicates the port is operating at 100Mbps.
Power Input on Rear Panel The power cable connection is located on the rear panel of the Switch. Rear panel view of the Switch Switch power input is provided by and internal universal power supply (100-240VAC : 12V/3.3A). The AC power connector is a standard three-pronged connector that supports the power cord. Please see the Power On section below for instructions on how to properly connect the Switch to a power source.
SECTION 2 Installation Package Contents Before You Connect to the Network Installing the Switch Power On Package Contents Open the shipping carton of the Switch and carefully unpack its contents.
Before You Connect to the Network The site where you install the Switch may greatly affect its performance. Please follow these guidelines for setting up the Switch. • Install the Switch on a sturdy, level surface that can support at least 3 kg (6.6 lbs) of weight. Do not place heavy objects on the Switch. • The power outlet should be within 1.82 meters (6 feet) of the Switch. • Visually inspect the power cord and see that it is fully secured to the AC power port.
Mounting the Switch on a Rack The DGS-1016D/1024D can easily be mounted on a rack. Two mounting ears are provided for this purpose. Make sure that the front panel is exposed in order to view the LEDs. Please refer to the following illustrations: Mounting the Switch to a Rack 1. 2. Attach the ears to each side of the Switch, using the screw-holes located on the side of the device. Firmly attach the ears to the rack as shown.
Attaching the Rubber Feet Use rubber feet provided. Position and apply rubber feet to the underside of the DGS-1016D/1024D Switch. Attaching the Rubber Feet Provide for Adequate Ventilation CAUTION: Do not place any device on top of Switch, or place the Switch on top of any device or object that will block the free flow of air through the ventilation slots on the sides, top, and bottom of the Switch’s case.
Power On To power on the Switch, Plug-in the female connector of the provided power cord into this socket, and the male side of the cord into a suitable power source. After the Switch is powered on, the LED indicators will blink briefly while the system resets. Power Failure As a precaution, in the event of a power failure, unplug the Switch. When power is resumed, plug the Switch back in.
Section 3 Connecting the Switch Switch to End Node Switch to Hub or Switch Connecting to a Server NOTE: All Ethernet ports auto-detect MDI-II/MDI-X, port speed (10, 100, 1000Mbps) and duplex of the device connected to the Switch. Cable Quality For all connections to the Switch, use these rules to determine the • For connections to 10BASE-T and 100BASE-TX devices, use Category 5 or 5e UTP/STP cable. • For connections to 1000BASE-T and 100BASE-TX devices, use Category 5e or better UTP/STP cable.
Switch to End Node End nodes include PCs outfitted with a 10, 100 or 1000 Mbps RJ-45 Ethernet/Fast Ethernet Network Interface Card (NIC) and Ethernet ready routers. Use standard Ethernet cable to connect the Switch to end nodes. Switch ports will automatically adjust to the hardware characteristics (MDI-II/MDI-X, speed, duplex) of the device to which it is connected. Switch connected to an end node Observe the guidelines for cable quality stated at the beginning of this section.
Switch to Hub or Switch Connect to another switch or hub Observe the guidelines for cable quality stated at the beginning of this section. The Link/Act LEDs for each port lights green when the link is valid.
Connecting to Network Backbone or Server Any port may be used to uplink the Switch to a network backbone or network server. When linking to a 10000BASE-T device the port operates in full duplex mode. Connection to a Server Observe the guidelines for cable quality stated at the beginning of this section. The Link/Act LEDs for each port lights green when the link is valid.
Appendix Technical Specifications General Standards: IEEE 802.3 10BASE-T IEEE 802.3u compliance IEEE 802.3ab compliance IEEE 802.1p compliance Half or Full-Duplex operations at 10/100Mbps Full-Duplex operations at 1000Mbps IEEE 802.
Physical and Environmental AC Inputs: 100~240VAC; 12V/3.3A Internal universal power supply Power Consumption: 30.2 watts maximum Fans 1 Built-in 40 x 40 x 10 mm Fans Operating Temperature: 32°F ~ 104F ° (0 °C ~ 40 ºC) Storage Temperature: 14°F ~ 158°F (-10°C ~ 70°C) Humidity: Dimensions: 5% ~ 95% RH, non-condensing 11.02 in. x 7.09 in. x 1.73 in. (280 mm x 180 mm x 44 mm) Weight DGS-1024D: 1.79 kg / DGS-1016D: 1.
Performance Transmission Method: Store-and-forward RAM Buffer: DGS-1016D Supports 340KB RAM per device DGS-1024D Supports 500KB RAM per device Filtering Address Table: Packet Filtering/ Forwarding Rate: 8K MAC address per device Full wire speed MAC Address Learning: Self-learning, auto-aging Jumbo Frame 9.
Glossary 1000BASE-LX – A short laser wavelength on multimode fiber optic cable for a maximum length of 550 meters. 1000BASE-SX – A long wavelength for a "long haul" fiber optic cable for a maximum length of 10 kilometers. 100BASE-FX – 100Mbps Ethernet implementation over fiber. 100BASE-TX – 100Mbps Ethernet implementation over Category 5 and Type 1 Twisted Pair cabling. 10BASE-T – The IEEE 802.3 specification for Ethernet over Unshielded Twisted Pair (UTP) cabling.
CSMA/CD – Channel access method used by Ethernet and IEEE 802.3 standards, in which devices transmit only after finding the data channel clear for some period of time. When two devices transmit simultaneously, a collision occurs and the colliding devices delay their retransmissions for a random amount of time.
protocol – A set of rules for communication between devices on a network. The rules dictate format, timing, sequencing, and error control. resilient link – A pair of ports that can be configured so that one will take over data transmission should the other fail. See also main port and standby port. RJ-45 – Standard 8-wire connectors for IEEE 802.3 10BASE-T networks. RMON – Remote Monitoring.
USA Warranty and Registration Information Subject to the terms and conditions set forth herein, D-Link Systems, Inc. (“D-Link”) provides this Limited warranty for its product only to the person or entity that originally purchased the product from: • • D-Link or its authorized reseller or distributor and Products purchased and delivered within the fifty states of the United States, the District of Columbia, U.S. Possessions or Protectorates, U.S. Military Installations, addresses with an APO or FPO.
date of original retail purchase of the Software for a period of ninety (90) days (“Warranty Period”), provided that the Software is properly installed on approved hardware and operated as contemplated in its documentation. D-Link further warrants that, during the Warranty Period, the magnetic media on which D-Link delivers the Software will be free of physical defects.
and shipped to D-Link Systems, 17595 Mt. Herrman Street, Fountain Valley, CA. 92708. D-Link will not be held responsible for any packages that are lost in transit to D-Link. The repaired or replaced packages will be shipped to the customer via UPS Ground or any common carrier selected by D-Link, with shipping charges prepaid. Expedited shipping is available if shipping charges are prepaid by the customer and upon request.
OF THE PRODUCT, INCONVENIENCE OR DAMAGES OF ANY CHARACTER, WHETHER DIRECT, SPECIAL, INCIDENTAL OR CONSEQUENTIAL (INCLUDING, BUT NOT LIMITED TO, DAMAGES FOR LOSS OF GOODWILL, LOSS OF REVENUE OR PROFIT, WORK STOPPAGE, COMPUTER FAILURE OR MALFUNCTION, FAILURE OF OTHER EQUIPMENT OR COMPUTER PROGRAMS TO WHICH D-LINK’S PRODUCT IS CONNECTED WITH, LOSS OF INFORMATION OR DATA CONTAINED IN, STORED ON, OR INTEGRATED WITH ANY PRODUCT RETURNED TO D-LINK FOR WARRANTY SERVICE) RESULTING FROM THE USE OF THE PRODUCT, RELATI
Trademarks: D-Link is a registered trademark of D-Link Systems, Inc. Other trademarks or registered trademarks are the property of their respective manufacturers or owners. Copyright Statement: No part of this publication or documentation accompanying this Product may be reproduced in any form or by any means or used to make any derivative such as translation, transformation, or adaptation without permission from D-Link Corporation/D-Link Systems, Inc.
Register online your D-Link product at http://support.dlink.
International Offices U.S.A 17595 Mt. Herrmann Street Fountain Valley, CA 92708 TEL: 1-800-326-1688 URL: www.dlink.com Canada 2180 Winston Park Drive Oakville, Ontario, L6H 5W1 Canada TEL: 1-905-8295033 FAX: 1-905-8295223 URL: www.dlink.ca Europe (U. K.) 4th Floor, Merit House Edgware Road, Colindale London NW9 5AB U.K. TEL: 44-20-8731-5555 FAX: 44-20-8731-5511 URL: www.dlink.co.uk Germany Schwalbacher Strasse 74 D-65760 Eschborn Germany TEL: 49-6196-77990 FAX: 49-6196-7799300 URL: www.dlink.
International Offices Poland Budynek Aurum ul. Walic-w 11 PL-00-851 Warszawa Poland TEL : +48 (0) 22 583 92 75 FAX: +48 (0) 22 583 92 76 URL: www.dlink.pl Turkey Ayazaga Maslak Yolu Erdebil Cevahir Is Merkezi 5/A Ayazaga – Istanbul Turkiye TEL: +90 212 289 56 59 FAX: +90 212 289 76 06 URL: www.dlink.com.tr Hungary R-k-czi-t 70-72 HU-1074 Budapest Hungary TEL : +36 (0) 1 461 30 00 FAX: +36 (0) 1 461 30 09 URL: www.dlink.