D-Link DSB-T100 USB TV Tuner & Capture User’s Manual Rev.
Contents Introduction ..................................................................................................3 Package Contents..................................................................................3 Introduction to USB .....................................................................................4 Introduction to Video Capture ......................................................................5 Introduction to Video Editing ...................................................
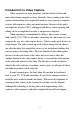
Introduction Congratulations on your purchase of the D-Link DSB-T100. The DSB-T100 enables you to watch TV on your computer and capture video from any video source. This guide will explain the features and functions of the DSB-T100.
Introduction to USB USB stands for Universal Serial Bus. It is a standard for connecting external devices to your computer quickly and easily. One of the nice things about USB is that power can be provided to the USB device through the USB cable. Some devices such as printer need more power than the USB ports can provide, so those devices will have to use an external power source. USB also allows the device to be connected and removed from the PC without the need to shut down the computer.
Introduction to Video Capture Video capture has risen in popularity with the advent of faster and more robust home computer systems. Normally, those wanting to do video capture and mastering were required to purchase very expensive computer systems with expensive video and audio hardware. Because of the quick developments of faster CPU’s and bigger hard drives, video capturing and editing can be accomplished on today’s inexpensive computers.
Introduction to Video Editing As with video capture, the hardware that was previously needed to edit video was very expensive. Today’s PC market has lowered the cost of very powerful computers that are very capable of editing and producing home videos. Or course, the faster and more robust your computer is, the faster and easier it is to edit video. The first thing to understand when delving into video editing is that video takes up a lot of hard drive space.
Hardware Installation Note: Install the Drivers by following the Quick Install Guide for the operating system before connecting the DSB-T100 to the USB port of your computer. Placement Your DSB-T100 should be placed in a safe and secure location. To ensure proper operation, please keep the unit away from water and other damaging elements. Your DSB-T100 can be held in place by using the stand provided.
Rear Panel Coaxial Input Use when connecting to a coaxial source such as Cable TV or VCR. S-Video Input Use when connecting to an S-Video source such as a TV or VCR. Video Input Use when connecting to an RCA video source. Connect the yellow end of the video cable to this RCA jack. Left Audio Input Use when connecting to an RCA audio source. Connect the white end of the audio cable to this RCA jack. Right Audio Input Use when connecting to an RCA audio source.
Software Guide On-Screen Remote When you start the TV Jukebox application an on-screen remote control will appear. All options and features are controlled using the remote control.
Below is a description of the major functions of the on-screen remote: Press the TV button to play video from either cable or antenna. Press the AV button to play video from a host of input devices such as VCD, DVD, and VHS. Press the SV button to play video from a host of input devices such as VCD, DVD, and VHS. Press the Channel Scan button to automatically scan channels that are available for viewing from cable or antenna.
Scanning for Available Channels You can scan for available channels while using a Cable or Antenna connection. Click on the Channel Scan icon from the remote control and a prompt will appear as shown below. To begin scanning click on the “Yes” icon and a new screen will appear with the scanned channels appearing on the remote as illustrated below.
TV Jukebox Options To configure the settings for the TV Tuner software click on the “Settings” icon. The following menu will be shown: Under “Tuner Control” you can select the Input Type from either a Cable or Antenna source. From the “Video Input System” you are able to select the TV Tuner support system in your area. For example, NTSC, PAL, or SECAM. The “Channel Table” lists all the channels available.
negative (−) sign will appear when you delete a channel from the list. When changes are made, click the “Save” button to save all the new settings you have set. The “Device Process” tab allows you to change the sound card that will be used for capture and playing sound. Click “OK” to save your changes.
In the “Capture Process” tab, you can select the directory you want to save the video recordings and snapshots captured from the USB TV Tuner. The “Time limit” drop down box allows you to select the recording time limit from 30 seconds up to 120 minutes or no limit. All files are saved in AVI format. You can also change the Video Format to SP44 or RGB. Choose the directory used to save the video recordings or snapshot photos by clicking on Browse.
Browse your computers file system and choose a directory and press the “OK” button. When changes are made, click the “Save” button to save all the new settings you have set. How To Adjust Color You can adjust the viewing color from the on-screen interface by clicking the “Color Control” icon and an on-screen menu will pop up on the bottom of the viewing screen like the one below. The color control allows 4 options to enhance the picture quality.
You can adjust each of the options by moving the “3D slide button” right (increase) or left (decrease) for your desired choice Click the “Reset” button to refresh the new setting. Clicking on the “Color Control” icon again will deactivate the color control. How To Capture Still Images from Video You can capture still video images from TV, AV or SV. Click the "capture to .bmp file" icon on the remote control and an on-screen menu will appear on the upper left side of the screen like the one below.
function is supported by a TWAIN driver. The TWAIN driver can be activated by an image editing software, like Windows Imaging or other imaging software. For example: After running Windows Imaging, (click on Start, Programs, Accessory, Imaging). Click "File" on the menu bar and choose "Select Scanner". After selecting the DSB-T100 as the scanner source, click "File" from the menu bar and choose "Scan New".
space. Make sure that you have ample amount before attempting to capture a large video sequence. Uninstalling The USB TV Tuner Driver In order to uninstall the DSB-T100, you must begin while the DSB-T100 is still connected to your computer. § § Open up the System Properties in Windows by double-clicking on the System icon in the Control Panel or by right-clicking on My Computer and clicking on properties.
§ Click on the "Remove" button and a prompt will appear to confirm the removal of the DSB-T100. Click on the "OK" button and the driver will be uninstalled. A prompt will appear asking to restart your computer, click on the “No” icon to continue the uninstallation procedure. § Note: For Windows 2000 O.S the above prompt will not appear. § Follow these steps to remove the USB controller of the TV Tuner Driver.
§ § Click on the "Remove" button and a prompt will appear to confirm the removal of the DSB-T100. Click on the "OK" button and the device will be uninstalled. A prompt will appear asking to restart your computer, click on the “No” icon to continue the uninstallation procedure. Note: Windows 2000 users will not see the “restart your computer” prompt. Open the Control Panel and double-click the “Add/Remove Programs” icon.
Select “D-Link USB TV Tuner & Video Capture” from the list and click the “Add/Remove” button. Select “Remove” from the Install Shield Wizard and click on the Next button to continue. Click on the “OK” button to confirm you want to completely remove the application. Click on the “Finish” button to finish the uninstall of the Driver.
Uninstalling The USB TV Tuner AP From the Start Menu, click Programs, TV Jukebox, Uninstall TV Jukebox. Click the “Uninstall” icon to continue. Once the uninstall process is finished, click on the “Exit” icon.
Technical Specifications System Requirements § Microsoft Windows 98, 98SE, ME or Windows 2000 § 300MHz Processor and Above § 48MB RAM § 500MB Hard Drive Space § CD-ROM Drive § 16-bit SoundBlaster Compatible Sound Card § Video Adapter That Supports 24 Bit (16.7 Million Colors) Or Greater Color § USB Port Standards § USB Specification version 1.
D-Link Offices AUSTRALIA CANADA CHILE CHINA DENMARK EGYPT FRANCE GERMANY INDIA ITALY JAPAN RUSSIA SINGAPORE S. AFRICA SWEDEN TAIWAN U.K. U.S.A. D-LINK AUSTRALASIA Unit 16, 390 Eastern Valley Way, Roseville, NSW 2069, Australia TEL: 61-2-9417-7100 FAX: 61-2-9417-1077 TOLL FREE: 1800-177-100 (Australia), 0800-900900 (New Zealand) URL: www.dlink.com.au E-MAIL: support@dlink.com.au, info@dlink.com.
Limited Warranty D-Link Systems, Inc. (“D-Link”) provides this limited warranty for its product only to the person or entity who originally purchased the product from D-Link or its authorized reseller or distributor.
determines is substantially equivalent (or superior) in all material respects to the defective Hardware. The Warranty Period shall extend for an additional ninety (90) days after any repaired or replaced Hardware is delivered.
non-conformance is incapable of correction, or if D-Link determines in its sole discretion that it is not practical to replace the non-conforming Software, the price paid by the original licensee for the non-conforming Software will be refunded by D-Link; provided that the non-conforming Software (and all copies thereof) is first returned to D-Link. The license granted respecting any Software for which a refund is given automatically terminates. What You Must Do For Warranty Service: Registration Card.
the original or other suitable shipping package to ensure that it will not be damaged in transit, and the RMA number must be prominently marked on the outside of the package. The packaged product shall be insured and shipped to D-Link, 53 Discovery Drive, Irvine CA 92618, with all shipping costs prepaid. D-Link may reject or return any product that is not packaged and shipped in strict compliance with the foregoing requirements, or for which an RMA number is not visible from the outside of the package.
Disclaimer of Other Warranties: EXCEPT FOR THE LIMITED WARRANTY SPECIFIED HEREIN, THE PRODUCT IS PROVIDED “AS-IS” WITHOUT ANY WARRANTY OF ANY KIND INCLUDING, WITHOUT LIMITATION, ANY WARRANTY OF MERCHANTABILITY, FITNESS FOR A PARTICULAR PURPOSE AND NON-INFRINGEMENT. IF ANY IMPLIED WARRANTY CANNOT BE DISCLAIMED IN ANY TERRITORY WHERE A PRODUCT IS SOLD, THE DURATION OF SUCH IMPLIED WARRANTY SHALL BE LIMITED TO NINETY (90) DAYS.
SERVICE, OR ARISING OUT OF ANY BREACH OF THIS LIMITED WARRANTY, EVEN IF D-LINK HAS BEEN ADVISED OF THE POSSIBILITY OF SUCH DAMAGES. THE SOLE REMEDY FOR A BREACH OF THE FOREGOING LIMITED WARRANTY IS REPAIR, REPLACEMENT OR REFUND OF THE DEFECTIVE OR NON-CONFORMING PRODUCT. GOVERNING LAW: This Limited Warranty shall be governed by the laws of the state of California.
This is a Class B product. In a domestic environment, this product may cause radio interference, in which case the user may be required to take adequate measures Warnung! Dies ist in Produkt der Klasse B. Im Wohnbereich kann dieses Produkt Funkstoerungen verursachen. In diesem Fall kann vom Benutzer verlangt werden, angemessene Massnahmen zu ergreifen. Advertencia de Marca de la CE Este es un producto de Clase B.
are designed to provide reasonable protection against harmful interference in a residential installation. This equipment generates, uses and can radiate radio frequency energy and, if not installed and used in accordance with the instructions, may cause harmful interference to radio communications. However, there is no guarantee that interference will not occur in a particular installation.
Register online at http://support.dlink.com/register/ Registration Card Print, type or use block letters. Your name: Mr./Ms _____________________________________________________________________________ Organization: ________________________________________________ Dept.