DSL-300G+ ADSL Modem User’s Guide (Sep 2002) 651L300G+015
DSL-300G+ ADSL Modem User’s Guide Wichtige Sicherheitshinweise 1. Bitte lesen Sie sich diese Hinweise sorgfältig durch. 2. Heben Sie diese Anleitung für den spätern Gebrauch auf. 3. Vor jedem Reinigen ist das Gerät vom Stromnetz zu trennen. Vervenden Sie keine Flüssig- oder Aerosolreiniger. Am besten dient ein angefeuchtetes Tuch zur Reinigung. 4. Um eine Beschädigung des Gerätes zu vermeiden sollten Sie nur Zubehörteile verwenden, die vom Hersteller zugelassen sind. 5.
DSL-300G+ ADSL Modem User’s Guide WARRANTY SERVICE MAY BE OBTAINED BY CONTACTING A D-LINK OFFICE WITHIN THE APPLICABLE WARRANTY PERIOD, AND REQUESTING A RETURN MATERIAL AUTHORIZATION (RMA) NUMBER. IF A REGISTRATION CARD FOR THE PRODUCT IN QUESTION HAS NOT BEEN RETURNED TO D-LINK, THEN A PROOF OF PURCHASE (SUCH AS A COPY OF THE DATED PURCHASE INVOICE) MUST BE PROVIDED.
DSL-300G+ ADSL Modem User’s Guide LIMITATION OF LIABILITY IN NO EVENT WILL D-LINK BE LIABLE FOR ANY DAMAGES, INCLUDING LOSS OF DATA, LOSS OF PROFITS, COST OF COVER OR OTHER INCIDENTAL, CONSEQUENTIAL OR INDIRECT DAMAGES ARISING OUT THE INSTALLATION, MAINTENANCE, USE, PERFORMANCE, FAILURE OR INTERRUPTION OF A D- LINK PRODUCT, HOWEVER CAUSED AND ON ANY THEORY OF LIABILITY. THIS LIMITATION WILL APPLY EVEN IF D-LINK HAS BEEN ADVISED OF THE POSSIBILITY OF SUCH DAMAGE.
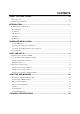
CONTENTS ABOUT THIS USER’S GUIDE ................................................................................. VII Before You Start ........................................................................................................................................... vii Requirements for Installation............................................................................................................................ vii INTRODUCTION ............................................................
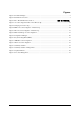
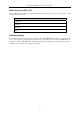
Figures Figure 1. Front Panel Display ................................................................................................................................. 2 Figure 2. Rear Panel Connections........................................................................................................................... 3 Figure 3. PC to Modem Ethernet Connection ..................................................................... 錯誤! 尚未定義書籤。 Figure 4. Account Configuration Menu – First Time Set Up....
DSL-300 ADSL Ethernet Modem User’s Guide About This User’s Guide This user’s guide instructs the reader to install the DSL-300G+ ADSL Modem and use it to connect a single computer to the Internet. If you are using a computer with a functioning Ethernet port, you can use the Quick Installation Guide to quickly establish your ADSL connection and access the Internet. Guide Overview Chapter 1 Introduction – A description of the Modem and its key features including Front and Rear panel diagrams.
DSL-300 ADSL Ethernet Modem User’s Guide Ethernet Adapter (NIC) Any computer using the Modem for Internet access, must have an Ethernet NIC (Network Interface Card) installed or a working Ethernet port. Most recently produced notebook computers are equipped with an Ethernet port. The system must have TCP/IP Protocol installed and enabled. If you have an Ethernet port installed, you probably already have TCP/IP enabled.
DSL-300 ADSL Ethernet Modem User’s Guide IPoA Connections (RFC 1577) IP over ATM connections may require global IP settings for the device. Your service provider will give you IP settings information if needed. Global IP Settings for IPoA Connections IP Address: Netmask: Gateway: DNS: Additional Settings If your ISP or ADSL service provider has instructed to change the VPI/VCI settings, there is a special menu, the System Settings menu in the management software used to change this.
DSL-300 ADSL Modem User’s Guide 1 Introduction This section provides a brief description of the Modem, its associated technologies and a list of Modem features. ADSL Technology Asymmetric Digital Subscriber Line (ADSL) is broadband access technology that provides high-speed digital data transmission and interactive multimedia applications for business and residential customers over ordinary telephone line.
DSL-300 ADSL Modem User’s Guide Front Panel Place the Modem in a location where the LED indicators can be easily viewed. Power Status ADSL Ethernet Figure 1. Front Panel Display LED Indicators Power Steady green light indicates the unit is powered on. Status Lights steady green during power on self-test. Once the connection status has been settled, the light will blink green indicating normal operation.
DSL-300 ADSL Modem User’s Guide Rear Panel All cable connections to the Modem are made at the rear panel, including the Console port connection. The Console port is intended for use by a qualified telecommunications technician. Please do not attempt to configure the device through the Console connection. Power cord connects here Ethernet port, connect Ethernet cable here The factory reset button is located here. ADSL port, connect ADSL cable here Figure 2.
DSL-300 ADSL Modem User’s Guide 2 Hardware Installation In this chapter you will learn about the various connections you will need to make in order to use the Modem. When selecting the location for the Modem, allow ample room to access the connections on the rear panel. For convenience, try to place the Modem near your computer so you can monitor the LED indicators. Allow some space above the Modem for ventilation to avoid problems with overheating.
DSL-300 ADSL Modem User’s Guide 5
DSL-300 ADSL Modem User’s Guide 3 First Time Set Up This chapter will show you how configure the Modem in order to establish the ADSL connection and ultimately a connection to the Internet. Any management software features that are directly concerned with establishing an Internet connection using ADSL are explained in the following chapter, Using the Web Configuration Manager. Make sure your computer’s Ethernet port is connected directly to the Modem as described in the previous chapter.
DSL-300 ADSL Modem User’s Guide Configure Windows XP for DHCP Use the following steps to configure a computer running Windows XP to be a DHCP client. 1. From the Start menu on your desktop, go to click on Control Panel. 2. In the Control Panel folder, click on Network and Internet Connections.
DSL-300 ADSL Modem User’s Guide 3. In the Network and Internet Connections folder, click on Network Connections. 4. In the Network Connections folder, highlight the Local Area Connection icon by clicking on it once. A new option is revealed under Network Tabs in the left side panel.
DSL-300 ADSL Modem User’s Guide 5. Click on Change settings of the connection under Network Tabs. 6. In the General Tab of the Local Area Connection Properties menu, highlight Internet Protocol (TCP/IP) under “This connection uses the following items:” by clicking on it once. Click on the Properties button.
DSL-300 ADSL Modem User’s Guide 7. Select “Obtain an IP address automatically” by clicking once in the circle. Click the OK button. Your computer is now ready to use the Modem’s DHCP server. Windows 2000 First, check for the IP protocol and, if necessary, install it: 1. In the Windows task bar, click the Start button, point to Settings, and then click Control Panel. 2. Double-click the Network and Dial-up Connections icon. 3.
DSL-300 ADSL Modem User’s Guide Windows ME First, check for the IP protocol and, if necessary, install it: 1. In the Windows task bar, click the Start button, point to Settings, and then click Control Panel. 2. Double-click the Network and Dial-up Connections icon. 3. In the Network and Dial-up Connections window, right-click the Network icon, and then select Properties. 4. The Network Properties dialog box displays with a list of currently installed network components.
DSL-300 ADSL Modem User’s Guide Configure Windows 95, 98 for DHCP 1. Open the Control Panel window, and then click the Network icon. 2. Select the network component labeled TCP/IP, and then click Properties. 3. If you have multiple TCP/IP listings, select the listing associated with your network card or adapter. 4. In the TCP/IP Properties dialog box, click the IP Address tab. 5. Click the Obtain an IP address automatically option. 6. Double-click OK to confirm and save your changes.
DSL-300 ADSL Modem User’s Guide Access the Web-based Configuration Manager With your computer configured to receive its IP settings from the Modem, it can now access the web-based (HTML-based) configuration management software. Note: Be sure that the web browser on the computer is not configured to use a proxy server in the Internet settings. In Windows Internet Explorer, you can check if a proxy server is enabled using the following procedure: 1.
DSL-300 ADSL Modem User’s Guide Configure the Internet Connection Now that you have accessed the web-based manager, you can configure the device for connection to the Internet. For PPPoE and PPPoA connections, you will need to enter a User Name and Password used by your ISP or ADSL service provider for authentication purposes. This information is stored in the Modem’s memory and you will not need to enter this again.
DSL-300 ADSL Modem User’s Guide 9. The Modem is now ready to begin the process that establishes a connection to the Internet. This is known as the “negotiation” process since the Modem must first contact other computers on the network to verify your account information and negotiate the connection. Click on the Connect button to begin the negotiation. It will take a few seconds for verification and connection processes to be completed.
DSL-300 ADSL Modem User’s Guide Change Connection Type to PPPoA To change the connection type to PPPoA and connect to the Internet, follow these steps: 1. In the Account Configuration window, select PPPoA from the Connection Type pull-down menu. The web page display will change to present this menu: Figure 5. PPPoA Account Configuration – Initial Set Up 2. DO NOT change the Encapsulation setting unless your ADSL service provider or ISP has instructed you to change it. By default, the LLC is selected.
DSL-300 ADSL Modem User’s Guide 9. A new message appears: 10. Click on the OK button. The information you have just entered will be saved to the Modem’s flash memory. Note: If you have been instructed to change the VPI/VCI settings, skip ahead to the System Settings section in the next chapter. 11. The Modem is now ready to begin the process that establishes a connection to the Internet.
DSL-300 ADSL Modem User’s Guide Change Connection Type to IPoA To change the connection type to IPoA and connect to the Internet, follow these steps: 1. In the Account Configuration window, select IPoA from the Connection Type pull-down menu. The web page display will change to present this menu: Figure 6. IPoA Account Configuration – Initial Set Up 2. DO NOT change the Encapsulation setting unless your ADSL service provider or ISP has instructed you to change it. By default, the LLC is selected.
DSL-300 ADSL Modem User’s Guide Change Connection Type to RFC 1483 Bridge For ADSL accounts using the RFC 1483 so-called “Bridged Ethernet” connection type, the IP information needed to use the Internet will be located in the computer using the Modem. In this case, you probably have a CD with software for your computer. Follow the instructions from your ISP or ADSL service provider regarding connection software and configure the Modem before or after this installation as instructed.
DSL-300 ADSL Modem User’s Guide 4 Using the Web Manager If you are setting up the Modem for the first time you may want to read the previous chapter, First Time Se Up. This chapter describes functions and features of the Modem’s configuration manager that are not described in the previous chapter.
DSL-300 ADSL Modem User’s Guide System Setting (VPI/VCI Settings) IMPORTANT! DO NOT change any of the settings in the System Setting menus unless you have been instructed by you ISP or ADSL service provider to change the VPI, VCI or AC Name information. If you have been told to change the VPI or VCI settings or if you have been given an AC Name, use the System Setting menu to enter the new information. Figure 9.
DSL-300 ADSL Modem User’s Guide PPP Account Configuration PPPoE and PPPoA accounts use different connection types, however the variables that are required for configuration are the same. These variables are summarized in the table below. Figure 10. PPPoE Account Configuration The PPP Account Configuration menu presents the following user defined parameters: Connection Type User Name Password Use this drop-down menu to change connection type used for your ADSL service.
DSL-300 ADSL Modem User’s Guide IPoA Account Configuration IPoA connections require static global IP settings. Your ISP should supply this information. The glbal IP configuration settings are summarized in the table below. Figure 11. IPoA Account Configuration The IPoA Account Configuration menu presents the following user IP settings: Connection Type Encapsulation IP Address Use this drop-down menu to change connection type used for your ADSL service.
DSL-300 ADSL Modem User’s Guide Summary Use the Summary screen to view information that can be useful for troubleshooting. Click the Refresh hyperlink to update the statistics in the Summary screen. Figure 12.
DSL-300 ADSL Modem User’s Guide ADSL Line Status Operation Path This describes the method used for data transfer on the network backbone. It should read either Fast or Interleave. Operation Mode The ADSL operation mode is detected automatically by the Mode. This tells you what mode is being used. It should read either G.dmt or G.lite.
DSL-300 ADSL Modem User’s Guide Update Firmware Use the Update Firmware feature to load the latest firmware for the Modem. You can obtain the latest version of the DSL-300G+ firmware by logging onto the D-Link web site at www.dlink.com. You can also link to the DLink web site by clicking on the D-Link logo in the upper left corner of the browser window. Download the firmware file and save it to your computer is a location that is easy to find or easy to remember.
DSL-300 ADSL Modem User’s Guide Accounts Management As of the writing of this user’s guide, the Modem supports ADSL connection for one computer that is directly connected to it. In a future firmware version, the Modem will allow for connection to an Ethernet LAN and provide an ADSL service connection as well as limited DHCP function for the LAN. The Accounts Management feature will be useful for future versions of the firmware.
DSL-300 ADSL Modem User’s Guide A Technical Specifications General ITU G.992.1 (G.dmt) Standards: ITU G.992.2 (G.lite) ITU G.994.1 (G.Hs) ANSI T1.413 (Issue 2) Protocol: TCP/IP Data Transfer Rate: G.dmt full rate: Downstream up to 8 Mbps Upstream up to 640 Kbps G.lite: Downstream up to 1.5 Mbps Upstream up to 512 Kbps Media Interface Exchange: RJ-11 port connection ADSL telephone line RJ-45 port for 10/100BASET Ethernet connection Physical and Environmental DC inputs: Input: 100V ~ 240V AC, 1.
Offices Australia D-Link Australasia Unit 16, 390 Eastern Valley Way, Roseville, NSW 2069 Australia TEL: 61-2-9417-7100 FAX: 61-2-9417-1077 TOLL FREE (Australia): 1800-177100 TOLL FREE (New Zealand): 0800-900900 URL: www.dlink.com.au E-MAIL: support@dlink.com.au & info@dlink.com.au Level 1, 434 St.
Norway D-Link Norway Waldemar Thranesgt. 77, 0175 Oslo, Norway TEL: 47-22-991890 FAX: 47-22-207039 Russia D-Link Russia Michurinski Prospekt 49, 117607 Moscow, Russia TEL: 7-095-737-3389 & 7-095-737-3492 FAX: 7-095-737-3390 URL: www.dlink.ru E-MAIL: vl@dlink.ru Singapore D-Link International 1 International Business Park, #03-12 The Synergy, Singapore 609917 TEL: 65-774-6233 FAX: 65-774-6322 E-MAIL: info@dlink.com.sg URL: www.dlink-intl.
Registration Card Print, type or use block letters. Your name: Mr./Ms__________________________________________________________________________ Organization: ____________________________________________Dept.