DSL-504G ADSL Router User’s Guide (April 2004)
DSL-504G ADSL Router User’s Guide FCC Warning This device complies with part 15 of the FCC Rules. Operation is subject to the following two conditions: (1) This device may not cause harmful interference, and (2) this device must accept any interference received, including interference that may cause undesired operation. This equipment has been tested and found to comply with the limits for a Class B digital device, pursuant to part 15 of the FCC Rules.
DSL-504G ADSL Router User’s Guide LIMITED WARRANTY D-Link provides this limited warranty for this product only to the person or entity who originally purchased the product from D-Link Australia or its authorized reseller or distributor. Limited Hardware Warranty: D-Link Australia warrants that the hardware portion of the D-Link product described below (“Hardware”) will be free from material defects in Hardware, for the period set forth below applicable to the product type (“Warranty Period”).
DSL-504G ADSL Router User’s Guide What You Must Do For Warranty Service: Submitting a Claim. Any claim under this limited warranty must be submitted to a D-Link Australia Service Office. This must be done by first obtaining a Return Material Authorization (RMA) number from the Authorized D-Link Australia Service Office.
DSL-504G ADSL Router User’s Guide Disclaimer Of Other Warranties: EXCEPT FOR THE LIMITED WARRANTY SPECIFIED HEREIN, THE PRODUCT IS PROVIDED “AS-IS” WITHOUT ANY WARRANTY OF ANY KIND INCLUDING, WITHOUT LIMITATION, ANY WARRANTY OF MERCHANTABILITY, FITNESS FOR A PARTICULAR PURPOSE AND NON-INFRINGEMENT. IF ANY IMPLIED WARRANTY CANNOT BE DISCLAIMED IN ANY TERRITORY WHERE A PRODUCT IS SOLD, THE DURATION OF SUCH IMPLIED WARRANTY SHALL BE LIMITED TO NINETY (90) DAYS.
CONTENTS About This User’s Guide..................................................................................................................................1 Before You Start ..............................................................................................................................................1 Installation Requirements.................................................................................................................................1 Introduction...................
Virtual Server .................................................................................................................................................37 Filters .............................................................................................................................................................39 Firewall ..........................................................................................................................................................41 Static Routing.
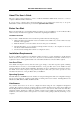
DSL-504G ADSL Router User’s Guide About This User’s Guide This user’s guide provides instructions on how to install the DSL-504G ADSL Router and use it to connect a computer or Ethernet LAN to the Internet. If you are using a computer with a functioning Ethernet port, the quickest and easiest way to set up the DSL-504G is to follow the instructions provided in the Quick Installation Guide.
DSL-504G ADSL Router User’s Guide Ethernet Port (NIC Adapter) Any computer that uses the Router must be able to connect to it through the Ethernet port on the Router. This connection is an Ethernet connection and therefore requires that your computer be equipped with an Ethernet port as well. Most notebook computers are now sold with an Ethernet port already installed. Likewise, most fully assembled desktop computers come with an Ethernet NIC adapter as standard equipment.
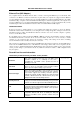
DSL-504G ADSL Router User’s Guide Information you will need about your DSL-504G ADSL Router: Username This is the Username needed access the Router’s management interface. When you attempt to connect to the device through a web browser you will be prompted to enter this Username. The default Username for the Router is admin. This may be changed by the user. Password This is the Password you will be prompted to enter when you access the Router’s management interface. The default Password is admin.
DSL-504G ADSL Router User’s Guide 1 Introduction This section provides a brief description of the Router, its associated technologies and a list of Router features. Router Description and Operation The DSL-504G ADSL Router is designed to provide a simple and cost-effective ADSL Internet connection for individual computers through the Ethernet ports, or use it to bridge your Ethernet LAN to the Internet.
DSL-504G ADSL Router User’s Guide Router Features The DSL-504G ADSL Ethernet Router utilizes the latest ADSL enhancements to provide a reliable Internet portal suitable for most small to medium sized offices. DSL-504G advantages include: • Data rates up to 8 Mbps for downstream and 864 Kbps for upstream • Friendly web-based graphical user interface for configuration and management • Supports up to eight simultaneous virtual connections for a single ADSL account • Supports T1.413 issue 2, G.
DSL-504G ADSL Router User’s Guide Front Panel Display Place the Router in a location that permits an easy view of the LED indicators on the front panel. The LED indicators on the front panel include the Power, Status, ADSL Link/Act and LAN (1-4) Link/Act indicators. The ADSL and Ethernet indicators monitor link status and activity (Link/Act). Power Steady green light indicates the unit is powered on. When the device is powered off this remains dark.
DSL-504G ADSL Router User’s Guide Rear Panel Connections All cable connections to the Router are made at the rear panel. Connect the power adapter here to power on the Router. Use the Reset button to restore the settings to the factory default values. ADSL port connect to ADSL line Ethernet ports connect to Ethernet cable Factory Reset button Power input connect to power adapter Using a power supply with a different voltage rating will damage and void the warranty for this product.
DSL-504G ADSL Router User’s Guide 2 Hardware Installation The DSL-504G maintains five separate interfaces, four Ethernet and one ADSL interface. Place the Router in a location where it can be safely connected to the various devices as well as to a power source. The Router should not be located where it will be exposed to moisture or excessive heat. Make sure the cables and power cord are placed safely out of the way so they do not create a tripping hazard.
DSL-504G ADSL Router User’s Guide Network Connections Network connections are provided through the ADSL port and the four Ethernet ports on the back of the Router. See the Rear Panel diagram above and the illustrations below for examples. Connect ADSL Line Use the ADSL cable included with the Router to connect it to a telephone wall socket or receptacle. Plug one end of the cable into the ADSL port (RJ-11 receptacle) on the rear panel of the Router and insert the other end into the RJ-11 wall socket.
DSL-504G ADSL Router User’s Guide Hub or Switch to Router Connection Connect the Router to an uplink port on an Ethernet hub or switch with a straight-through cable as shown in the diagram below: If you wish to reserve the uplink port on the switch or hub for another device, connect to any on the other MDI-X ports (1x, 2x, etc.) with a crossed cable. Power On Router To power on the Router: 1.
DSL-504G ADSL Router User’s Guide 3 Basic Router Configuration The first time you setup the Router it is recommended that you configure the WAN connection using a single computer making sure that both the computer and the Router are not connected to the LAN. Once the WAN connection is functioning properly you may continue change settings to suit your network. This chapter is only concerned with settings up the WAN connection.
DSL-504G ADSL Router User’s Guide Configure Windows XP for DHCP Use the following steps to configure a computer running Windows XP to be a DHCP client. 1. 2. From the Start menu on your desktop, go to click on Control Panel. In the Control Panel folder, click on Network and Internet Connections.
DSL-504G ADSL Router User’s Guide 3. 4. In the Network and Internet Connections folder, click on Network Connections. In the Network Connections folder, highlight the Local Area Connection icon by clicking on it once. A new option is revealed under Network Tabs in the left side panel.
DSL-504G ADSL Router User’s Guide 5. Click on Change settings of the connection under Network Tabs. 6. In the General Tab of the Local Area Connection Properties menu, highlight Internet Protocol (TCP/IP) under “This connection uses the following items:” by clicking on it once. Click on the Properties button.
DSL-504G ADSL Router User’s Guide 7. Select “Obtain an IP address automatically” by clicking once in the circle. Click the OK button. Your computer is now ready to use the Router’s DHCP server. Windows 2000 First, check for the IP protocol and, if necessary, install it: 1. In the Windows task bar, click the Start button, point to Settings, and then click Control Panel. 2. Double-click the Network and Dial-up Connections icon. 3.
DSL-504G ADSL Router User’s Guide Your computer is now ready to use the Router’s DHCP server. Windows 95, 98, ME First, check for the IP protocol and, if necessary, install it: 1. In the Windows task bar, click the Start button, point to Settings, and then click Control Panel. Double-click the Network icon. 2. The Network dialog box displays with a list of currently installed network components.
DSL-504G ADSL Router User’s Guide 4. In the Microsoft TCP/IP Properties dialog box, check the “Obtain an IP address automatically” option. 5. Click OK and OK again to confirm and save your changes. You will be prompted to restart Windows. 6. Click Yes and wait for your computer restarting and booting up again. Your computer is now ready to use the Router’s DHCP server.
DSL-504G ADSL Router User’s Guide Access the Web Manager Once the computer has IP settings that allow it to access the web-based configuration software, you can change the settings to enable the Router to connect to the Internet. If the browser software on the computer you are using is configured to use a proxy server for Internet access, it is necessary to first disable the proxy connection.
DSL-504G ADSL Router User’s Guide Click on a tab to view the menus available in that directory Click here to run the Setup Wizard to setup the Internet connection Click on a menu button to use or view the menu Web Manager – First Time Log On Using the Web Manager All configuration and management of the Router is done using the web-based management interface pictured in the above example. The various menus accessed by clicking on one of the directory tabs, Home, Advanced, Tools, Status and Help.
DSL-504G ADSL Router User’s Guide Using the Setup Wizard To use the Setup Wizard, click the Run Wizard button in the first browser window and follow the instructions in the pop-up window that appears. The first window summarizes the setup process. Click the Next button to proceed. You may stop using the Setup Wizard at any time by clicking the Exit button. If you exit the wizard you will return to the first page without saving any of the settings changed during the process.
DSL-504G ADSL Router User’s Guide Set the system time of the Router in Step 2. Choose the time zone you are in from the pull-down menu and click Next. If you wish to return to the previous menu during the setup process, click the Back button. In Step 3 you Select the Internet Connection Type for the WAN interface. Your ISP has given this information to you. If you do not know what type of connection to use, exit the Setup Wizard and contact your ISP for the information.
DSL-504G ADSL Router User’s Guide PPPoE/PPPoA Connections If you selected the PPPoE/PPPoA connection type in the previous menu, you will see the Setup Wizard menu pictured here. Type in the Username and Password used to identify and verify your account to the ISP. If you have been instructed to change the VPI number and VCI number, type in the new values. Select the Connection Type used for encapsulation specific to your service. Click Next when you are ready to proceed to the Setup Completed menu.
DSL-504G ADSL Router User’s Guide Static IP Address Connections If you selected the Static IP Address connection type, change the WAN IP Address, Subnet Mask, ISP Gateway Address and (if available) Secondary DNS Server IP address as instructed by your ISP. Select the Connection Type used for encapsulation. If you have been instructed to change the VPI number and VCI number, type in the new values. Click Next when you are ready to proceed to the Setup Completed menu.
DSL-504G ADSL Router User’s Guide Do not turn the Router off while it is restarting. When it is finished restarting the dialog box below appears. Click Exit to close the box and continue to configure the Router as desired.
DSL-504G ADSL Router User’s Guide Configure WAN Connection To configure the Router’s basic configuration settings without running the Setup Wizard, you can access the menus used to configure WAN, LAN, DHCP and DNS settings directly from the Home directory. To access the WAN Settings menu, click on the WAN link button on the left side of the first window that appears when you successfully access the web manager. The WAN Settings menu is also used to configure the Router for multiple virtual connections.
DSL-504G ADSL Router User’s Guide PPPoE and PPPoA Connection for WAN Most ADSL accounts will use either PPPoE or PPPoA type connections. Follow the instructions below to configure the Router to use a PPPoE or PPPoA for the Internet connection. Make sure you have all the necessary information before you configure the WAN connection. See the Record Your Account Information table in the first section of this manual for a summary of the information you will need. 1.
DSL-504G ADSL Router User’s Guide Bridged Connection for WAN For Bridged connections it will be necessary for most users to install additional software on any computer that will the Router for Internet access. The additional software is used for the purpose of identifying and verifying your account, and then granting Internet access to the computer requesting the connection. The connection software requires the user to enter the User Name and Password for the ISP account.
DSL-504G ADSL Router User’s Guide Dynamic IP Address for WAN Connection When the Router is configured to use Dynamic IP Address assignment for the WAN connection, a server on the ISP’s network assigns the global IP address settings used for the WAN connection. This is method is simply Dynamic Host Control Protocol (DHCP) for the WAN. The Router is configured to be a DHCP client and obtain its IP settings automatically for the DHCP server owned by the ISP.
DSL-504G ADSL Router User’s Guide Static IP Address for WAN Connection When the Router is configured to use Static IP Address assignment for the WAN connection, you must manually assign a global IP Address, Subnet Mask and Gateway IP Address used for the WAN connection. Most users will also to configure DNS server IP settings in the DNS Settings configuration menu (see below). Follow the instruction below to configure the Router to use Static IP Address assignment for the WAN connection.
DSL-504G ADSL Router User’s Guide LAN IP Settings You can configure the LAN IP address to suit your preference. Many users will find it convenient to use the default settings together with DHCP service to manage the IP settings for their private network. The IP address of the Router is the base address used for DHCP. In order to use the Router for DHCP on your LAN, the IP address pool used for DHCP must be compatible with the IP address of the Router.
DSL-504G ADSL Router User’s Guide DHCP Server Settings for the LAN The DHCP server is enabled by default for the Router’s Ethernet LAN interface. DHCP service will supply IP settings to workstations configured to automatically obtain IP settings that are connected to the Router though the Ethernet port. When the Router is used for DHCP it becomes the default gateway for DHCP client connected to it.
DSL-504G ADSL Router User’s Guide Use the Router for DHCP To use the built-in DHCP server, click to select the DHCP Server option if it is not already selected. The IP Address Pool settings can be adjusted so that up to 253IP addresses are available for use. The Starting IP Address is the lowest available IP address (default = 10.1.1.2). If you change the IP address of the Router this will change automatically to be 1 more that the IP address of the Router.
DSL-504G ADSL Router User’s Guide DNS Server Settings The Router is configured by default to act as a proxy for DNS service to workstations on your LAN. As a proxy DNS agent, the Router will relay DNS service to clients on the LAN. When the DNS Relay Selection is enabled, the DNS clients on the LAN will automatically get DNS settings relayed from the Router.
DSL-504G ADSL Router User’s Guide Save New Settings Any changes you have made to the must be saved to the Router’s memory and the device must be restarted for the settigns to take effect. To save settings you need to access the Miscellaneous Configuration menu. Click on the Tools directory tab then click the Misc menu button to view the menu pictured below. Save Settings and Restart the Router To save the new settings, click the Save and Reboot button.
DSL-504G ADSL Router User’s Guide 4 Advanced Configuration/Network Management This chapter introduces and describes the management features that have not been presented in the previous chapter. These include the more advanced features used for network management and security as well as administrative tools to manage the Router, view statistics and other information used to examine performance and for troubleshooting.
DSL-504G ADSL Router User’s Guide NAT Click on the NAT menu button to display the NAT and DMZ menu. This menu allows you to enable and disable Network Address Translation (NAT) system wide. Most users will leave the default NAT setting, Enabled. If NAT is Disabled, the DSL-504G will function essentially as a invisible bridge. Any LAN IP addresses will be readily visible to properly equipped agents on the WAN. If you are using multiple virtual circuits, NAT will be disabled for all PVCs.
DSL-504G ADSL Router User’s Guide Virtual Server A Virtual Server can allow remote users to access services on your LAN such as FTP for file transfers or SMTP and POP3 for e-mail. The DSL-504G will accept remote requests for these services at your Global IP Address, using the specified TCP or UDP protocol and port number, and then redirect these requests to the server on your LAN with the Private IP address you specify. Remember that the Private IP Address must be within the range specified for your LAN.
DSL-504G ADSL Router User’s Guide To configure a virtual server set, define the following settings in the Virtual Server configuration menu located in the top half of the browser window. NAT Network Address Translation (NAT) can be enabled or disabled system wide. Under certain circumstances it may be desirable to disable NAT, however this will render other router functions (such as DHCP) useless. Most users will leave NAT enabled.
DSL-504G ADSL Router User’s Guide Filters Filter rules in the Router are put in place to allow or block specified traffic. The Filter Rules however can be used in a single direction to examine and then Allow or Deny traffic for Inbound (WAN to LAN) or Outbound (LAN to WAN) routed data. The rules based on IP address and TCP/UDP port. Configure the filter rules as desired and click the Apply button to create the rule.
DSL-504G ADSL Router User’s Guide First determine the direction of the traffic you want the rule to filter. To filter WAN to LAN traffic, select the Inbound Filter option; notice that the Filter List at the bottom of the menu displays the Inbound Filter List. Any new Inbound Filter rules created will appear in the list. Likewise, should you choose to create an Outbound Filter rule, the Outbound Filter List of rules will appear at the bottom of the menu.
DSL-504G ADSL Router User’s Guide Firewall The Firewall Configuration menu allows the Router to enforce specific predefined policies intended to protect against certain common types of attacks. There are two general types of protection that can be enabled on the Router, as well as filtering for specific packet types sometimes used by hackers. Figure 4- 5.
DSL-504G ADSL Router User’s Guide Static Routing Use the Static Routing Table to specify a route used for data traffic within your Ethernet LAN or to route data on the WAN. This is used to specify that all packets destined for a particular network or subnet use a predetermined gateway. If the DSL-500G is the only routing device on your network and the only gateway to the Internet, you do not need to use static routing. However, for particular networking arrangements it may be desirable.
DSL-504G ADSL Router User’s Guide RIP The Router supports RIP v1 and RIP v2 used to share routing tables with other Layer 3 routing devices on your local network or remote LAN. If your network does not employ another IP routing device, it will not be necessary to enable RIP. Figure 4- 7. RIP menu RIP can be enabled on any existing WNA or LAN interfaces. It may be specified to receive RIP requests and reply to them, it can be specified to send RIP queries, or to both receive and send RIP packets.
DSL-504G ADSL Router User’s Guide ADSL Modulation Settings The default modulation technique used by the Router will automatically detect what ADSL protocol is used for your account. However it can be changed to any of the recognized standard modulations used for ADSL. Select the Modulation Type from the pull-down menu and click the Apply button to change the modulation. Figure 4- 8.
DSL-504G ADSL Router User’s Guide ATM VC The ATM Virtual Circuit connection menu is used to configure the WAN connection. If you are using multiple PVCs, you can change the configuration of any PVC in this menu. This menu can be used as an alternative menu to configure the same settings found on the WAN menu in the Home directory. Figure 4- 10.
DSL-504G ADSL Router User’s Guide Multiple Virtual Connections The Router supports multiple virtual connections. Up to eight PVCs to eight separate destinations can be created and operated simultaneously utilizing the same bandwidth. Additional PVC connections can be added for various purposes. For example, you may want to establish a private connection to remote office in order to create an extended LAN, or setup a server on a separate connection.
DSL-504G ADSL Router User’s Guide In the example below, a new VC (Pvc1) has been added using the WAN Settings menu. The connection is setup as a bridged connection. Figure 4- 12. Configure new VC The new VC appears listed in the ATM VC Setting menu located in the Advanced directory. Figure 4- 13. New VC listed in ATM VC Settings menu Any VC may be configured in the ATM VC menu by clicking the notepad icon for the PVC you want to configure.
DSL-504G ADSL Router User’s Guide Tools and Utilities Click the Tools tab to reveal the menu buttons for various functions located in this directory. These menus are used to change the system password used to access the web manager, to save or load Router configuration settings, upgrade the device firmware, save current configuration settings, restore default settings, and to perform miscellaneous actions such performing Ping tests. These menus are described below.
DSL-504G ADSL Router User’s Guide Configure System Time Use the Time menu to configure the Router’s system time manually or from an SNTP server or your computer’s system clock. Figure 4- 15. Time Settings Menu If you opt to use the Automatic option you must have an IP address of an available SNTP server. Date settings use the format Year/Month/Date, Time settings use the format Hour (24 hour clock)/ Minute/ Second. Click the Apply to set the Date and Time settings.
DSL-504G ADSL Router User’s Guide Save Router Configuration Settings When you have completed configuration of the Router, make sure you save the current configuration settings to flash memory or risk losing the settings. To save the current configuration settings, click the Misc. menu button to view the Miscellaneous Configuration menu and click the Save and Reboot button. The current settings will be saved to NV-RAM and the system will restart. Do not turn off the Router during this process.
DSL-504G ADSL Router User’s Guide Save Configuration File to PC Once you have configured the Router to your satisfaction, it is a good idea to back up the configuration file to your computer. Use the System Setting menu to save the existing configuration file to the hard drive of the system you are using to access the web manager. To save the system configuration file to your computer, click the Save button. You will be prompted to select a location on your computer to put the file. The file type is .
DSL-504G ADSL Router User’s Guide Firmware Upgrade Note Performing a Firmware Upgrade can sometimes change the configuration settings. Be sure to back-up the Router’s configuration settings before upgrading the firmware. Use the Firmware Upgrade menu to load the latest firmware for the device. Note that the device configuration settings may return to the factory default settings, so make sure you save the configuration settings with the System Settings menu described above. Figure 4- 18.
DSL-504G ADSL Router User’s Guide Router Status Information Use the various read-only menus to view system information and monitor performance. Device Information Display Use the Device Information window to quickly view basic current information about the LAN, WAN and Wireless interfaces. The basic information available in this window is summarized below.
DSL-504G ADSL Router User’s Guide ADSL Status Use the ADSL Status summary window for troubleshooting when problems occur with the ADSL connection. Figure 4- 20. ADSL Line Condition Log The log file keeps record of the events and activities occurring on the device. It can display up to 256 events. The latest activities will overwrite the outdated ones. When the device is rebooted, the logs are automatically cleared. Figure 4- 21.
DSL-504G ADSL Router User’s Guide The log menu buttons in this function as follow: First Page Display the first page of the log. Last Page Display the last page of the log. Previous Moves back one log page. Next Moves forward one log page. Clear Log Clears the logs completely. Save Log Save log file to your hard drive. Traffic Statistics The device keeps statistic of the data traffic that it handles.
DSL-504G ADSL Router User’s Guide A Technical Specifications GENERAL Standards & Protocols ITU G.992.1 (G.dmt) Annex A Classical IP over ATM (RFC1577) ITU G.992.2 (G.lite) Annex A DHCP Server (RFC2131) ITU G.994.1 (G.Hs) DHCP Client (RFC2131) ANSI T1.
DSL-504G ADSL Router User’s Guide Physical and Environmental DC Inputs: Input: 100V ~ 240V AC 50 ~ 60Hz Power Adapter: Output: 12V AC, 1.2A Power Consumption: 12 Watts (max) Operating Temperature: 0° to 40° C (32° - 104° F) Humidity: 5 to 95% (non-condensing) Dimensions: 180 x 141 x 30 mm Weight: 332 g EMI: CE Class B, FCC Class B (Part 15) Safety: CSA International Reliability: Mean Time Between Failure (MTBF) min.
DSL-504G ADSL Router User’s Guide B Low Pass Filters Most ADSL clients will be required to install a simple device that prevents the ADSL line from interfering with regular telephone services. These devices are low pass filters and are variously referred to as in-line filters, micro-filters, line splitters or split line filters. They are easy to install and use standard telephone connectors and cable.
DSL-504G ADSL Router User’s Guide Split Line Filter If you are instructed to use a split line style filter you must install the device between the Router and the phone jack. Use standard telephone cable with standard RJ-11 connectors. The splitter has three RJ-11 ports used to connect to the wall jack, the Router and if desired, a telephone or telephone device. The connection ports are typically labeled as follows: Line - This port connects to the wall jack. ADSL – This port connects to the Router.
Offices Australia D-Link Australia 1 Giffnock Avenue, North Ryde, NSW 2113, Sydney, Australia TEL: 61-2-8899-1800 FAX: 61-2-8899-1868 TOLL FREE (Australia): 1300-766-868 TOLL FREE (New Zealand): 0800-900-900 URL: www.dlink.com.au E-MAIL: support@dlink.com.au & info@dlink.com.
Registration Card Print, type or use block letters. Your name: Mr./Ms __________________________________________________________________________ Organization: ____________________________________________ Dept.