DSL-604+ 802.11b Wireless ADSL Router User’s Guide First Edition (November 2002) 6DSL604G..
DSL-604+ ADSL Ethernet Router User’s Guide Wichtige Sicherheitshinweise 1. Bitte lesen Sie sich diese Hinweise sorgfältig durch. 2. Heben Sie diese Anleitung für den spätern Gebrauch auf. 3. Vor jedem Reinigen ist das Gerät vom Stromnetz zu trennen. Vervenden Sie keine Flüssig- oder Aerosolreiniger. Am besten dient ein angefeuchtetes Tuch zur Reinigung. 4. Um eine Beschädigung des Gerätes zu vermeiden sollten Sie nur Zubehörteile verwenden, die vom Hersteller zugelassen sind. 5.
DSL-604+ ADSL Ethernet Router User’s Guide WARRANTY SERVICE MAY BE OBTAINED BY CONTACTING A D-LINK OFFICE WITHIN THE APPLICABLE WARRANTY PERIOD, AND REQUESTING A RETURN MATERIAL AUTHORIZATION (RMA) NUMBER. IF A REGISTRATION CARD FOR THE PRODUCT IN QUESTION HAS NOT BEEN RETURNED TO D-LINK, THEN A PROOF OF PURCHASE (SUCH AS A COPY OF THE DATED PURCHASE INVOICE) MUST BE PROVIDED.
DSL-604+ ADSL Ethernet Router User’s Guide LIMITATION OF LIABILITY IN NO EVENT WILL D-LINK BE LIABLE FOR ANY DAMAGES, INCLUDING LOSS OF DATA, LOSS OF PROFITS, COST OF COVER OR OTHER INCIDENTAL, CONSEQUENTIAL OR INDIRECT DAMAGES ARISING OUT THE INSTALLATION, MAINTENANCE, USE, PERFORMANCE, FAILURE OR INTERRUPTION OF A D- LINK PRODUCT, HOWEVER CAUSED AND ON ANY THEORY OF LIABILITY. THIS LIMITATION WILL APPLY EVEN IF D-LINK HAS BEEN ADVISED OF THE POSSIBILITY OF SUCH DAMAGE.
TABLE OF CONTENTS ABOUT THIS GUIDE ................................................................................................VII Before You Start .................................................................................................................................................. vii Requirements for Installation............................................................................................................................. viii PACKING LIST ....................................
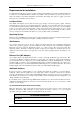
DSL-604+ ADSL Ethernet Router User’s Guide About This Guide Thank you for choosing the DSL-604+ Wireless ADSL Router. The DSL-604+ will provide your small office or home network with convenient Internet access, rapid download speeds, improved network efficiency and enhanced security. If you would like to set up the device quickly in order to verify that the ADSL connection to the WAN (wide area network) is working properly, please read the Quick Installation Guide included in the DSL-604+ package.
DSL-604+ ADSL Ethernet Router User’s Guide Requirements for Installation To install and use the Router you need a computer equipped with an Ethernet port (such as an Ethernet NIC) and a web browser. To establish the WAN connection to your ISP’s network, it will be necessary for most users to make some changes to the WAN configuration of the Router. This change may only be to supply a user name and password for your ISP account (see below).
DSL-604+ ADSL Ethernet Router User’s Guide About IPoA Connections (RFC 1577) IP over ATM connections may require global IP settings for the device. Your service provider will give you IP settings information if needed. Some IPoA connections function like peer-to-peer connections and therefore do not require IP settings on the WAN interface. Additional PVC Settings If you are using multiple virtual connections it will be necessary to provide additional VPI and VCI values for the device.
DSL-604+ ADSL Ethernet Router User’s Guide 1 Introduction This chapter describes the Router and it features and includes brief introduction to ADSL and 802.11b Wireless LAN. Front and rear panel diagrams are used to illustrate the LED indicators and cable connections. Router Description and Operation The DSL-604+ ADSL Router is designed to provide a simple, cost-effective and secure ADSL Internet connection for wired (Ethernet) and wireless (802.11b) stations on your network.
DSL-604+ ADSL Ethernet Router User’s Guide Static Routing This allows you to select a data path to a particular network destination that will remain in the routing table and never “age out”. If you wish to define a specific route that will always be used for data traffic from your LAN to a specific destination within your LAN (for example to another router or a server) or outside your network (to a ISP defined default gateway for instance).
DSL-604+ ADSL Ethernet Router User’s Guide Standards Compatibility and Compliance The DSL-604+ complies with or is compatible with the following standards as recognized by their respective agencies. • ITU G.994.1 (G.Hs Auto-handshake) compliant • ITU G.992.1 (G.dmt Full-rate ADSL) compliant • ITU G.992.2 (G.lite “Splitterless ADSL”) compliant • ITU-T Rec. I.361 compliant • ITU-T Rec. I.610 compliant • Compatible with all T1.
DSL-604+ ADSL Ethernet Router User’s Guide Front Panel LED Display Place the Router in a location that permits an easy view of the LED indicators on the front panel. The LED indicators on the front panel include the Power, Status, ADSL Link/Activity, and WLAN indicators. Each Ethernet LAN port displays a pair of indicators for monitoring connection speed (10M/100M), link status and activity (Link/Act). Power Steady green light indicates the unit is powered on.
DSL-604+ ADSL Ethernet Router User’s Guide Introduction to 802.11b Wireless The IEEE 802.11b standard is the most widely used standard for wireless LANs today. A wireless LAN (WLAN) is a cellular computer network that transmits data using radio signals instead of cables. WLAN technology is commonly used on home, small office and large corporate networks.
DSL-604+ ADSL Ethernet Router User’s Guide points can be set up using the same SSID so that wireless stations can move from one location to another without losing connection to the wireless network. The DSL-604+ operates in Infrastructure mode. It controls network access on the wireless interface in its broadcast area. It will allow access to the wireless network to devices using the correct SSID after a negotiation process takes place.
DSL-604+ ADSL Ethernet Router User’s Guide 2 Hardware Installation The DSL-604+ functions on three separate networks, a wired Ethernet LAN, a wireless LAN and a wired ADSL WAN. Placement of the Router must take into account the fact that it is connected to these three networks with three types of media. Ethernet cables connect the Router to computers and network devices and the ADSL line connects it to a wall socket. In addition, the device must be near an AC wall outlet for power.
DSL-604+ ADSL Ethernet Router User’s Guide Network Connection Complete the connection to the wired networks through the ADSL port and the Ethernet port on the back of the Router. See the diagram on page 4. Connect ADSL Line Use the ADSL cable included with the Router to connect it to a telephone wall socket. Plug one end of the cable into the ADSL port (RJ-11 receptacle) on the rear panel of the Router and insert the other end into the RJ-11 wall socket.
DSL-604+ ADSL Ethernet Router User’s Guide 3 Configuring the Router for the First Time The first time you setup the Router it is recommended that you configure the WAN connection using a single computer making sure that both the computer and the Router are not connected to the LAN. Once the WAN connection is functioning properly you may continue change settings to suit your network. This chapter is only concerned with settings up the WAN connection.
DSL-604+ ADSL Ethernet Router User’s Guide Configure Windows XP for DHCP Use the following steps to configure a computer running Windows XP to be a DHCP client. 1. 2. From the Start menu on your desktop, go to click on Control Panel. In the Control Panel folder, click on Network and Internet Connections.
DSL-604+ ADSL Ethernet Router User’s Guide 3. 4. In the Network and Internet Connections folder, click on Network Connections. In the Network Connections folder, highlight the Local Area Connection icon by clicking on it once. A new option is revealed under Network Tabs in the left side panel.
DSL-604+ ADSL Ethernet Router User’s Guide 5. Click on Change settings of the connection under Network Tabs. 6. In the General Tab of the Local Area Connection Properties menu, highlight Internet Protocol (TCP/IP) under “This connection uses the following items:” by clicking on it once. Click on the Properties button.
DSL-604+ ADSL Ethernet Router User’s Guide 7. Select “Obtain an IP address automatically” by clicking once in the circle. Click the OK button. Your computer is now ready to use the Router’s DHCP server. Windows 2000 First, check for the IP protocol and, if necessary, install it: 1. In the Windows task bar, click the Start button, point to Settings, and then click Control Panel. 2. Double-click the Network and Dial-up Connections icon. 3.
DSL-604+ ADSL Ethernet Router User’s Guide Windows ME First, check for the IP protocol and, if necessary, install it: 1. In the Windows task bar, click the Start button, point to Settings, and then click Control Panel. 2. Double-click the Network and Dial-up Connections icon. 3. In the Network and Dial-up Connections window, right-click the Network icon, and then select Properties. 4. The Network Properties dialog box displays with a list of currently installed network components.
DSL-604+ ADSL Ethernet Router User’s Guide Configure Windows 95, 98 for DHCP 1. Open the Control Panel window, and then click the Network icon. 2. Select the network component labeled TCP/IP, and then click Properties. 3. If you have multiple TCP/IP listings, select the listing associated with your network card or adapter. 4. In the TCP/IP Properties dialog box, click the IP Address tab. 5. Click the Obtain an IP address automatically option. 6. Double-click OK to confirm and save your changes.
DSL-604+ ADSL Ethernet Router User’s Guide Access the Configuration Manager Now that your computer’s IP settings allow it to communicate with the Router, you can access the configuration software. Be sure that the web browser on your computer is not configured to use a proxy server in the Internet settings. In Windows Internet Explorer, you can check if a proxy server is enabled using the following procedure: 1. In Windows, click on the START button, go to Settings and choose Control Panel. 2.
DSL-604+ ADSL Ethernet Router User’s Guide Figure 3- 2. Login to Router Note Do not confuse the user name and password used to access the web-based manager with the ADSL account user name and password needed for PPP connections to access the service provider’s network. Configure the Router The first page that appears after you successfully login displays the menu you need to configure the Router so it can connect to the Internet.
DSL-604+ ADSL Ethernet Router User’s Guide When the Router is used to provide Internet access it actually must first access your service provider’s network, that is, it must communicate with computers and other routers owned by your service provider. These computers and routers then provide access to the Internet. The Router must be configured to communicate with the systems that give it access to the larger network.
DSL-604+ ADSL Ethernet Router User’s Guide 4 Web-based Management Guide The DSL-604+ offers a web-based (HTML) graphical user interface allowing users to manage the Router from anywhere on the LAN using a standard browser, software such as Netscape Navigator or Microsoft Internet Explorer. The web browser is used for direct communication with the Router using HTTP protocol.
DSL-604+ ADSL Ethernet Router User’s Guide The Maintenance folder and Summary folder contain menus useful for system upkeep and analysis. These menus are described later in this chapter. Configuring the WAN Connection Use the Multiple PVC menu to configure the WAN interface for PVC settings and other settings used to configure the ADSL connection and the connection to the service provider’s network. Use this menu to add, change or delete PVC connection profiles if you have a multiple PVC account.
DSL-604+ ADSL Ethernet Router User’s Guide In the Multiple PVC configuration menu configure the WAN interface settings described in the table below. ALL CONNECTIONS MUST CONFIGURE: Select index to set Choose the index number you wish to modify or delete. Item Name Type in a new name for this profile.
DSL-604+ ADSL Ethernet Router User’s Guide Additional Virtual Connections (PVCs) The Router can use up to eight simultaneous PVC connections. These additional connections occupy the same bandwidth used for ADSL service. Additional PVC connections can be added to establish a private connection to remote offices or maintain a server accessible through the WAN port. Provision for additional PVC profiles must be done through the telephone company or telecommunications services company.
DSL-604+ ADSL Ethernet Router User’s Guide To add a PVC: 1. Type in an Item Name. This name may not be used for any other PVC profiles on the Router. 2. Type in a new VPI and VCI value. This combination may not be used for another PVC profile on the Router. 3. Select the Encapsulation method used for the new PVC. 4. For PPP connections (PPPoE or PPPoA), you must supply a new User Name and Profile.
DSL-604+ ADSL Ethernet Router User’s Guide Configuring LAN IP Settings Use this menu to change the Ethernet LAN IP address of the Router. You can also find the MAC address for the Router listed here. Figure 4- 3. Ethernet IP Address Menu The Ethernet IP Address displays the current LAN IP settings of the Router. To change the IP address, type in the new LAN IP Address in the space provided and select a Subnet Mask from the drop-down menu. Click on the OK button.
DSL-604+ ADSL Ethernet Router User’s Guide Wireless Configuration All 802.11b wireless network settings for the Router are configured on this page. The Router supports data rates of up to 22 Mbps when it is used with other D-Link AirPlus devices. The data rate is automatically determined and set to the highest possible rate. Basic Settings The two essential settings for wireless LAN operation are the SSID and Channel Number.
DSL-604+ ADSL Ethernet Router User’s Guide 128 Bit Hex Key: Choose the 128 Bit Hex Key option and define the 128 bit key. Enable the 128 bit key by selecting it and typing the key characters in the allotted spaces. If you have opted not to use a Passphrase, you can define the keys here by typing in 26 hexadecimal digits. Hexadecimal digits are defined as the numerical digits 0 – 9 and the letters A - F (upper and lower case are recognized as the same digit). Figure 4- 4.
DSL-604+ ADSL Ethernet Router User’s Guide MAC Access Control For added security you can opt to use Access Control based on MAC address. This feature lets you create a list of MAC addresses that are allowed or denied association with the Router through the wireless interface. When it is enabled, the access point is instructed to forward packets only from wireless devices only if the MAC address of the device is granted association.
DSL-604+ ADSL Ethernet Router User’s Guide Layer 2 Filtering The Layer 2 Filter function of the Router can be configured to drop a number of packets types as they are encountered on either interface. This is especially useful is the Router is configured to operate as a simple bridge. The packet types that can be filtered are the following: • ARP • PPPoE • IP Multicast • IPv6 Multicast • IP Broadcast (blocked by default) • RARP (blocked by default) • IPX • NetBEUI • Appletalk • IEEE 802.
DSL-604+ ADSL Ethernet Router User’s Guide Proxy DNS Settings You may use the Router to provide DNS services for work stations on your LAN. To configure on-board DNS, click on the Proxy DNS button. Figure 4- 6. Proxy DNS Menu The Proxy DNS Menu presents the following user defined parameters: Proxy DNS Choose enabled or disabled from the drop down menu to enable or disable the proxy DNS function. Default = enabled.
DSL-604+ ADSL Ethernet Router User’s Guide DHCP Configuration Us e the DHCP Configuration on LAN menu to configure the Router to act as a DHCP server for the LAN. Figure 4- 7. DHCP Configuration Menu Configure LAN DHCP services by defining the following parameters: Start IP Address Type in the base address for the IP pool of unassigned IP addresses. End IP Address Type in the last address of the contiguous IP address range to be used by the Router for DHCP function.
DSL-604+ ADSL Ethernet Router User’s Guide NAT Configuration Network Address Translation (NAT) is a routing protocol that allows your network to become a private network that is isolated from, yet connected to the Internet. It does this by changing the IP address of packets from a global IP address usable on the Internet to a local IP address usable on your private network (but not on the Internet) and vice-versa. The Router allows up to 128 host IP addresses. NAT has two major benefits.
DSL-604+ ADSL Ethernet Router User’s Guide DMZ IP Address NAT may conflict with certain interactive applications such as video conferencing or playing Internet video games. For these applications, a NAT bypass can be set up using a DMZ IP address. The DMZ IP address is a “visible” address and does not benefit from the full protection of the NAT function. Therefore it is advisable that other security precautions be enabled to protect the other computers and devices on the LAN.
DSL-604+ ADSL Ethernet Router User’s Guide IP Masquerade Timer The IP Masquerade Timer is used to control how frequently the IP Masquerade table is updated. The IP Masquerade table is used to map the internal LAN IP addresses to the external WAN global IP address used for your account. If you are familiar with Ethernet switching, you can think of the IP Masquerade Timer as being similar to a MAC address table timeout in a switch. Figure 4- 10.
DSL-604+ ADSL Ethernet Router User’s Guide Port Redirection Figure 4- 11. Port Redirection Menu The Port Redirection feature of the Router is used in conjunction with NAT or IP Masquerading to improve security and efficiency. Port redirection can be used to direct potentially hazardous packets to a proxy server outside your firewall. For example, you can configure the Router to direct HTTP packets to a designated HTTP server in the DMZ.
DSL-604+ ADSL Ethernet Router User’s Guide Port redirection is universally enabled or disabled for the Router with the Port Redirection State drop-down menu. The Existing Entry number tells you how many sets currently are configured. The Valid Entry number tells you the number of sets that are active. Index to Set When adding a new set, choose the Not selected option from the drop-down menu first. This will automatically add the next available index number to the new rule.
DSL-604+ ADSL Ethernet Router User’s Guide Static Route Configuration Use Static Routing to specify a route used for data traffic within your Ethernet LAN or to route data on the WAN. This is used to specify that all packets destined for a particular network or subnet use a predetermined gateway. The Existing Entry number tells you how many routes are currently configured. The Valid Entry number tells you the number of routes that are enabled. Figure 4- 12.
DSL-604+ ADSL Ethernet Router User’s Guide Advanced Filter & Firewall One of the most important elements of any network security implementation is the firewall. Packet filtering is a basic firewall security measure and should be used on any network that is exposed to security risk. A packet filter system examines data packets and scrutinizes them in order to control network access. Filtering rules determine whether packets are passed through the Router from either side of the gateway.
DSL-604+ ADSL Ethernet Router User’s Guide Define these variables for each filter rule: SELECT INDEX TO SET When adding a new rule, choose the Not selected option from the drop-down menu first. This will automatically assign the next available index number to the new rule. If you are deleting or modifying an existing rule, select it and click the appropriate button to the right. Item Name Name filtering rule defined here. State Select Enabled to start using the static route when it is applied.
DSL-604+ ADSL Ethernet Router User’s Guide RIP Use the RIP menu to enable RIP version 1, version 2 or both for any interface. You can further specify whether to enable RIP packets to be sent or accepted. RIP is disabled by default on all interfaces (sending and accepting RIP packets). Figure 4- 14. RIP Menu Select the Interface to configure for RIP and then select to RIP version 1 (V1), version 2 (V2) or Both for RIP packets sent from the Router (Send) or accepted by the Router (Accept).
DSL-604+ ADSL Ethernet Router User’s Guide Date & Time Settings The Router can use Network Time Protocol (NTP) to set system time and date accurately using a public or private NTP server. The function may be disabled if highly accurate time recording is not a priority. Figure 4- 15. Date & Time Configuration If you wish to use NTP to set system time and date following these steps: 1. Make sure NTP enabled is displayed in the NTP State drop-down menu. 2.
DSL-604+ ADSL Ethernet Router User’s Guide UPnP Universal Plug and Play (UPnP) is a feature that facilitates networking for a variety of devices and systems. UPnP allows enabled systems to be networked more easily. This feature is enabled by default. You can disable it in the UPnP Configuration menu by selecting disabled and clicking the OK button. Figure 4- 16.
DSL-604+ ADSL Ethernet Router User’s Guide System Maintenance The Mainatenance folder in the web mananger contains links to menus used for sytem maintenance functions including firmware upgarde and username/password configuration. ATM Loopback Test ATM loopback tests are used to verify connectivity and path integrity along a specified ATM circuit. In the test, a cell is sent to an endpoint or to the end of the first segment of the ATM path.
DSL-604+ ADSL Ethernet Router User’s Guide System Username and Password Use this screen to change the username and password used to access the Web Manager. The Web Manager can be accessed remotely from outside the LAN when it is functioning in router mode using the Remote Administration Access menu (described in a later section). Figure 4- 18. System User Name and Password Menu 1 Type the current User Name in the entry field provided. 2 Type in the current password in the Old Password entry field.
DSL-604+ ADSL Ethernet Router User’s Guide Factory Reset The DSL-504 can be reset to the default configuration for all settings using the Factory Reset option. This will also change the both the LAN and WAN IP address of the device, so these will need to be reconfigured accordingly. Figure 4- 20. Factory Reset Screen To perform a factory reset, click the Factory Reset button. Since the IP settings will return to their default, you will lose access to the Web Manager.
DSL-604+ ADSL Ethernet Router User’s Guide Configuration File Maintenance Use the Configuration File Maintenance store current settings to a file on your computer or to load previously saved configuration files on the device. Figure 4- 22. Configuration Maintenance Screen To save the current settings to a configuration file on your computer, click on the lower OK button, after the Backup configuration file option. The file will be saved as adslmodem.cfg or you can specify another name.
DSL-604+ ADSL Ethernet Router User’s Guide ADSL Line Setting If your ADSL connection is disconnected or the connection is faulty, you can try to reconnect using the ADSL Line Setting menu. The ADSL/Link LED Indicator will light green if you have a viable ADSL link. You can also look at the Summary statistics and Line Condition windows to diagnose problems with the ADSL connection. To reestablish the ADSL connection, click the Retrain button.
DSL-604+ ADSL Ethernet Router User’s Guide Summary Use the summary windows to monitor Router performance and troubleshoot the device. System Summary The main summary page displays key information about the WAN connection and various Router functions. Figure 4- 25. System Summary See the Summary description on the following page.
DSL-604+ ADSL Ethernet Router User’s Guide IP Address Configuration PPP Login Information WAN (PPP) Information PVC Connection Type IP Address Router LAN IP Address Subnet Mask Subnet Mask on LAN MAC Address Fixed Hardware ID of Router Login User Name User name used for PPP login Authentication Method used for PPP authentication IP Address WAN IP address used for account Connection Status WAN connection status VPI Virtual Path Identifier VCI Virtual Circuit Identifier MODE WAN Conne
DSL-604+ ADSL Ethernet Router User’s Guide DHCP Allocation Table The DHCP Allocation Table provides a summary of current IP setting allocation for the network. Figure 4- 26. DHCP Allocation Table Information listed in the DHCP Allocation Table includes the following: Index Index reference number for entry. MAC Address MAC address of computer or networked device. IP Address Assigned IP address of computer or networked device. Computer Name Name of computer or networked device.
DSL-604+ ADSL Ethernet Router User’s Guide Runtime Routing Table The Runtime Routing Table provides a summary of dynamic and static routing information for both the LAN and WAN interface. Figure 4- 28.
DSL-604+ ADSL Ethernet Router User’s Guide Figure 4- 30. Line Condition Disconnected - ADSL connection failure ADSL State Active - valid connection that currently transmitting packets Protocol Link Status Line Error Frame Counter Loop Distance Idle - valid connection currently not active Data Path Current data path type Fast or Interleaved Operation Mode Modulation technique used for ADSL connection, G.DMT or G.
DSL-604+ ADSL Ethernet Router User’s Guide Figure 4- 31. Carrier Chart This chart can be used to gauge signal quality for the entire upstream (lower portion) and downstream (upper portion) range of discrete modular tones. The example above displays normal signal function for the full range of frequencies.
DSL-604+ ADSL Ethernet Router User’s Guide A Technical Specifications GENERAL STANDARDS: PROTOCOLS: • ITU G.992.1 (G.dmt) • RFC 1661 (PPP) • • ITU G.992.2 (G.lite) ITU G.994.1 (G.Hs) • • RFC 1994 (CHAP) RFC 1334 (PAP) • • ITU-T Rec. I.361 ITU-T Rec. I.610 • • RFC 2364 (PPP over ATM) RFC 1631 (NAT) • IEEE 802.3 • • • IEEE 802.3u IEEE 802.
DSL-604+ ADSL Ethernet Router User’s Guide Physical and Environmental DC inputs: Input: 100V AC 50 - 60Hz 24W Power Adapter: Output: 7.5V DC 1.5 A Power Consumption: 12 Watts (max) Operating Temperature: 0° to 40° C (32° - 104° F) Humidity: 5 to 95% (non-condensing) Dimensions: 234.0 mm x 162.0 mm x 35.0 mm Weight: 500 grams EMI: FCC Class B, CE Class B Safety: CSA International Wireless Compatibility: Wi-Fi (To Be Defined) Reliability: Mean Time Between Failure (MTBF) min.
Offices Australia D-Link Australasia Unit 16, 390 Eastern Valley Way, Roseville, NSW 2069 Australia TEL: 61-2-9417-7100 FAX: 61-2-9417-1077 TOLL FREE (Australia): 1800-177100 TOLL FREE (New Zealand): 0800-900900 URL: www.dlink.com.au E-MAIL: support@dlink.com.au & info@dlink.com.au Level 1, 434 St.
Norway D-Link Norway Waldemar Thranesgt. 77, 0175 Oslo, Norway TEL: 47-22-991890 FAX: 47-22-207039 Russia D-Link Russia Michurinski Prospekt 49, 117607 Moscow, Russia TEL: 7-095-737-3389 & 7-095-737-3492 FAX: 7-095-737-3390 URL: www.dlink.ru E-MAIL: vl@dlink.ru Singapore D-Link International 1 International Business Park, #03-12 The Synergy, Singapore 609917 TEL: 65-774-6233 FAX: 65-774-6322 E-MAIL: info@dlink.com.sg URL: www.dlink-intl.
Registration Card Print, type or use block letters. Your name: Mr./Ms__________________________________________________________________________ Organization: ____________________________________________Dept.