D-Link AirPlus DWL-810+ 2.
Contents 1. Package Contents ............................................. 3 2. Introduction........................................................ 4 3. Wireless Basics ................................................. 7 4. Getting Started ................................................ 10 5. Web Configuration........................................... 12 6. Troubleshooting............................................... 18 8. Technical Specifications .................................. 24 9.
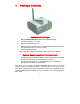
1. Package Contents Contents of Package: • • • • D-Link AirPlus DWL-810+ Ethernet-to-Wireless Bridge AC Power Adapter – 5V; 2.5A Manual and Warranty on CD Ethernet Cable (the DWL-810+ Auto MDI/MDIX Ethernet port works with straight-through or crossover cable) • Quick Installation Guide If any of the above items are missing, please contact your reseller. System Requirements for Configuration: • • A computer with an Ethernet adapter.
2. Introduction The D-Link AirPlus DWL-810+ Ethernet-to-Wireless Bridge is a device that can be implemented in a variety of ways to provide wireless access by converting an Ethernet connection. For devices with a built-in Ethernet port, the DWL-810+ provides a cost effective way to gain wireless connectivity, virtually transforming wired devices into wireless units! Connect any Ethernet-enabled device to an existing 802.11b wireless network using the DWL-810+.
Features and Benefits • • • • Transforms an Ethernet device into a wireless device Up to 22Mbps transfer rates* Fully compatible with standard 802.11b-compliant devices Equipped with one 10/100 Ethernet port, Auto-MDI/MDIX • Quick and Simple connectivity via Ethernet • Supports Ad Hoc or Infrastructure modes • Easy web-based configuration when changing settings • Encryption to provide a level of security for data transfers LEDs LED stands for Light-Emitting Diode.
Connections Ethernet Port – this RJ-45 Auto MDI/MDIX port provides Reset Button connection to a network device using a Cat 5 Ethernet cable. (The auto MDI/MDIX port accommodates either StraightThrough or Cross-Over cable and is auto-sensing.
3. Wireless Basics With the DWL-810+ you can provide instant wireless access to the LAN (Local Area Network) for Ethernet-enabled devices. With an Ethernet (CAT5) cable simply connect the DWL-810+ to the Ethernet port of a network device (such as a printer or web camera) to establish a wireless connection with another device equipped with a wireless network adapter set to Ad-Hoc mode.
Wireless Basics People use WLAN technology for many different purposes. Mobility - Productivity increases when people have access to data in any location within the operating range of the WLAN. Management decisions based on real-time information can significantly improve worker efficiency. Low Implementation Costs – WLANs are easy to set up, manage, change and relocate. Networks that frequently change, both physically and logically, can benefit from WLANs ease of implementation.
Wireless Basics The DWL-810+ is also compatible with the following D-Link AirPlus family of products: DWL-650+ Enhanced 2.4GHz Wireless Cardbus Adapter for laptop PCs DWL-520+ Enhanced 2.4GHz Wireless PCI card for desktop PCs DWL-900AP+ Wireless Access Point DI-614+ Wireless Router Standards - Based Technology The IEEE standard-based technology assures that this product is interoperable with existing compatible wireless technology.
Wireless Basics meters), at a 45-degree angle appears to be almost 3 feet (1 meter) thick. At a 2-degree angle it looks over 42 feet (14 meters) thick! Position Access Points and Adapters so that the signal will travel straight through a wall or ceiling (instead of at an angle) for better reception. 3. Building Materials can impede the wireless signal - A solid metal door or aluminum studs may have a negative effect on range.
Getting Started Setup #2: This example illustrates an Infrastructure setup. To connect the DWL-810+ to a wireless network with a wireless router or access point, please refer to the printed Quick Installation Guide included with the product. Web configuration is required to connect the DWL-810+ in Setup #2.
5. Web Configuration Before using the Web Configuration for the DWL-810+, please consider the following: You will need a JavaScript-enabled web-browser such as the Internet Explorer 6.0 or later, or the Netscape Navigator 6.0 or later. The computer that you are using for initial configuration must have an IP Address within the same range as the IP Address of the DWL810+. The DWL-810+ has a default IP Address of 192.168.0.30 with a subnet mask of 255.255.255.
Configuration Menu Whenever you want to configure your network or the DWL-810+, you can access the Configuration Utility by opening the web-browser and typing in the IP Address of the DWL-810+. The DWL-810+ default IP Address is shown below: • • Open the web browser Type in the IP Address of the Access Point http://192.168.0.30 (The IP Address shown in the example above is the default setting.
Configuration Menu Network This window displays the default settings of the DWL-810+. The default IP Address is 192.168.30. If you select Dynamic IP Address, you will obtain a dynamic IP Address from a DHCP server on your network. The Subnet Mask is 255.255.255.0. Input the IP Address of the Gateway (the router on your network.) Click Apply if you have made any changes. Operating Mode: Select Ad-hoc or Infrastructure. Infrastructure is the default setting.
Configuration Menu Channel: Channel 6 is the default channel. Input a new number if you want to change the default setting. All devices on the network must be set to the same channel to communicate on the network. WEP Encryption: Select Enable Encryption to use WEP (Wired Equivalent Privacy) on the network. All devices on the network, and the Access Point, must share the same WEP selection – either Enable or Disable, and they must share the same WEP key.
Configuration Menu Admin 1.5 Monday, December 30, 2002 Administrator Settings: Change your password in this window. Re-enter the new password to confirm. It can be up to 14 characters in length. Please keep a copy of your password in a safe place. Click Apply, if you have made any changes. System Settings: The current system settings can be saved as a file onto the local hard drive by clicking Save. The saved file can be loaded back on the DWL-810+ by clicking Browse.
Configuration Menu Help The Help window displays information about each window in the Configuration menu. When you change the settings in the Configuration menu, you will need to restart the DWL-810+ for the changes to take effect.
6. Troubleshooting This section provides solutions to situations that can occur during the installation and operation of the DWL-810+ Ethernet-to-Wireless Bridge. Read the following descriptions if you are having problems. 1. How do I assign a Static IP Address in Windows XP/2000? Please note that Residential Gateways/Broadband Routers will automatically assign IP Addresses to the computers on the network, using DHCP (Dynamic Host Configuration Protocol) technology.
How do I assign a Static IP Address in Windows XP/2000? (continued) • Right-click on Local Area Connections • Double-click Properties • Click on Internet Protocol (TCP/IP) • Click Properties • In the window below, select Use the following IP address • Input your IP address and subnet mask. (The IP Addresses on your network must be within the same range. For example, if one computer has an IP Address of 192.168.0.2, the other computers should have IP addresses that are sequential, like 192.168.0.
How do I assign a Static IP Address in Windows XP/2000? (continued) • IP Address: e.g., 192.168.0.2 • Subnet Mask: 255.255.255.0 • Default Gateway: Enter the LAN IP address of the wireless router. (D-Link wireless routers have a LAN IP address of 192.168.0.1) • Select Use the following DNS server address. Enter the LAN IP address of the Wireless Router. (D-Link wireless routers have a LAN IP address of 192.168.0.
How do I assign a Static IP Address in Macintosh OSX? (continued) • Select Built-in Ethernet in the Show pull-down menu • Select Manually in the Configure pull-down menu. • Input the Static IP Address, the Subnet Mask and the Router IP Address in the appropriate fields. • Click Apply Now 3. The DWL-810+ Ethernet-to-Wireless Bridge Power light is not on. • Check to see if the DWL-810+ Ethernet-to-Wireless Bridge power adapter is connected properly to a known good power outlet. 4.
Advanced Setup (optional) For advanced setup features, enter http://192.168.0.30 into your Internet browser and gain access to the web configuration of the DWL-810+. The advanced setup features can be used to change the LAN and wireless settings for your DWL-810+ Ethernet-to-Wireless Bridge. 5. I cannot connect to another wireless client in Ad-Hoc mode. • The DWL-810+ Ethernet-to-Wireless Bridge has a default SSID of default.
8. I cannot connect the DWL-810+ to my network. • Check that the LED indicators for the broadband modem are indicating normal activity. If not, there may be a problem with the broadband connection. • Check that the LED indicators on the wireless router are functioning properly. If not, check that the AC power and Ethernet cables are firmly connected.
• • If you are using 2.4GHz cordless phones, X-10 equipment or other home security systems, ceiling fans, and lights, your wireless connection will degrade dramatically or drop altogether. Try changing the Channel on your Router, Access Point and all other devices on the network to avoid interference. Keep your product away (at least 3-6 feet) from electrical devices that generate RF noise, like microwaves, Monitors, electric motors, etc. 8. Technical Specifications Standards: • IEEE 802.11 • IEEE 802.
• Outdoors – Up to 1,312 ft. (400m)* *Environmental factors may adversely affect range Modulation Technology: • PBCC – Packet Binary Convolutional Coding • DSSS – Direct Sequence Spread Spectrum • 11-chip Barker sequence Modulation Techniques: • PBCC (22Mbps/8.5db) • PBCC (11Mbps/4.5db) • CCK (11Mbps/8.5db) • PBCC (5.5Mbps/1.5db) • CCK (5.5Mbps/5.5db) • Barker (2Mbps/3db) • Barker (1Mbps/0db) Power Input: • External Power Supply, DC 5V, 2.
Safety & Emissions: • FCC • UL Dimensions: • L=3.5 inches (90mm) • W=3.2 inches (82mm) • H=1.6 inches (40mm) Weight: • 0.34 lbs (153g) Warranty: • 3 Year 9. Contacting Technical Support You can find the most recent software and user documentation on the D-Link website. D-Link provides free technical support for customers within the United States for the duration of the warranty period on this product. U.S. customers can contact D-Link technical support through our web site, or by phone.
10. Warranty and Registration Subject to the terms and conditions set forth herein, D-Link Systems, Inc. (“D-Link”) provides this Limited warranty for its product only to the person or entity that originally purchased the product from: D-Link or its authorized reseller or distributor and Products purchased and delivered within the fifty states of the United States, the District of Columbia, U.S. Possessions or Protectorates, U.S. Military Installations, addresses with an APO or FPO.
The original product owner must obtain a Return Material Authorization (“RMA”) number from the Authorized D-Link Service Office and, if requested, provide written proof of purchase of the product (such as a copy of the dated purchase invoice for the product) before the warranty service is provided.
Governing Law: This Limited Warranty shall be governed by the laws of the State of California. Some states do not allow exclusion or limitation of incidental or consequential damages, or limitations on how long an implied warranty lasts, so the foregoing limitations and exclusions may not apply. This limited warranty provides specific legal rights and the product owner may also have other rights which vary from state to state. Trademarks: D-Link is a registered trademark of D-Link Systems, Inc.