93
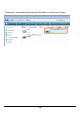
Highlight the printer, as shown. If the desired printer is not on the list, click Have Disk and insert the printer driver disk that came with your printer to install the printer drivers.
Click Next to start installing the printer.
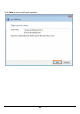
After clicked Print a test page, a small dialogue box will show up as below. Click Close.
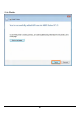
Click Finish.
The printer is now ready for printing with Windows Vista on your network.
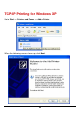
TCP/IP Printing for Windows XP Go to Start => Printers and Faxes => Add a Printer. When the following screen shows up, click Next.
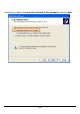
Select the first option, Local printer attached to this computer, and click Next.
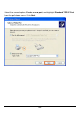
Select the second option, Create a new port, and highlight Standard TCP/IP Port from the pull-down menu. Click Next.
Click Next.
Type the IP address of the MFP server (e.g. 10.62.31.15 used in this manual), which can be referred from the PRINTER SERVER STATUS of the MFP server’s Web configuration, and then the Port Name will automatically be filled in.
Select Custom and click Settings.
Then the follow screen will shows up, select LPR from the Protocol field. Then enter the Queue Name, which can be referred from PRINTER STATUS of the MFP server’s Web configuration, in the LPR Settings field. Click OK.
106
Click Next.
Click Finish.
Highlight the printer, as shown. If the desired printer is not on the list, click Have Disk and insert the printer driver disk that came with your printer to install the printer drivers.
At this screen, you can input a name for the printer, and then click Next 110
Select Yes to print a test page, click Next. Click Finish. The printer is now ready for printing with Windows XP on your network.
112
TCP/IP Printing for Windows 2000 Go to Start => Settings => Printers and Faxes => Add a Printer. When the following screen shows up, click Next.
Select the first option, Local printer attached to this computer, and click Next.
Click Next if New Printer Detection page pops up. Select the second option, Create a new port, and highlight Standard TCP/IP Port from the pull-down menu. Click Next.
Click Next.
Type the IP address of the MFP server (e.g. 10.62.31.15 used in this manual), which can be checked from the PRINTER SERVER STATUS of the MFP server’s Web configuration, and then the Port Name will automatically be filled in.
Select Custom and click Settings.
Then the follow screen will shows up, select LPR from the Protocol field. Then enter the Queue Name, which can be referred from PRINTER STATUS of the MFP server’s Web configuration, in the LPR Settings field. Click OK.
120
Click Next.
Click Finish.
Highlight the printer, as shown. If the desired printer is not on the list, click Have Disk and insert the printer driver disk that came with your printer to install the printer drivers. Click Next.
At this screen, you can input a name for the printer, and then click Next 124
Select the first option, Do not share this printer, and click Next.
Select Yes to print a test page, click Next.
Click Finish. The printer is now ready for printing with Windows 2000 on your network.
TCP/IP Printingfor Windows 98SE/ME Go to Start => Settings => Control Panel. Double click on Network, and then click Add.
Highlight Client and click Add. At this window, click Have Disk.
1. Insert the DPP-1061 CD-ROM into your CD-ROM drive. Select the letter representing the CD-ROM drive on your computer from the pull-down menu. 2. Double-click on the folder lpr. 3. Highlight lpr.inf 4. Click OK. Click OK to accept the location of the file.
You should now be back to the Network Properties Page. Highlight LPR for TCP/IP Printing and click Properties.
Click Add Port.
Type in the IP address and Port Name of the MFP server, which can be referred from the PRINTER SERVER STATUS and PRINTER STATUS of the MFP server’s Web configuration, in the corresponding field, and then click OK. (The IP Address and Port Name here are just for example only.
134
The IP Address and Port Name will be displayed in the following screen. (The IP Address and Port Name here are just for example only.) Click OK.
Click OK.
Windows will ask for a restart. Click Yes. Once your computer has rebooted, click on Start => Settings => Printers => Add Printer. When the Add Printer Wizard screen appears, click Next.
Select Network Printer and click Next. Type in the path if you know it; otherwise, click Browse.
At the following screen, browse for the printer port and highlight the port (e.g. dlink-1D6FA3 in this manual). Click OK.
If the network path is not specified, type in the IP Address and Port Name of the MFP server. Select Yes or No to enable or disable printing from MS-DOS based programs. Click Next.
Highlight the printer, as shown. If the desired printer is not on the list, click Have Disk and insert the printer driver disk that came with your printer to install the printer drivers. Click Next.
Click Next. Select Yes to print a test page. Click Finish.
To check whether the printer is installed, go to Start => Settings => Printers.
Unix/Linux Printing Printing Text Files form Unix Text files on Unix systems contain lines that end with “newline” characters, as opposed to MS-DOS and Windows-related operating systems that end with a carriage return followed by a linefeed. Most printers require a carriage return/linefeed pair at the end of each line, making it necessary for some translation to be done before Unix text files can be printed on most printers.
Printing form BSD Unix Versions For “flavors” of the Unix operating system derived from or related to the BSD releases, such as SunOS 4.x, Linux, BSD/OS, FreeBSD, or NetBSD, you can use the following procedure to enable users to print to a printer connected to your D-LINK network print server: 1. Log in as the superuser (root). 2. Add an entry for the print server in the host’s /etc/hosts file, giving a hostname for the print server’s IP address.
chown bin.daemon /var/spool/hp5l chmod 775 /var/spool/hp5l 5. Add an entry for the printer to /etc/printcap, similar to the following: hp5l:\ :lp=:sd=/var/spool/hp5l :mx#0:\ :rm=ps-142634:rp=ps-142634-p1: The meaning of each of the entries is described below. The directory path in the ✍✝✎ spool directory entry should match the directory name you created above. If your entry requires more than one line you can escape the newline with a backslash. 6.
0 means no limit. rm=address The host where the remote printer is located, in this case ✏ the D-Link print server. ✏ rp=printer The name of the printer on the remote host. For the D-Link print server, the port name should be used. Note: this entry is case-sensitive.
Printing from SCO Unix System V/386 To allow printing to a printer attached to your D-LINK network print server from a SCO Unix System V/386 host. 1. Login as the superuser (root). 2. Add an entry for the print server in the host’s /etc/hosts file, giving a hostname for the print server’s IP address. A line in /etc/hosts contains an IP address and one or more aliases for the host. For example: 202.39.74.40 ps-142634 ps-142634.dlink.com.
Enter an alias for the printer on the local machine and press Enter. This name should be the same as the destination port name. 7. Answer r (remote printer) to the question Is printer a remote printer or a local printer (r/l)? 8. When prompted with the question: Please enter the name of the remote host that printer is attached to: then enter the address of the D-Link print server. You can use the name you added to /etc/host in the step above. 9. Confirm that your entries are correct.
Printing from Solaris To allow printing from a Sun Solaris workstation, 1. Log in as the superuser (root). 2. Add an entry for the print server in the host’s /etc/hosts file, giving a hostname for the print server’s IP address. A line in /etc/hosts contains an IP address and one or more aliases for the host . For example: 202.39.74.40 ps-142634 ps-142634.dlink.com.tw If you use DNS (the Domain Naming Services protocol), you can add an address record entry to your DNS database for the print server. 3.
Printing from Red Hat Linux Adding a Printer 1. Click the printer icon at the bottom of the desktop. 2. Since no printer is set up so far, a prompt appears asking to run the printer configuration tool.
3. Click the OK button in the pop-up dialogue box to open the man Printer configuration tool menu. Note that to use the Printer configuration tool you must have root privileges, and to start the application you may also type the command: “redhat-config-printer”. 4. Click the New button in the Printer configuration tool menu.
Printer Configuration Tool menu 5. The Add a new print queue menu appears, click Forward to continue.
6. Enter a unique name for the printer in the Name text field. The printer name cannot contain spaces and must begin with a letter. The printer name may contain letters, numbers, dashes (-), and underscores (_). Optionally, enter a short description for the printer, which can contain spaces. Then click Forward to enter Queue type window. 7.
8. Select the printer model.
If a printer has not been detected automatically, select the model from the list. You can manually select the name of the printer manufacturer from the Generic (click to select manufacturer) pull-down menu, and the printer model from the sub-list. Click Forward to continue. 9. The last step is to confirm your printer configuration. Click Apply button to confirm or Back button to modify the configuration.
10. Print a test page to make sure the printer is functioning properly. To print a test page, select the printer from the printer list, then select the appropriate test page from the Test drop-down menu.
Setting up Printing in Mac OS X Tiger(10.4.9) NOTE: Mac OS printing is supported by Postscript printers only! With Mac OS X Tiger (10.4), you can use Apple Talk, Bonjour, Internet Printing Protocol (IPP), Line Printer Daemon (LPD), and HP Jet Direct-Socket printing through Print Server. Click on this icon in your Dock to open your System Preferences window as below. Click on the Network icon in System Preferences menu to view the menu below.
Select the Apple Talk tab in the Network menu. Check to select the Make Apple Talk Active option. Click on the Apply Now button and close the menu. Apple Talk is now active on the system. Now a printer can be added. Adding a Printer Use the Go menu at the top tool bar and select Applications option and find the Utilities folder or open the Utilities folder directly in Go menu.
In the Utilities folder, find and select to see the Printer List dialog window.
Click Add button to open Printer Browser window. Mac OS X Tiger (10.4) supports five printing protocols: 1. AppleTalk 2. Bonjour 3. Internet Printing Protocol (IPP) 4. Line Printer Daemon (LPD) 5. HP Jet Direct – Socket To add an Internet Printing Protocol enabled, Line Printer Daemon enabled or HP Jet Direct – Socket enabled printer, click on the button and follow the instructions to add an IP Printer beginning on “Adding an IP printer” session.
AppleTalk-enabled or Bonjour-enabled Printers To add an AppleTalk-enabled or Bonjour-enabled printer, click the button in the Printer Browser menu. Select the printer model from Printer Name list and Connection type in the Printer Browser menu. The printer name selected should be the same as that appearing listed in the Printer Server’s web manager.
dlk-C352AB-U1. By default the Printer Browser will use the Auto Select for Print Using: to determine what printer configuration to use. This may also be manually selected in the Print Using drop-down menu by brand and model. Click the Add button to exit the Printer Browser window and implement the new setting.
The printer that has just been added will show up in the Printer List menu, it might take a few seconds depending on network conditions. When the printer appears listed it is ready for use. Quit the Printer Setup Utility and start printing.
Adding an IP Printer To add an Internet Printing Protocol enabled, Line Printer Daemon enabled or HP Jet Direct – Socket enabled printer, click the button in the Printer Browser window. Select a desired printing protocol from the Protocol drop-down menu.
Type the IP Address of the printer. The name will appear in the Name field when the printer is found. The Printer Browser will indicate that it is verifying the address. If the printer is found, the Printer Browser will state “Valid and complete address” in the Address field. The printer utility is able to detect the printer and may automatically select the correct printer driver in the Print Using field.
For set up LPD Printing: 1. Enter the IP address of the print server to which the printer is attached in Address field. 2. Type the port name in the Queue field. Click Add button after done the section of printer model in the Print Using drop-down menu. For set up IPP Printing: 1.
Address field. After that, type “: 80” or “: second port” if print server’s second port is enabled. 2. Type the port name in the Queue field. Click Add button after done the section of printer model in the Print Using drop-down menu. For set up Socket Printing: 1. Enter the IP address of the print server to which the printer is attached in Address field.
for port 3. 2. Keep the blank in Queue field. Click Add button after done the section of printer model in the Print Using drop-down menu.
When the Installable Options pop-up window shows up as below, click Continue button. The printer that has just been added will show up in the Printer List menu, it might take a few seconds depending on network conditions. When the printer appears listed it is ready for use. Quite the Printer Setup Utility and start printing.
171
Setting up AppleTalk Printing in Mac OS 9 : Mac OS printing is supported by Postscript printers only! The AppleTalk network protocol is used with computers using the MacOS operating system. It can be used for network communications over standard Ethernet or Fast Ethernet using the EtherTalk transport, or over a proprietary low-speed LocalTalk transport. MFP server can be used for network printing to PostScript printers.
For each Printer Port that will be used for AppleTalk printing, you may need to change the AppleTalk Port Settings in the Advanced LAN screen, shown as below. AppleTalk Enter the AppleTalk Zone name in the box. In the following options, enter the related configuration, such as the printer type. Chooser Name: Display the print server's port name. Printer Type: Enter the printer's type in this box. PostScript Level: Select from the pull-down menu (Level 1 or Level 2).
Font Group: Select from the pull-down menu. The exact procedure for selecting a PostScript printer connected to MFP server may vary slightly, depending on what printer driver version you are using. The procedure described below assumes you are using the LaserWriter 8. To choose a printer connected to MFP server as your MacOS workstation‘s default printer, open the Chooser by selecting Chooser from the Apple menu. Select the LaserWriter 8 icon on the left. Make sure that AppleTalk is set to Active.
Select the appropriate printer description file for your printer. Click Open. (If your printer is not listed, click Generic to use a generic printer description.) If you wish to access this setting in the future, you can use the Setup button in the Chooser window. The selected printer will become your computer‘s default printer. You may need to choose Page Setup in any applications you have open.
Technical Specifications Printer Connection Printer Port: USB 2.0 Bi-directional Communication: Hewlett-Packard PJL (Printer Job Language) standard for bi-directional communication. Network Connection Network Standards: 100Base-TX Fast Ethernet Network Data Transfer Rate: 10/100 Mbps (megabits per second) Network Connector: RJ-45 Network Protocols Ethernet Frame Types: 802.2, 802.
Contacting Technical Support 181 Warranty and Registration Subject to the terms and conditions set forth herein, D-Link Systems, Inc. (—D-Link“) provides this Limited warranty for its product only to the person or entity that originally purchased the product from: D-Link or its authorized reseller or distributor and Products purchased and delivered within the fifty states of the United States, the District of Columbia, U.S. Possessions or Protectorates, U.S.
for the defective Hardware will be refunded by D-Link upon return to D-Link of the defective Hardware. All Hardware (or part thereof) that is replaced by D-Link, or for which the purchase price is refunded, shall become the property of D-Link upon replacement or refund.
customer shall submit a claim to D-Link as outlined below: The customer must submit with the product as part of the claim a written description of the Hardware defect or Software nonconformance in sufficient detail to allow D-Link to confirm the same.
misuse, faulty installation, lack of reasonable care, repair or service in any way that is not contemplated in the documentation for the product, or if the model or serial number has been altered, tampered with, defaced or removed; Initial installation, installation and removal of the product for repair, and shipping costs; Operational adjustments covered in the operating manual for the product, and normal maintenance; Damage that occurs in shipment, due to act of God, failures due to power surge, and cosme
PRODUCTRETURNED TO D-LINK FOR WARRANTY SERVICE) RESULTING FROM THE USE OF THE PRODUCT, RELATINGTO WARRANTYSERVICE, OR ARISING OUT OFANY BREACH OF THIS LIMITED WARRANTY, EVEN IF D-LINKHAS BEEN ADVISED OF THE POSSIBILITY OF SUCH DAMAGES. THE SOLE REMEDY FOR A BREACH OF THE FOREGOING LIMITED WARRANTY IS REPAIR, REPLACEMENT OR REFUND OF THE DEFECTIVE OR NON-CONFORMING PRODUCT. THE MAXIMUM LIABILITY OF D-LINK UNDER THIS WARRANTY IS LIMITED TO THE PURCHASE PRICE OF THE PRODUCT COVERED BYTHE WARRANTY.
radiofrequency energy and, if not installed and used in accordance with the instructions, may cause harmful interference to radio communication. However, there is no guarantee that interference will not occur in a particular installation.
NCC Warning Statement Article 12 Without permission, any company, firm or user shall not alter the frequency, increase the power, or change the characteristics and functions of the original design of the certified lower power frequency electric machinery.