
Operating instructions


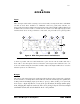


D.W. FEARN
VT-1 &
VT-2 Microphone Preamplifers
27
cate 0 on the meter. This is the standard “0 VU” level for all professional audio recording
equipment built since t
he early 1
970s. “0 VU” on t
he VT-2 should result in “0 VU” on a prop-
erly aligned recorder. (This reference level can be changed; see the Maintenance Section.)
This is a tr
ue VU meter
, and conf
or
ms to ASA Standard C16.5-1954.
In some applications, or while testing the VT-2, the output level may be considerably higher
t
han 0 VU. To prevent damage to the meter, it should be turned off under these conditions,
using t
he Meter switch (5). This switch has no ot
her effect on the operation of the VT-2.
Occasional meter pinning will not damage the meter.
Benc
h Test
If desir
ed, test the VT-2 before installation. The source generator should be set to -50 dBm,
150 ohms impedance, balanced, and the output should feed a balanced bridging input of the
audio analyzer. Measured bandwidth should be 22 cps to 22 kc to obtain the same readings
as t
he f
actory test results. Compare your measurements with the test data supplied with VT-
2. Keep the results for comparison in future maintenance tests.
Initial Set-Up
The VT-2 should be installed as detailed in the Installation section. With the outputs connect-
ed to an appr
opriate destination (typically to audio r
ecorder inputs), configure the studio to
monitor the VT-2 output. Apply power and wait about twenty seconds for the tube filaments
to g
et up to temperature. Check for hum, buzz, or other noise. For the first few minutes after
a cold start it is not unusual for the VT-2 to produce hiss, pops, and microphonic “clanks” as
the internal elements of the tubes expand from the heat. Correct any ground loop problems
bef
or
e proceeding.