User Manual Modernist Built-In Microwave Combi Oven DOC30M977D Part No.
To Our Valued Customer: Congratulations on your purchase of the very latest in Dacor® products! Our unique combination of features, style, and performance make us a great addition to your home. To familiarize yourself with the controls, functions and full potential of your new Dacor combi oven, read this manual thoroughly, starting at the Before you begin section. Dacor appliances are designed and manufactured with quality and pride, while working within the framework of our company values.
Regulatory Notice Precautions to avoid exposure to excessive microwave energy A. Do not place anything between the chassis face and door, or let soil/cleaner residue collect on the seal. B. Do not operate the microwave if it is damaged. It is critical that the door close properly and that there is no damage to the: 1. Door (bent), 2. Hinges and latches (broken or loose), 3. Door seals and sealing surface. C. The microwave should only be adjusted/repaired by qualified service personnel. 1.
Regulatory Notice FCC STATEMENT: This equipment was tested and found compliant within the limits for a Class B digital device, pursuant to Part 15 of FCC Rules. These limits are designed to provide reasonable protection against harmful interference in a residential installation. This equipment generates, uses, and can radiate radio frequency energy, and, if not installed and used as instructed, may interfere with radio communications.
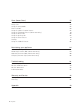
Contents Important safety information 7 Introducing your new oven 15 Overview What’s included with your oven 15 16 Before you begin 17 Energy saving tips Optitray (For microwave oven) Water reservoir 17 17 18 Basic operations 19 Control panel Microwave Display (Oven) Control lockout Kitchen timer 19 19 20 21 22 Microwave oven (Upper Oven) 25 25 25 27 28 29 30 31 32 35 38 39 40 43 51 English 5
Oven (Lower Oven) 53 Timed cooking Delay start Using the temp probe Oven functions Using the special function feature Using the iQ control feature (Lower oven only) Using the oven racks Using the gliding rack Using the clean feature Settings Using the Sabbath feature 53 54 56 58 63 67 68 69 71 79 82 Maintaining your appliance 84 Care and cleaning of the oven Removing the oven door (Lower oven only) Replacing the oven door (Lower oven only) Changing the oven light (Lower oven only) 84 87 88 89 Troubl
Important safety information To avoid fire, electric shock, and personal injury, read this guide thoroughly before using the oven. Contact your service agent or the manufacturer about issues you cannot resolve. What you need to know about safety instructions The warnings and important safety instructions in this manual do not cover all conditions that may occur. Use common sense and caution in maintaining and operating your oven.
State of California Proposition 65 warning (US only) WARNING :This product contains chemicals known to the State of California to cause cancer and birth defects or other reproductive harm. WARNING To reduce risk of electric shock, fire, injury, or exposure to excessive microwave energy: • • • • • • • • • • • • • • • • • • • • Read all safety instructions before using the appliance. Read and follow Precautions to avoid exposure to excessive microwave energy, pg. 3.
Important safety information • Water, milk, coffee, tea, etc. can be "superheated" (heated beyond the boiling point without bubbling). THIS COULD RESULT IN VERY HOT LIQUIDS SUDDENLY BOILING OVER WHEN THE CONTAINER IS DISTURBED OR A UTENSIL IS PUT IN THE LIQUID. To reduce the risk of injury: – Do not overheat liquid. – Stir liquid before and halfway through heating. – Do not use straight-sided, narrow-necked containers. – After heating, leave liquids in the microwave briefly before removing.
Important safety information • • • • • • • • • • • • • Do not leave children unattended around the combi when it is in use. Do not use the combi as a space heater. Do not use water on grease fires. Turn off the oven, and smother the flames by closing the door or use a dry-chemical, baking-soda, or foam-type extinguisher. Avoid scratching/striking the glass doors and control screen. Do not use the oven if the glass is broken.
Important safety information WARNING Turn off the combi before replacing the lamp to avoid possible electric shock. Child safety WARNING • • • Young children should not use the combi without supervision by a responsible adult. Do not let children play with any part of the combi. Keep children away when opening or closing the door to avoid possible injury. During self-cleaning, the surfaces may get hotter than usual. Do not let children near the combi during self-cleaning mode.
Important safety information Cleaning the oven Do not clean the door gasket. The gasket keeps heat from escaping the oven chamber. Do not rub, damage, or move the gasket. • • • • Birds are sensitive to the fumes released during an oven self-clean cycle. During self-cleaning, move birds to a well-ventilated room. Before a self-cleaning cycle, remove all accessories and food, then wipe up any residue to prevent possible smoke and fire during the cycle.
Important safety information Critical usage warning CAUTION • • • • • • • • • • • • • • • • • • • • • • If the combi is flooded, contact your Dacor service center. Flooding is an electric-shock or fire hazard. If the emits a strange noise, burning smell, or smoke, remove power at the circuit breaker immediately, and contact a Dacor service center. Do not touch the oven door, heating element, or other hot surfaces during or just after cooking.
Important safety information Usage cautions CAUTION • • • • • • • • • • • • • • If the combi exterior is cracked, turn it off to avoid electric shock. Remove lids from baby-food jars before heating. Afterward, stir to distribute the heat evenly. Always taste the food for hotness before feeding the baby. Stir drinking liquids during and after heating. Avoid heating a slippery container with a narrow neck.
Introducing your new oven Overview 07 01 02 08 03 09 02 10 05 04 08 06 11 01 Control panel 05 Oven gasket 09 Halogen lamp 02 Door latch 06 Oven door 10 Water reservoir 03 MWO door 07 LED lamp 11 Rack support 04 Door LED light 08 Convection fan English 15
What’s included with your oven This oven ships with different kinds of accessories that help you cook what you want.
Before you begin Before using the top and bottom ovens for the first time, remove all the accessories, and then clean the ovens thoroughly. Then, set the lower oven to Bake, and run it at 400 °F for 1 hour. Next, set the microwave (top) oven to Power Convection, and then run it at 400 °F for 1 hour. There will be a distinctive odor. This is normal. Ventilate your kitchen well during this conditioning period. Energy saving tips • Keep the oven door closed except to turn food.
Before you begin Water reservoir This feature is for Steam Bake, Steam Roast, and GreenClean™ modes, and for removing water scale that forms on the oven walls after using these three modes. Fill the reservoir before steam cooking or descaling. The reservoir is on the oven's right side above the oven chamber. 1. Open the oven door, and on the control screen, touch Open/Close Reservoir. The reservoir ejects. Pull it from the oven. 2.
Basic operations Control panel 01 MICROWAVE 02 PAUSE/OFF 03 TIMER 04 SETTINGS LOWER OVEN 05 OFF 06 LIGHT 07 OPEN/CLOSE RESERVOIR 08 09 01 MICROWAVE: Touch to display Microwave functions (does not turn the oven on/off). 02 PAUSE/OFF: Touch to pause/cancel cooking in the microwave oven. 03 TIMER: Touch to display the set Timer functions. 04 SETTINGS: Touch to display oven-settings options. (Touch-hold for 3 seconds to disable oven functions.
02 03 04 05 Page Indicator: Shows location of current mode. Mode: The current or selected menu appears with a mode description. Cook Time: Cook time appears. Tap this area to display the cooking time. Information area: • Temp.: The current/selected temperature appears. Tap this area to display the temperature adjustment screen. • Power: Microwave power level appears. Tap this area to display the power level adjustment screen. 06 07 08 09 +30sec: Add 30 seconds to cook time before/during cooking.
Basic operations 05 Information area • Temp Probe: The set temperature of the temp probe is displayed. When you tap this area, the Temp Probe screen is displayed. • Cook Time: The cooking time is displayed. When you tap this area, the cooking time screen is displayed. • Delay Start: The delay start time is displayed. When you tap this area, the Delay Start screen is displayed. • InstantHeat™: Indicates if the InstantHeat™ feature is on or off.
NOTE • • Control Lockout is available only when the oven temperature is under 400 °F. All other functions must be cancelled before you activate Control Lockout. How to unlock the controls MICROWAVE LOWER OVEN PAUSE/OFF OFF TIMER LIGHT SETTINGS OPEN/CLOSE RESERVOIR Touch SETTINGS for 3 seconds. The control lock confirmation and the lock icon will disappear from the display. NOTE It may take up to 10 seconds for the doors to unlock.
Basic operations + ADD Timer MICROWAVE LOWER OVEN PAUSE/OFF OFF Timer 01 01:53:03 TIMER LIGHT START SETTINGS DELETE OPEN/CLOSE RESERVOIR RESET • + ADD Timer MICROWAVE LOWER OVEN PAUSE/OFF OFF Timer 01 01:52:48 TIMER LIGHT PAUSE SETTINGS DELETE 5. Tap START. When the set time has elapsed, the oven will beep and the display will show the Timer has finished. OPEN/CLOSE RESERVOIR RESET You can pause, reset, or delete the timer at any time by tapping the screen.
Basic operations Minimum and maximum settings Microwave (upper) oven All the features in this table have min/max time, temperature, and power-level settings. Tap MICROWAVE to select the cooking mode. Set the temperature or microwave power level via the numeric pad. See Basic baking and broiling instructions starting on pg. 61. Feature Microwave Temp./ Power range Default Temp./ Power Max. time 10-100% 100% 1 hr. 30 min. Microwave energy lets food be cooked/reheated without changing the form or color.
Microwave oven (Upper Oven) Setting the power level 4:35 PM UPPER MICROWAVE PAUSE/OFF LOWER OVEN OVEN MODE OFF 0hr 00min 00sec TIMER SETTINGS Microwave Microwave heating LIGHT Power +30sec 100% MICROWAVE START OFF 100 % TIMER Tap the Power Level area. Slide the screen or tap the wheel picker to set the power level. If you tap the wheel picker, the numeric pad will appear.
4:35 PM MICROWAVE Maximum cook time: 1hr 30min PAUSE/OFF 1 hr 30 min 00 sec TIMER SETTINGS 1 2 3 4 5 6 7 8 9 0 LOWER OVEN OFF LIGHT OK OPEN/CLOSE RESERVOIR 4:35 PM MICROWAVE Maximum cook time: 1hr 30min PAUSE/OFF 1 hr 30 min 00 sec TIMER SETTINGS 1 2 3 4 5 6 7 8 9 0 LOWER OVEN OFF OK MICROWAVE PAUSE/OFF Microwave OFF Microwave heating 1hr 10min 30sec TIMER SETTINGS OPEN/CLOSE RESERVOIR LOWER OVEN OVEN MODE LIGHT Power 100% +30sec 4. Tap OK.
Microwave oven (Upper Oven) Microwave Microwaves are high-frequency electromagnetic waves that can be used to cook or reheat food without changing either the form or color of the food.
CAUTION • • Use only microwave-safe cookware. Use oven mitts when taking out food. Power level 100% (High) 50% (Medium) 90% (Sauté) 40% (Medium low) 80% (Reheat) 30% (Low) 70% (Medium high) 20% (Defrost) 60% (Simmer) 10% (Warm) Convection Sear Heat is evenly distributed inside the oven by the convection fan. Use a microwave rack, or a rack and even plate on the optitray. Use this mode for biscuits, individual scones, rolls, cakes, choux pastries, and soufflés.
Broil For best performance, make sure all heating elements are in the horizontal position. UPPER 4:35 PM MICROWAVE PAUSE/OFF LOWER OVEN OVEN MODE Broil OFF Direct heat cooking TIMER SETTINGS LIGHT Cook Time START None OPEN/CLOSE RESERVOIR 1. Put a rack or the combination of a rack and the even plate on the optitray. 2. Tap MICROWAVE and swipe the screen to select Broil. If preheating is preferred, simply tap START. NOTE You cannot set the temperature in Broil mode.
Microwave oven (Upper Oven) Speed Conv. Sear 4:35 PM UPPER MICROWAVE PAUSE/OFF LOWER OVEN OVEN MODE Speed Conv.Sear 0hr 00min 00sec TIMER SETTINGS OFF Direct hot air convection with microwave Temp. Power 350°F 30% +30sec LIGHT START OPEN/CLOSE RESERVOIR 1. Put a rack or the combination of a rack and the even plate on the optitray. 2. Tap MICROWAVE and swipe the screen to select Speed Conv.Sear, and then tap the temperature area. The numeric pad will appear.
Broil The heating elements generate heat, which is reinforced by the microwave energy. 4:35 PM UPPER MICROWAVE PAUSE/OFF LOWER OVEN OVEN MODE OFF 0hr 00min 00sec TIMER SETTINGS Speed Broil Direct heating with microwave LIGHT Power +30sec 30% START OPEN/CLOSE RESERVOIR 1. Put a rack or the combination of a rack and the even plate on the optitray. 2. Tap MICROWAVE and swipe the screen to select Speed Broil. NOTE You cannot set the temperature in Speed broil mode.
Microwave oven (Upper Oven) Sense Cook™ The oven offers 16 different Sense Cook™ options, which include pre-programmed cooking times. You do not need to set either the cooking time or the power level. Once you have selected a program and touched START, the oven automatically sets the cooking time and starts to cook. The gas-sensing animation effect shows the status of the sensing process.
Food Amount Instructions Popcorn 3.0–3.5 oz 1 package Potato 1–5 ea Poke each potato several times with a fork; place on optitray in spoke-like fashion; let cooked potatoes stand 3–5 min.; let oven cool 5 min. or more before re-use. 1–4 slices Place 1-4 pizza slices (wide ends out) on a microwave-safe plate; do not overlap or cover slices; let oven cool 5 min. or more before re-use. 6–8 oz Use uncovered measuring cup/mug; after heating, stir well; let oven cool 5 min. or more before re-use.
Microwave oven (Upper Oven) Auto-sensor cooking When food cooks, it emits various gases, by which Auto Sensor determines the proper time and power level, eliminating the need to set these two elements. If a container is topped with a lid or plastic wrap, Auto Sensor detects the gases emitted when the container is saturated with steam. NOTE • • • If using cling film or plastic wrap, pierce the plastic with a knife/fork in several places.
Microwave oven (Upper Oven) Conv. Sear AutoCook 4:35 PM UPPER MICROWAVE PAUSE/OFF TIMER SETTINGS LOWER OVEN OVEN MODE Conv.Sear AutoCook Pre-programmed cooking temperature and time with Conv.sear modes Bone-in chicken pieces Salmon steak Hamburger Homemade gratin Sirloin steak, Medium (1 inch) Homemade mac and cheese LIGHT OPEN/CLOSE RESERVOIR 4:35 PM UPPER MICROWAVE PAUSE/OFF LOWER OVEN OVEN MODE Bone-in chicken pieces 16min 30sec START MICROWAVE 1.
Food Bone-in chicken pieces Hamburger patties Sirloin steak, Medium (1 inch) Sirloin steak, Well Done (1 inch) Tenderloin steak, Medium (1 inch) Tenderloin steak, Well Done (1 inch) T-bone steak, Medium (1 inch) T-bone steak, Well Done (1 inch) 36 English Amount 1.0 lb 2.0 lbs 2 ea 4 ea (1 ea = 4 oz) Instructions Brush pieces with oil and seasonings; lay pieces skin side down on high rack; when microwave beeps, turn over bone-in pieces, then press START to continue.
Microwave oven (Upper Oven) Food Amount Barbecue pork ribs 1.0 lb 2.0 lbs Brush ribs with bbq sauce, and lay them on low rack. Boneless pork chops 2 ea 4 ea (1 ea = 5-6 oz) Brush chops with oil and seasonings, and lay them on high rack; when microwave beeps, turn chops, then press START to continue. Salmon steak 2 ea 4 ea (1 ea = 5-6 oz) Brush salmon fillets with oil and seasonings, lay them on "even" plate, and put plate on high rack.
Healthy Fry 4:35 PM UPPER MICROWAVE PAUSE/OFF TIMER LOWER OVEN OVEN MODE Healthy Fry OFF Healthy fry with less oil Frozen onion rings Frozen buffalo wings Frozen potato croquettes Frozen potato chips Frozen prawns, Breaded Frozen chicken nuggets LIGHT SETTINGS PAUSE/OFF OPEN/CLOSE RESERVOIR 3. Tap to select one of 14 different options. LOWER OVEN 4. Tap the weight area to select the food weight screen.
Microwave oven (Upper Oven) Food Amount Frozen potato croquettes Frozen chicken nuggets Instructions 8 oz 16 oz Put food on "even" plate, then put plate on high rack. Frozen cheese sticks 6 ea 12 ea Homemade french fries 8 oz 12 oz Peel potatoes and cut into 7/16" x 7/16" (10 x 10 mm) thick sticks; soak in salted, cold water 30-40 min; dry sticks well (to avoid sticking to tray), then brush with 1 tsp (5 g) oil; put sticks on "even" plate on high rack.
Microwave oven (Upper Oven) 0.9 MICROWAVE PAUSE/OFF LOWER OVEN OFF 1.0 lb TIMER LIGHT 1.1 SETTINGS CANCEL 4:35 PM MICROWAVE LOWER OVEN OVEN MODE PAUSE/OFF Meat OFF Use microwave safe dish 9min 50sec TIMER LIGHT Unit SETTINGS START 1.0 lb 6. Tap OK. OPEN/CLOSE RESERVOIR OK UPPER 5. Slide the screen or tap the number to select the food weight. If you tap the number, the numeric pad appears. OPEN/CLOSE RESERVOIR 7. Tap START to start defrosting. 8.
Microwave oven (Upper Oven) MICROWAVE LOWER OVEN 1 serving PAUSE/OFF TIMER OFF 2 OPEN/CLOSE RESERVOIR OK 7. Tap START to start cooking. 4:35 PM UPPER MICROWAVE LOWER OVEN OVEN MODE PAUSE/OFF Broccoli florets OFF Use glass bowl 2min 00sec TIMER LIGHT Unit SETTINGS 2 serving 6. Tap OK. LIGHT SETTINGS CANCEL 5. Slide the number to select the number of servings. START OPEN/CLOSE RESERVOIR 8. If you want to pause cooking, tap PAUSE.
Food Amount Instructions 1 – 4 servings (4 – 5 oz each) Put vegetables in microwave-safe bowl; add 1 tbsp water/ serving; cover while cooking; stir after. 1 – 4 servings (4 – 5 oz each) Put vegetables in microwave-safe bowl; cover while cooking; stir after. Oatmeal 1 pack 2 packs Follow package directions for recommended amount of water; stir well before/after cooking.
Microwave oven (Upper Oven) Auto Cook This mode offers a total of 69 cooking options on two menus. You do not need to set the cook time or power level, and you can adjust the serving size.
CAUTION Use only microwave-safe cookware, and wear oven mitts to handle food/cookware. Food Amount Instructions Reheat Beverage 1/2 cup 1 cup 2 cups Use an uncovered measuring cup/mug; do not cover; put beverage in oven, heat, then stir well. Pizza reheat 1 slice 2 slices 3 slices 4 slices Place 1-4 pizza slices crust-out on a microwave-safe plate; do not overlap slices; do not cover.
Food Amount Instructions Breakfast Frozen french toast 2 ea 4 ea French toast sticks 6 ea 12 ea Sausage links, Frozen Sausage links, Fresh 4 ea 8 ea Place the french toast on the high rack. Arrange food on even plate; put plate on low rack. Frozen sandwich Frozen waffles 2 ea 4 ea Frozen bagels Sausage patties, Frozen Sausage patties, Fresh 2 ea 4 ea Arrange food on even plate; put plate on high rack. Beef Hamburger Sirloin steak, Medium (1 inch) Sirloin steak, Well done (1 in.
Microwave oven (Upper Oven) Food Amount Instructions Meat loaf 2.5 lbs 1½ lbs ground beef, 1 egg, 1 onion (chopped), 1 C milk, 1 C dried bread crumbs, s/p to taste In large bowl, combine beef, egg, onion, milk, crumbs; season with s/p; put in lightly greased 5 x 9 in. microwavesafe loaf pan on low rack. Roast beef 2.0 lbs 3.0 lbs Brush beef with oil, season, and put on low rack; when microwave beeps, turn roast, and restart microwave. Barbecue pork ribs 1.0 lb 2.
Food Amount Instructions Baked potato 2 ea 4 ea Poke potatoes 3 times with fork; put potatoes on low rack; after cooking, let potatoes 3–5 min. Frozen garlic bread 6 ea Put bread on "even" plate on low rack; when microwave beeps, turn bread, and press START to continue; after cooking, let rest 1–2 min. Snacks 40-oz: 25 oz potatoes; 4 oz milk; 4 oz cream; 1 whole egg (beaten); 1 tsp ea.: salt, pepper, nutmeg; 6 oz grated mozzarella cheese; butter; thyme.
Food Toast Hawaii Frozen lasagna Amount 4 ea 1 serving 2 servings Potato bites 5 ea 10 ea Egg rolls 10 ea 20 ea Instructions Toast bread slices, then put toast with topping on high rack; after cooking, let rest 2–3 min. Put frozen lasagna on low rack; let rest 2–3 min. Arrange food on "even" plate on high rack. Bake Box cake mix 1 pack Pour batter in 8-in. round cake pan; put pan on low rack. Brownie mix 1 pack Pour batter in 8 x 8-in. pan; put pan on low rack.
Microwave oven (Upper Oven) Food Amount Instructions Dough: 1/4-oz packet yeast, 1/2 C warm water, 1/2 C milk, 1/4 C granulated sugar, 4 T butter (melted), 1 t salt, 2 eggs, 4 C a-p flour Filling: 4 tbsp butter (softened), 1/2 C brown sugar, 2 tbsp cinnamon, 1/2 C raisins, 3/4 C chopped pecans (optional) Icing: 8 oz cream cheese (softened), 4 tbsp butter (softened), 1 tsp vanilla extract, 3/4 C powdered sugar Cinnamon rolls 1 ea Prep: Dough 1.
Food Amount Instructions Cupcakes 6 ea Put batter in 6-cup pan on low rack. Marble cake 1 ea Put batter in round cake pan on low rack; after baking, let rest 5-10 min. 15 graham crackers (crushed); 1/2 C butter, 14 oz cream cheese (softened), 2 eggs, 1 C sugar, 1 tsp vanilla extract Cheese cake 1 ea 1. Melt butter in pan; add crushed crackers, and stir to coat crackers; spread evenly in 8-in. tin, and press down firmly. 2.
Soften / Melt The oven offers 8 different Soften/Melt options. You do not need to set either the cooking time or the power level. You can adjust the size of serving.
Microwave oven (Upper Oven) Food Amount Instructions Melt butter 0.25 lb (1 stick) 0.5 lb (2 sticks) Unwrap, cut butter into pieces, and put in microwavesafe bowl; cover with wax paper, melt, stir well. Soften butter 0.25 lb (1 stick) 0.5 lb (2 sticks) Unwrap butter, and put on microwave-safe dish. Soften/Melt Melt chocolate 1 cup chips Put chocolate chips in microwave-safe bowl; when microwave beeps, stir well, and press START to resume.
Oven (Lower Oven) Timed cooking In this mode, the oven turns on immediately and cooks for the length of time you select, then turns off automatically when done. Timed cooking can only be used with another cooking operation (Bake, Convection Bake, Convection Roast, Broil, Pure Convection Sear, Convection Broil, Steam Bake, Steam Roast, Dual Four Part Pure Convection, Proof, Stone Bake Mode, Dehydrate).
Oven (Lower Oven) CAUTION Timed cooking and Delay Start are good for cooking cured or frozen meats and most fruits and vegetables. Foods that spoil easily (e.g., milk, eggs, thawed/fresh fish, meat, or poultry) should be chilled in the refrigerator first. Even when chilled, however, they should not sit in the oven more than 1 hour before cooking, and should be removed promptly when done. Eating spoiled food can result in sickness from food poisoning.
How to set the oven for delay timed cooking 4:35 PM LOWER MICROWAVE PAUSE/OFF LOWER OVEN OVEN MODE OFF Faster, more even baking 325 ˚F TIMER SETTINGS TIP Convection Bake Cook Time Delay Start LIGHT InstantHeat™ 1hr 45min 4:35PM Off START OPEN/CLOSE RESERVOIR 4:35 PM MICROWAVE 6 : 00 PAUSE/OFF TIMER SETTINGS LOWER OVEN Set start time 1 6 2 7 3 8 AM PM 4 9 OFF LIGHT 5 0 OPEN/CLOSE RESERVOIR OK 1.
Oven (Lower Oven) Using the temp probe For many foods, especially roasts (e.g., beef, pork, lamb) and poultry (chicken, turkey, etc), measuring internal temperature is the best way to determine doneness. The temp probe lets you cook meat to the exact desired internal temperature. This function can be used with Bake, Convection Bake, or Convection Roast. The food's internal temperature appears on the oven display from 100 °F upward. How to use the temp probe 1.
CAUTION To protect the Temp probe tip, it should not protrude through the surface of the meat but should be in or near the center. • Do not store the probe in the oven or leave it in the oven after cooking; always remove the probe after use to avoid damaging it later. • To avoid breaking the probe’s tip, defrost your food completely. • Do not use tongs to insert/remove the probe. Tongs can damage the probe. • Use the Temp probe for Temp Probe function cooking only.
Oven functions Cooking mode Tap LOWER OVEN and swipe to select the cooking mode. See Basic baking and broiling instructions starting, pg. 61. Mode Temperature range Lower Temp probe InstantHeat™ Bake 175 °F (80 °C) - 550 °F (285 °C) ✔ ✔ - Convection Bake 175 °F (80 °C) - 550 °F (285 °C) ✔ ✔ ✔ Convection Roast 175 °F (80 °C) - 550 °F (285 °C) ✔ ✔ ✔ L0 / HI ✔ - - Pure Conv.
Oven (Lower Oven) Mode Broil Pure Conv. Sear Description • • • • • Uses the convection element and fan; meat is cooked 75 °F (42 °C) higher than the set temperature for the first 15 min.; the resulting browning process sears the exterior to trap natural juices; best for game hens, chickens, stuffed/un-stuffed turkeys, turkey breasts, pork tenderloin, and pork loin.
Oven (Lower Oven) Broiling recommendation guide Size, weight, thickness, starting temperature, and doneness preference affect broiling times. This guide is based on meats at refrigerator temperature. Always use a broiler pan and its grill when broiling, and preheat the oven for 5 minutes. Food Doneness Size Thickness Level Rack positon Medium 9 patties 3/4" Hi Medium 9 patties 1" Rare - Medium Cooking time (min.
Basic baking and broiling instructions 4:35 PM LOWER MICROWAVE PAUSE/OFF LOWER OVEN OVEN MODE TIMER SETTINGS Convection Bake TIP Faster, more even baking OFF 325˚F LIGHT Cook Time Delay Start None 4:35PM Off InstantHeat™ START PAUSE/OFF LOWER OVEN OVEN MODE TIMER SETTINGS Convection Bake TIP Faster, more even baking OFF 325˚F LIGHT Cook Time Delay Start None 4:35PM Off InstantHeat™ START LOWER OVEN OVEN MODE TIMER SETTINGS Convection Bake TIP Faster, more even baking OFF
Oven (Lower Oven) MICROWAVE LOWER OVEN OVEN MODE Steam Bake PAUSE/OFF OFF Steam baking 325 ˚F TIMER SETTINGS Cook Time Delay Start LIGHT Steam OPEN/CLOSE RESERVOIR START 0hr 40min 4:35PM LOW MICROWAVE LOWER OVEN High Medium Low PAUSE/OFF TIMER SETTINGS CANCEL MICROWAVE OFF LIGHT OPEN/CLOSE RESERVOIR OK LOWER OVEN High Medium Low PAUSE/OFF TIMER SETTINGS CANCEL OFF LIGHT OPEN/CLOSE RESERVOIR OK 4:35 PM LOWER MICROWAVE PAUSE/OFF LOWER OVEN OVEN MODE Steam Bake TIMER SETTINGS
How to adjust the temperature while cooking 4:35 PM MICROWAVE UPPER LOWER PAUSE/OFF Microwave Bake 0hr 00min 29sec 350˚F LOWER OVEN OFF TIMER LIGHT PAUSE OFF SETTINGS OPEN/CLOSE RESERVOIR LOWER 4:35 PM MICROWAVE LOWER OVEN Bake OVEN MODE PAUSE/OFF View Summary 350˚F TIMER Cooking in progress...
Oven (Lower Oven) Mode Description • Keep Warm • Keeps cooked food warm for serving up to 3 hr after cooking is done. Use this mode by itself or set it to activate after timed or delay-timed cooking. You should not use this mode to reheat cold food. • Provides optimal temp (100 °F / 110 °F) for bread proofing.For the best results, always start Proof with a cool oven. Stone Bake Mode • • Bake on a baking or pizza stone (not included) for pizza and bread.
Oven (Lower Oven) Rack position chart for special cooking options Mode Rack position Keep Warm 5 Proof 3 Stone Bake Mode 1 or 2 Dehydrate 3 or 4 Using Chef mode For inexperienced cooks, the oven offers 15 gourmet auto-cook options. Use this feature to save time or shorten your learning curve. The cook time and temperature are automatically adjusted to the selected recipe. You can download detailed recipes for each option from the Dacor website.
4. Tap START to start cooking. 4:35 PM MICROWAVE PAUSE/OFF OVEN MODE TIP Garlic prime rib OFF Set start time 4:01 AM PM TIMER LIGHT SETTINGS Previous LOWER OVEN START OPEN/CLOSE RESERVOIR Cooking tips in chef mode 1. Tap OK. 4:35 PM MICROWAVE PAUSE/OFF LOWER OVEN OVEN MODE TIMER TIP Garlic prime rib - OFF For 8-9 servings Use Roasting Pan with Roasting Rack LIGHT Use Temperatue probe SETTINGS OPEN/CLOSE RESERVOIR OK 2. Tap TIP.
Oven (Lower Oven) Using the iQ control feature (Lower oven only) To use the iQ Control feature, download the Dacor iQ Kitchen app to a mobile device. Functions that can be operated by the Dacor iQ Kitchen app may not work smoothly if communication conditions are poor or the oven is in a place with a weak Wi-Fi signal. See this table for the main functions that can be operated from the app: When iQ Control on the oven is off.
Oven (Lower Oven) Using the oven racks Lower oven rack positions Recommended rack positions for cooking Type of Food Rack Positions Broiling hamburgers 6 6 Broiling meats or small cuts of poultry, fish 5 4 3-5 3 Bundt cakes, pound cakes, frozen pies, casseroles 2 Angel food cakes, small roasts 2 1 Turkeys, large roasts, hams, fresh pizza 1 • 4 or 3 This table is for reference only. Rack and pan placement 3 Centering baking pans in the oven as much as possible improves results.
Oven (Lower Oven) Before using the racks Each rack has stops that must be placed correctly on the supports. These stops keep the rack from coming completely out. Removing the racks 1. Pull the rack straight out until it stops. 2. Lift up the front of the rack, and then pull it out. Replacing the racks 1. Place the end of the rack on the support. 2. Tilt the front end up and push the rack in. CAUTION • • Do not cover any rack or oven surface with foil.
• When sliding the gliding rack in/out, use the rack's front handle. If you grasp by the frame, you will pull the rack out of the oven. Use oven mitts to handle the gliding rack while cooking. • With the oven off and cool, open the door, and grasp the rack and frame, and pull both forward to remove. Removing the gliding rack CAUTION Do not install the Gliding rack on the next level above a wire rack. It will not engage properly and may fall.
Oven (Lower Oven) Using the clean feature The Clean feature has four selections: Self-Clean, GreenClean™, Descale, and Draining. Self clean This self-cleaning oven uses high temperatures (well above cooking temperatures) to burn off or reduce cooking residue to a fine ash you can wipe away with a damp cloth. CAUTION • • • • During self-cleaning, the outside of the oven becomes hot enough to burn skin. Do not let children near the oven during self-cleaning.
How to run a self-cleaning cycle 4:35 PM LOWER MICROWAVE PAUSE/OFF TIMER SETTINGS LOWER OVEN OVEN MODE Clean OFF Oven cleaning Self clean LIGHT GreenClean™ Descale OPEN/CLOSE RESERVOIR Draining MICROWAVE TIMER SETTINGS LOWER OVEN OVEN MODE Clean OFF Oven cleaning Self clean LIGHT GreenClean™ Descale OPEN/CLOSE RESERVOIR Draining MICROWAVE LOWER OVEN OVEN MODE Self clean OFF Oven cleaning TIMER SETTINGS LIGHT Clean Time Delay Start START 3hr 00min 4:35PM 02 03 hr 05 MICROWAVE
Oven (Lower Oven) 4:35 PM LOWER MICROWAVE PAUSE/OFF LOWER OVEN OVEN MODE Self clean OFF Oven cleaning TIMER SETTINGS LIGHT Clean Time Delay Start START 3hr 00min 4:35PM PAUSE/OFF OPEN/CLOSE RESERVOIR 4:35 PM LOWER MICROWAVE LOWER OVEN OVEN MODE Self clean 8. Tap START to begin self-cleaning. The door locks automatically. Important: Only the lower oven door locks during self cleaning. 9. Tap CANCEL to pause or end a selfcleaning cycle. OFF Cleaning in progress...
Oven (Lower Oven) Before a green cleaning cycle Fig. 1 • Open a window, or use a fan or hood to ventilate the kitchen during selfcleaning. • Remove all accessories from the oven chamber. Wipe residue from the oven floor (Fig. 1). The silver-colored oven racks can be self-cleaned, but they will lose their luster and become hard to slide. • • Don’t hand clean the oven door gasket. You may hand clean the door. Fig. 2 • • • • • • Hand-clean the front frame of the oven and outside the door gasket.
LOWER MICROWAVE PAUSE/OFF LOWER OVEN OVEN MODE GreenClean™ OFF Quick 20 minute steam clean TIMER SETTINGS LIGHT Clean Time START 0 hr 20 min GreenClean™ OPEN/CLOSE RESERVOIR 4:35 PM MICROWAVE PAUSE/OFF 3. Tap START to begin Green cleaning. 4:35 PM LOWER OVEN Pour 20oz (600ml) of water into Water Reservoir. TIMER OFF LIGHT SETTINGS OK OPEN/CLOSE RESERVOIR 4. Follow the on-screen instructions. Green cleaning will start automatically. NOTE Lower oven door is locked during Green cleaning.
Oven (Lower Oven) Descale If you use Steam Bake or Steam Roast frequently, you should descale regularly to remove minerals that may affect the taste or quality of food cooked. Use only descaling agents designed for steam ovens or coffee machines. NOTE After 12 accumulated hours of steam baking/roasting, the Descale indicator appears. You can enable these two functions for two more hours without descaling. When those two hours are up, Steam Bake or Steam Roast are disabled until you run a descaling cycle.
Oven (Lower Oven) LOWER 4:35 PM MICROWAVE PAUSE/OFF LOWER OVEN OVEN MODE Descale TIMER Draining… OFF Caution: hot water. LIGHT Do not remove Water Reservoir while draining. SETTINGS OPEN/CLOSE RESERVOIR Descale 4:35 PM MICROWAVE LOWER OVEN Pour 22oz (650ml) of water into Water Reservoir to rinse. PAUSE/OFF TIMER 6. Use oven mitts to remove and empty the water reservoir, and then refill it with 22 oz (650 ml) of drinkable water for rinsing. 7.
Draining When a steam function is complete, you must drain the remaining water to prevent the water from affecting other cooking modes. To drain the water, follow these steps: How to drain the oven LOWER 4:35 PM MICROWAVE PAUSE/OFF TIMER SETTINGS LOWER OVEN OVEN MODE Clean OFF Oven cleaning Self clean Descale LIGHT GreenClean™ 4:35 PM MICROWAVE PAUSE/OFF LOWER OVEN OVEN MODE 2. Tap Draining. OPEN/CLOSE RESERVOIR Draining LOWER 1. Tap LOWER OVEN and swipe the screen to Clean.
Oven (Lower Oven) Settings In Settings, you can change the default settings to your preference or diagnose problems with the network connection. LOWER 4:35 PM MICROWAVE PAUSE/OFF LOWER OVEN OVEN MODE OFF Faster, more even baking 325 ˚F TIMER SETTINGS TIP Convection Bake Cook Time Delay Start InstantHeat™ None None Off Touch SETTINGS. The display will show the Setting item. LIGHT START OPEN/CLOSE RESERVOIR Wi-Fi To enable a Wi-Fi connection 1.
Display 1. Brightness (changes the brightness of the display screen) Tap SETTINGS > Display > Brightness. (Use the bar to adjust screen brightness.) 2. Screen saver (if screen saver is off, Clock theme and Timeout menu are disabled) Tap SETTINGS > Display > Screen saver > OFF. 3. Clock theme Tap SETTINGS > Display > Clock theme. (Slide the current setting to select a theme.) 4. Timeout Tap SETTINGS > Display > Timeout.
Oven (Lower Oven) Temp 1. Temp unit: Program the temperature display in Fahrenheit (default) or Celsius. • Tap SETTINGS > Temp > Temp unit. Tap the current setting to select the temp unit. 2. Temp adjust: Oven temp is factory-calibrated. When first using the oven, follow recipe times and temps. If the oven seems to cook too hot or cool, you can recalibrate the cooking temps. First, test a recipe with a temp that is higher or lower than recommended.
Oven (Lower Oven) Using the Sabbath feature (For use on the Jewish Sabbath & Holidays) K For further assistance, guidelines for proper usage, and a complete list of models with the Sabbath feature, visit the web at http:\\www.star-k.org. This feature is for baking use only. Oven temperature may be set higher or lower after the Sabbath feature is set. (Oven-temperature adjustment should be used only during Jewish holidays.) The display will not change, and tones will not sound.
Do not to attempt to activate any other program feature except Bake while the Sabbath feature is active. • • • • You can change the oven temperature, but the display will not change and tones will not sound when a change occurs. After you change the temperature while the unit is in Sabbath mode, there is a 15 second delay before the unit recognizes the change. You can set the Cook Time function before activating the Sabbath feature.
Maintaining your appliance Care and cleaning of the oven Cleaning painted parts and decorative trim • • For general cleaning, use a cloth with hot, soapy water. For more difficult residue and built-up grease, apply a liquid detergent directly onto the area and leave for 30 to 60 minutes. Wipe with a damp cloth and dry. Do not use abrasive cleaners on any oven surfaces. They can be scratched. Cleaning stainless-steel surfaces 1. Shake a bottle of stainless-steel appliance cleaner/polish. 2.
Maintaining your appliance To lubricate the slides of the gliding rack 1. Remove the rack from the oven. See Using the gliding rack > Removing the gliding rack, pg. 70. 2. Fully extend the rack on a table or countertop. Newspaper may be placed underneath the rack for easy cleanup. 3. If there is debris in the slide tracks, wipe it away using a paper towel. (Any graphite lubricant wiped away must be replaced - See steps 4 through 7. 4. Shake the graphite lubricant before opening it.
5. Repeat for the right (front and back) slide mechanism of the rack. 6. Open and close the rack several times to distribute the lubricant. 7. Replace the cap on the lubricant and shake it again. Turn the rack over and repeat steps 3, 4, 5, and 6. 8. Close the rack, turn the rack right-side up, and slide it into the oven. (See Installing the gliding rack, pg. 69.) NOTE Do not spray the gliding rack with cooking spray or other lubricant sprays. Oven door • Don’t hand clean the oven door gasket.
Maintaining your appliance Removing the oven door (Lower oven only) CAUTION Follow these instructions carefully to avoid personal injury and property damage. For safety reasons, you cannot remove the door of the upper oven. Wire Harness 1. Prepare a flat, blanket-covered surface to set th edoor on. (You can also use the corner posts from your packing material.) 2. Disconnect the LED's wire harness from the door's bottom-right corner. Locked Unlocked 3. Open the oven door. 4.
Maintaining your appliance Replacing the oven door (Lower oven only) Follow these instructions carefully to avoid personal injury and property damage. For safety reasons, you cannot remove the door of the upper oven. 1. Using two hands, grasp the side edges of the door at the midpoint. Face the oven cavity. Slot in oven cavity 2. Locate the slots on each side of the oven cavity for the door hinge locks. 3.
Maintaining your appliance Changing the oven light (Lower oven only) The oven light is a standard 40-watt-appliance halogen bulb. It comes on when the oven door is open. When the oven door is closed, touch LIGHT to turn the light on or off. It will not work during a self-cleaning or Green cleaning cycle. CAUTION Before changing your oven light, disconnect the electrical power to the oven at the main fuse or circuit breaker panel. Make sure the oven and the halogen bulb are cool. 1.
Troubleshooting If the oven malfunctions or has performance issues, review the tables in this section. If you cannot resolve the issue yourself, call Dacor Customer Assurance, (800) 793-0093. Control display Problem Possible cause The display goes blank. Blown fuse or tripped circuit breaker. Touch-controls do not respond to touch. • • Touch model: Moisture on control panel Lock function set Solution Replace the fuse or reset the circuit breaker. • • Remove the moisture; try again.
Troubleshooting Symptom Cause Action Door left open for long time. Interior light may automatically turn off during Eco function operation; close/reopen door, or tap CANCEL. Interior light covered by residue. Clean oven chamber, and recheck. Beeping sound during cooking If Auto Cook is active, beep means it is time to turn food during thawing. After turning food, press the START button again to restart operation. Oven not level. Oven installed on uneven surface.
Troubleshooting Symptom Cause Action Convection Oven does not heat. Door is open. Close door; retry. Smoke comes out during preheating. During initial operation, smoke may come from the heating elements. Food is on the heating elements. This is normal. After you run the oven 2-3 times, it should stop. Let oven cool; remove food from heating elements. Smell of burning or plastic when using oven. Plastic or non-heat-resistant cookware used. Use glass cookware suitable for high temps.
For the lower oven Problem Food not baking/roasting properly. Possible cause Solution The oven controls not set correctly. See Basic operations, starting on pg.19. Oven rack not properly installed. See Using the oven racks, pg. 68 Oven thermistor needs adjusting. See Settings > Temp, pg. 81. Serving size may be inappropriate. See Broiling recommendation guide for serving sizes, pg. 60, and retry. The rack is improperly positioned. See Broiling recommendation guide, pg. 60.
Information codes OVEN Displayed code Possible cause Occurs if control key is short for 1 min. C-d0 C-d1 Occurs if door lock is mispositioned. C-F0 Occurs if communication between Main and Sub PBA is interrupted. C-F2 Occurs if communication between Main and Touch is interrupted. C-10 C-20 The cooking sensor is open when the microwave is operating. The cooking sensor is short when the microwave is operating. The oven sensor is open when the oven is operating.
Warranty and Service Getting Help Before you request service: Review Troubleshooting (pg. 90), and familiarize yourself with the warranty terms and conditions of your product. If your issue remains unresolved, direct your warranty and non-warranty questions to Dacor Customer Assurance: Phone: (800) 793-0093 x2813 (US, Canada) Hours of Operation: Mon – Fri, 5:00 am – 5:00 pm Pacific Time Website: www.dacor.
Warranty and Service LIMITATIONS OF COVERAGE Warranty is voided if non-ETL or non-CUL approved product is transported from the U.S.A. OUTSIDE THE FIFTY STATES OF THE U.S.A, THE DISTRICT OF COLUMBIA, AND CANADA: LIMITED FIRST YEAR WARRANTY If your Dacor product malfunctions within 1 year of the original purchase date due to defective material/construction, Dacor will furnish a new replacement part, F.O.B. factory. The purchser shall pay all delivery, installation, labor costs, and other service fees.
Appendix Open source announcement The software included in this product contains open source software. You may obtain the complete corresponding source code for a period of three years after the last shipment of this product by sending an email to mailto:oss.request@samsung.com. It is also possible to obtain the complete corresponding source code in a physical medium such as a CD-ROM; a minimal charge will be required. The following URL http://opensource.samsung.
Notes
Please visit www.Dacor.com to activate your warranty online. WARRANTY INFORMATION IMPORTANT: cut here Your warranty will not begin until you activate it online or return this form to Dacor. If you have purchased more than one Dacor product, please return all forms in one envelope, or activate the warranty for each product online. Please rest assured that under no conditions will Dacor sell your name or any of the information on this form for mailing list purposes.
DE68-04463A-01 Dacor ∙ 14425 Clark Avenue, City of Industry, CA 91745 ∙ Phone: (800) 793-0093 ∙ Fax: (626) 403-3130 ∙ www.dacor.