Installation Instructions Distinctive™ Electric Cooktop 105643 Rev.
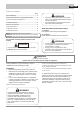
ENGLISH Table of Contents Page WARNING Special Warnings .............................................................. Product Dimensions and Cutout Requirements............. Important Preparation Suggestions..................................... Cooktop Installation.......................................................... Electrical Connections.................................................. .. This is the safety alert symbol.
ENGLISH Product Dimensions and Cutout Requirements ,2cm) 21” 30” (76 19- 3/1 6” ( (53 ,3c m) 2” (5,18cm) 48, 8cm ) 28-5/8” ) (72,7cm DECT304 ,4cm) 21” 36” (91 19- 3/1 6” ( (53 ,3c m) 48, 2” (5,18cm) 8cm ) .3cm) 34” (86 DECT365 Figure 1. Chassis dimensions WIDTH OF CUT DEPTH OF CUT Hole in cabinet floor for conduit routing: 3 1/2" (9 cm) deep x 2 1/2" (6.
ENGLISH CABINET REQUIREMENTS 200°F (93°C) Figure 3. Cabinet dimensions and requirements CUTOUT WIDTH A B C D E F 30” (76.2cm) 28-11/16” (72.9 cm) to 28 15/16” (73.5 cm) 19-1/4” (49.0 cm) to 19-9/16” (49.7 cm) 30” (76.2 cm) min 34-1/16” (86,5 cm) to 36” (91.4 cm) 34-5/16” (87.2 cm) 19-1/4” (49.0 cm) to 19-9/16” (49.7 cm) 36” (91.4 cm) min 18” (45.7 cm) min height from countertop to nearest cabinet on either side of unit 30” (76.2 cm) min.
ENGLISH Cooktop Installation Cooktop Installation Step 1 Remove packaging materials and literature package from the cooktop before beginning installation. Remove installation manual from literature pack and read them carefully before you begin. WARNING Excessive Weight Hazard Use two or more people to move and install cooktop. Failure to do so can result in back or other injury. Cut Hazard Beware of sharp edges. Use the polystyrene ends when carrying the product.
ENGLISH Step 2 Place a towel or table cloth onto the counter top. Lay the cooktop upside down onto the protected surface. BURNER BOX TABLE CLOTH Figure 6 Figure 8 Step 3 A foam tape is provided to seal the cooktop edges to the countertop. Apply tape approximately 1/16" (1.5 mm) from the glass edge to the underside of the cooktop glass. Use tape around the entire glass perimeter. Cut off excess where tape ends butt. Step 5 Four clamp brackets are provided to clamp the cooktop to the countertop.
ENGLISH CONDUIT OPENING Figure 11 WARNING Figure 10 THE CONDUIT IS 4 FEET LONG The junction box, must be located where it will allow considerable slack in the conduit for serviceability. Important: For solid surface material installations such as Surel™ and Corian®, consult with solid surface manufacturer. Apply heat reflective tape such as Scotch® Aluminum Foil Tape #425 or #427 around the cutout so that it folds over on the top and sides. Do not wrap the tape underneath the cooktop.
ENGLISH electrical connections Electrical Connections The flexible conduit (supplied) 4 feet long (123 cm) located at the right rear of the cooktop bottom box should be connected directly to junction box. Do not cut or lengthen the conduit. A U.L - or CSA - listed conduit connector must be provided at each end of the power supply cable (at the cooktop and at the junction box.) A time delay fuse or circuit breaker is recommended. Do not ground to a gas pipe.
ENGLISH Recommended Minimum kW Rating on serial plate Circuit protection in amperes Wire size (AWG) 0-4.8 20 12 4.9-6.9 30 10 7.0-9.9 40 8 10.0-11.9 50 8 12.0-14.9 60 6 Be sure your appliance is properly installed and grounded by a qualified technician. Ask your dealer to recommend a qualified technician or an authorized repair service. This cooktop does not require a neutral connection.
Cod. 09DR5800 ed 11-11 Dacor ● 600 Anton Blvd. Suite 1000 Costa Mesa, CA 92626 ● Phone: (800) 793-0093 ● Fax: (626) 403-3130 ● www.dacor.