
Specifications


4
Planning the Location
WARNING
Observe all governing codes and ordinances during •
planning and installation. Contact your local building
department for further information.
The range hood is heavy. To prevent personal injury •
and property damage caused by the hood coming
loose from the ceiling, use only the hood mounting
bracket provided with the unit.
Carefully check the location where the hood is to be •
installed. The hood should be placed for convenient
access. Make certain that electrical power can be pro-
vided in the selected location.
The hood model selected must be as wide as the •
cooktop surface or wider.
Install the range hood and cooking appliance(s) so that •
they can be removed if service is required.
Plan the installation so that all minimum dimensions •
are met or exceeded (see page 3). Dimensions shown
provide minimum clearances, unless otherwise noted.
The mounting bracket must be attached directly to the •
studs in the ceiling, or to a reinforced mounting block
secured to the studs. See below for mounting bracket
hole dimensions.
The mounting bracket must be mounted directly above •
the center of the cooking surface. The mounting sur-
face must be level.
Allow clearance in the center of the mounting bracket •
for the exhaust duct to pass through the ceiling.
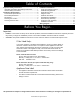
Installation Specifications
Back Dimensions
6 1/8”
(15.6 cm)
12 9/16”
(31.9 cm)
11” (27.9 cm) Dia.
Planning the Duct Work
WARNING
To prevent combustion by-products, smoke or odors •
from entering the home and to improve efficiency,
tape all duct joints securely.
Use only duct work deemed acceptable by state, •
municipal and local codes.
DO NOT• install an additional in-line or external blower
to increase the length of the duct run. Even small dif-
ferences between blower air flow rates can greatly
reduce the air draw of the hood.
CAUTION
To reduce the risk of fire and to properly exhaust air, be
sure to duct air outside the house or building. Do not vent
exhaust air into spaces within walls or ceilings or into
attics, crawl spaces or garages.
All duct work materials (including screws and duct tape) •
must be purchased separately by the customer.
When planning new duct work, always look for the •
shortest, most direct route to the outside.
The hood exhaust connects to an 8-inch round duct. •
You can increase the duct size over the duct run if
desired. To prevent a back draft, never decrease the
duct size over the run. If existing duct work is smaller
than 8 inches in diameter, remove it and replace it with
8-inch duct work.
Do not rely on tape alone to seal duct joints. Fasten all •
connections with sheet metal screws and tape all joints
with certified silver tape or duct tape. Use sheet metal
screws as required to support the duct weight.
To prevent back-drafts, a damper at the duct outlet may •
also be required.
Make sure duct work does not interfere with floor joists •
or wall studs.