decor The Life of the Kitchen? Important Safety Instructions Getting to Know Your Oven Oven Setup «vices Operating Your Oven The Basics Deluxe Features .. Cooking Care and Cleaning .. Before You Call for Service. Warranty and Service. Warranty Card DISCOVERY WALL OVEN USE AND CARE MANUAL models EO, MOH, MOV Style varies. Model EQ2305CH shown. Table of Contents a pr grt esa] Family Owned American Made Part No. 65491 Rev. i.
=e a roughen! To Our bated Customer an of features, style and Congratulations on your purchase of the very {test in Draco” products! Our unique coordinate your home. performance make us The Life of the Kirchner » and d great addition © in order 10 familiarize yourself with the. controls, functions and ult potential of your ne Distinctive Appliance. read 10S sons section: use and care manual thoroughly. beginning with the [important Safely instruct of our manufactured with quality and pride.
Important Safety Instructions INSTALLER: LEAVE THESE INSTRUCTIONS WITH THE APPLIANCE. CUSTOMER: READ THIS USE AND CARE MANUAL COMPLETELY BEFORE USING THIS APPLIANCE. SAVE IT FOR FUTURE REFERENCE. IT CONTAINS IMPORTANT USE AND CARE INFORMATION. KEEP YOUR SALES RECEIPT OR CANCELED CHECK IN A SAFE PLACE. PROF OF ORIGINAL PURCHASE DATE I$ REQUIRED FOR WARRANTY SERVICE. For service and warranty information see page 34.
Important Safety Instructions General Safety Precautions To reduce risk of fire, electric shock, serious injury or death when using your appliance, follow basic precautions, including the following: WARNING WARNING =. Only use the oven for cooking tasks expected of a home appliance as outlined in this manual. «0 if you receive a damaged product, immediately contact your dealer or builder. Do not install or use a damaged appliance. + Do not repair or replace any part of the oven unless.
Getting to Know Your Oven Control Panel Layout + Control panel display: The control panel display provides various types of information about your oven, including the current time {once the dock is set), the current cook settings, and the available cooking modes, The diagram below shows the display, as it appears when the oven is not in use. The information shown is referred to as the home screen. + Variable function keys: The variable function keys are right below the display.
Getting to Know Your Oven Before Getting Started, Get Familiar With Your Oven Parts of the Oven: « Control panel: Your oven's control panel consists of keys and a display. You use the control panel to control all the ovens features {sometimes called modes). + Oven racks: Your oven comes with three adjustable oven racks. It comes with six if you have a double oven. « Rack supports: There are six sets of rack supports inside each oven chamber. They support the adjustable oven racks.
Getting to Know Your Oven Control panel = Self Clean Latch EEE Cool air intake slots (hidden inside slot) EE — Broil elements (above glass panel} Meat probe connector Oven light Convection filter Convection element and fan (behind filter} Oven light Rack supports {6} Oven rack Bake element {below glass panel) Door gasket Door handle N— = Oven window Cool afr intake Exhaust slots The Parts of Your Wail Oven {Double Oven Shown)
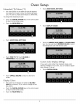
Oven Setup NOTE: If vou have a single oven, you cannot set the clock, temperature scale, display colors, keypad tones or disable the oven lights while the oven is in use. If you have a double oven, it is best not to change these settings while the oven is in use, Clock Setting the Time: . Touch the CANCEL /SECURE key on the control panel to return to the home screen. Touch the MAIN MENU key. Perplexing Using the number keypad, enter the current time.
Oven Setup + Touch CLOCK. SEER + Touch SMALL FONT to select the AM/PM indicator. + Touch LARGE FONT to deselect the AM/PM indicator. 1225p PM RABELAISIAN I= * Touch CANCEL/SECURE to return to the home scree. Changing the Size of the Numbers on the Clock {Fonts) NOTE: If vou switch the clock to large fonts, the AM/PM portion {if the clock is not set to military time) will disappear. You have a choice of 2 different sizes of numbers for the clock, large and small.
Oven Setup Fahrenheit Celsius (°C) «Your oven allows you to select the type of temperature scale that it uses to show the cooking temperature. The oven is preset at the factory to Fahrenheit. To change the temperature scale: + Touch the CANCEL/SECURE key on the control panel to return to the home screen. * Touch the MAIN MENU key. + Touch TEMP Touch CELSIUS or FAHRENHEIT, then touch OK. 000 0G 0 Touch CANCEL /SECURE to return to the home screen.
Oven Setup * Touch the RED, GREEN or BLUE kev. If you want to change the volume: * Touch the VOLUME (LO/HI} key. The display will indicate the volume level, LOW, MEDIUM or HIGH. + Touch INCREASE or DECREASE to change the hue the color selected. 1 * You can select each of the three colors and INCREASE or DECREASE each color until you find + Repeatedly touch VOLUME {LO/HI) until the volume the display color you like best, There are ten settings level you want is displayed.
Operating Your Oven The Basics Before You Cook * When the oven is not in use and none of the keys on the control panel have been touched for about five minutes, the display will go to “sleep.” When the display is sleeping, it is not lit. To wake the display {make it reappear}, touch one of the keys on the control panel or open the oven door. When you use your oven to bake or roast, it preheats automatically.
Operating Your Oven The Basics Quick Start Guide The four most commonly used modes are on the home screen for instant access, Bake Boston heat source, mode commonly used for basic recipes. Pure Convection™ /Sear Same as Pure Convection™, but runs 75°F hotter than the set temperature for the first 15 minutes to sear in the juices. Excellent for roasting. . . Pure Convection™ Rear heat source with fan to even the heat in the oven. Excellent for baked goods and multiple rack cooking. Max Broil Top heat source.
Deluxe Features » To find out what each of the keys on the bake screen He P Menu does, touch that key, For example, if you touch the DELAY key, the display tells you about what the The HELP key on your oven can help you to better under Delay OPTIONS mode does. stand how your oven works, The HELP key appears on the control panel display most of the time after you have * Touch OK to return to the BAKE screen or CANCEL/ selected one of your oven's features.
Deluxe Enter the hours, minutes and seconds to be timed on the keypad. For example: to enter 1 hour, 2 minutes and 30 seconds (1:02:30), touch 1-0-2-3-0. You need to enter the number of seconds being timed even if it is zero. For example: You must enter 5 minutes and no seconds as 5-0-0 to get 00:05:00 on the timer, If you don't enter 0-0, after 5, then the timer will only run for 5 seconds {you will have entered 00:00:05), The time entered appears just above the TIMER 1 (or TIMER 2) key.
Deluxe Features To select the specific type of food, touch the correct number on the number keypad. Fiercer reins in Eke Dicier Ear mE den Leis lal als The Draco Guide instructions were tested to give you the optimal mode and temperature by food. Touch the HELP key for detailed instructions on how to prepare the food. ee Simone REE Ein anon wear Fete we 12226PM YAPPED BOG.
As seen on the main menu diagram on the facing page, there are 3 options available. When one of these three keys is touched, the mode options available for that style of cooking appear on the screen, When you select a mode option for a particular cooking style the “jump-in” temperature is shown for that mode. This is the temperature that will automatically come up when vou select the mode. To change the temperature, just enter the desired temperature on the number keypad and touch START.
Deluxe Features About Pure Convection Baking * The uniform air circulation provided by Pure Convection allows you to use the full capacity of your oven. You can successfully prepare food, like cakes, cookies, muffins, and rolls racks at the same time. You can also prepare complete meals using multiple racks. Pure Convection Direction of Airflow Some recipes, especially those that are homemade, may require adjustment and testing when converting from standard baking to convection baking.
Roasting + When you touch the ROASTING key on the main . menu, the ROASTING menu appears, See the table below for roasting guidelines. 1205PM ins Deluxe Features Broiling below for broiling guidelines. Roasting Modes 1225PM SE Tec When you touch the BROILING key on the main menu, the BROILING menu appears. See the table Roasting Modes: Description: Jump-In Temperature: PURE CONVECTION™ SEAR The browning process sears the surface of the meat to keep the natural juices from escaping.
Deluxe Broiling Tips « Broiling is a quick and flavorful way to prepare many foods, including steaks, chicken, chops, hamburgers, and fish. « Broiling in the oven is done with the oven door completely shut. NOTE: The heating elements are disabled when the door is open. « Isis normal and necessary for some smoke to be present to give the food a broiled flavor.
Deluxe Features NOTE: Saved recipes will NOT be lost in the event of a power outage. The display will tell you that you have successfully saved the file for your recipe. Touch the OK key. . teased FECES Touch START to start cooking, or touch BACK/ RECALL three times to return to the home screen. . How fo Use the Oven Recipe Settings You Have Saved Touch the MAIN MENU key. . . Touch the number on the keypad of the recipe setting you want to use.
Deluxe Features Touch SABBATH. * When the oven is cooking, the 25° HOTTER and 25° COOLER keys tell the oven to raise or lower the temperature by 25°F (If your oven is set to Celsius, the oven will raise or lower the temperature by 15°C), In compliance with Jewish law, the bake elements will be adjusted randomly when these keys are touched and no changes will be seen on the display.
Deluxe Dehydrate Dehydration is the process of preserving food by removing water. If you would like to dehydrate fruits, vegetables or meats, your oven is equipped with special settings to allow you to do so easily, Before you turn on the oven, position the racks at the levels you need them. Place the food you want to dehydrate into the oven, If you have a double oven, touch the UPPER ON/OFF or LOWER ON/OFF key to select the oven you want to use. From the main menu, touch MORE.
Deluxe Features Notes for dehydrating fruits (continued): You should water blanch items with tough skins such as grapes, prunes, dark plums, cherries, figs, and some types of berries, Water blanching these types of fruit will crack the skins so that moisture can escape and dehydration can be done more effectively, To water blanch: Bring 2 quarts of water to boll in 4 quart pot. Drop the fruit in the water for 1 fo 2 minutes, or until the skin begins to crack.
Deluxe Thick, frozen casseroles such as lasagna will not defrost well in your oven. Instead, defrost according to the food manufacturer's suggestions, You may also defrost casseroles in the refrigerator overnight. You should leave the food in its original container and keep it covered. You can bake some foods from frozen. Some examples are: pizza, frozen pastries, croissants, cookies, etc. Before baking frozen food, allow the oven to finish preheating. .
Deluxe Features Delay/Timed Cooking (continued) NOTE: You may use the timers while using the delay options feature, The timers do not have an effect on any of the delay options settings. Setting Up the Delay Options + The delay options are set after you select the feature you want to use, but just before you touch the START key.
Deluxe Features . The duration time will appear on the display. PAPS = Inn Em CEE i. Touch the START key. If you did not enter a start time, the oven will start immediately and stop after the amount of duration time entered has elapsed. If you entered a start time “WAITING TO START" will appear on the display. The oven will turn on at the start time that was entered and stop cooking after the amount of duration time entered has elapsed.
Deluxe Features Meat Probe (continued) IMPORTANT: . To avoid breaking the meat probe, make sure the food is completely defrosted before inserting the skewer Never leave the meat probe inside the oven, especially during the self-clean cycle. Use of meat probes other than the one provided with your oven may result in damage to the meat probe and/or your oven. Y Comer A a. Meat Probe Skewer How to Use Your Meat Probe . Prepare the meat for cooking prior to setting the oven.
Cooking Tips Additional Accessories The Best Use of Bake Ware Optional cookie sheets: The Draco full sized cookie sheets maximize oven rack baking capabilities by utilizing the total usable rack space. 27 inch cookie sheet (3 per carton) Order Draco Part No. A0273CS 30 inch cookie sheet (3 per carton) Order Draco Part No, AQ303CS Pizza baking stone, Order Draco Part No, ABS Large capacity broadcaster pan with V-shaped rack. Order Draco Part No. AORTA Additional 27 inch standard oven rack.
Care and Self-Cleaning [A] WARNING Do not leave the racks, the meat probe, pots, pans, utensils: or any. other items in the oven in during self-cleaning. The convection filter must also be removed. Stems left in the oven during self-cleaning may. be damaged. The control panel automatically locks the oven door during self-cleaning. Do not try.to force the door open after it is locked, Damage tithe door latch may. result, Do not touch the outside surfaces of the oven during the serif-glean cycle.
Care and Cleaning Touch MORE. IMPORTANT: If you do not shut the oven door completely, the automatic door latch will not lock. The phrase "CLOSE OVEN DOOR” will flash on the display if the door is ajar. To correct the problem, touch the CANCEL/ SECURE key twice and wait approximately 1 minute. When the door is properly closed, start the self-clean process again. + When the oven has completed the self-clean cycle and has finished cooling down, it will release the door fats.
Care and Cleaning Cleaning the Surfaces of the Oven WARNING = To avoid electrical shock or burns, turn off the oven and be sure that it is cool before cleaning. + “Use only the cleaning solutions specified in this manual to clean your oven. Do not use ANY cleaners that are not specified to clean the inside or outside of the oven. Use of other cleaners could produce hazardous fumes, cause corrosion of the metal parts, and could permanently.
Care and Cleaning Installing your oven’s filter(s): The metal clips on the back of the filter hook over the metal bar across the fan hale. Place the filter flat against the back of oven above the hole with the clips on the back of the filter pointing down. Be careful not to push the filter too hard against the back wall because the clips can scratch the surface. Gently push the filter straight down over the hole until the clips catch on the metal bar. .
Care and Cleaning Optional Baking Stone Wash the optional baking stone with hot water and scrub it clean before you use it for the first time, Do not use any soap or detergents to wash the stone. The store is porous and soap will get trapped inside. The trapped soap will affect the flavor of the food cooked on it. Don't be alarmed if the stone gets stains on it after it is used for a while. Stains do not affect the stone's ability to bake properly.
Before You Call for Service Unnecessary service calls may be expensive, frustrating, and time-consuming. Before vou call for service, please review the Problem Solution Guide below, NOTE: See Solutions to Common Baking Problems on page 16 for problems with cooking food. Problem Solution Guide Problem: May be caused by: What to do: Nothing works. Oven not connected to electrical power. Have an electrician connect the oven to a properly wired electrical connection.
Warranty and Service Getting Help Before obtaining service, please review the Problem Solution Guide starting on page 33. If you have performed the checks in the Problem Solution Guide and the problem has not been remedied, please contact us at one of the numbers below. Prior to requesting service, iris helpful to be familiar with the terms and conditions in the Warranty section on this page. For warranty repairs, call: Draco Distinctive Service Phone: (877) 337-3226 and Canada) Business Hours: 6:00 ax.
NC POSTAGE NECESSARY IF MAILED ih THE UNITED STATES —— —— —— —— BUSINESS REPLY MAIL — FIRST-CLASS MAIL PERMIT NO 1600 GIT OF INDUSTRY CA Lo POSTAGE WILL BE PAID BY ADDRESSEE —— —— DECOR — ATTN WARRANTY PROCESSING DEPT PO BOX 90070 CITY OF INDUSTRY CA 91715-9907 Ida iluhalblbbdabldbdialoldl
Please visit www. Dacor.com to activate your warranty online. WARRANTY INFORMATION IMPORTANT: Your warranty will not be activated until you activate it online or return this form to Draco. if you have purchased more than one Draco product, please return ali forms in one envelope or activate the warranty for each product engine, Please rest assured that under no conditions will Draco sell your name or any of the information on this form for mailing list purposes.