Use and C are Manual Epicure 36-Inch Gas Range ® For use with models ER36G and ER36GI Ta b l e of Contents Important Safety Instructions.............................................. 1-3 Getting to Know Your Range............................................. 4-5 Setting Up Your Range....................................................... 6-7 Operating Your Range..................................................... 8-13 Care and Cleaning........................................................
© 2009 Dacor, all rights reserved
Important Safety Instructions Installer: Leave this manual with the appliance. Important Information About Safety Instructions Consumer: Read this use and care manual completely before using this appliance. Save it for future reference. It contains important use and care information. Keep your sales receipt or canceled check in a safe place. Proof of original purchase date is required for warranty service.
Important Safety Instructions General Safety Precautions To reduce the risk of fire, electric shock, serious injury or death when using your range, follow basic safety precautions, including the following: WARNING WARNING • Do not hang flammable or heat sensitive objects over the range. • If you receive a damaged product, immediately contact your dealer or builder. Do not install or use a damaged appliance. • Do not cover the burners and grates with anything except properly selected utensils.
Important Safety Instructions WARNING WARNING TO REDUCE THE RISK OF INJURY TO PERSONS IN THE EVENT OF A RANGE TOP GREASE FIRE: • Use extreme caution if adding water to food on a hot cooktop or oven. The steam can cause serious burns or scalds. a. SMOTHER FLAMES with a close-fitting lid, cookie sheet or metal tray, then turn off the burner. BE CAREFUL TO PREVENT BURNS. If the flames do not go out immediately, EVACUATE AND CALL THE FIRE DEPARTMENT. • Do not allow pot or pans to boil dry.
Getting to Know Your Range Parts of the Cooktop BACKGUARD: Model ER36G comes standard with a six inch backguard installed. Model ER36GI comes standard with a low profile (1 3/4” inch) backguard. The backguard protects the wall from the effects of heat and splattering grease. Optional kits are available to change the size of the backguard for both models. See the Accessories section.
Getting to Know Your Range Parts of the Oven Oven Control Knob Oven ON Indicator Light Oven light switch Convection fan switch IR broil burner igniter Rack support Temperature probe Oven rack IR broil burner Oven light Convection filter Convection fan (behind filter) Door gasket Bake burner (below floor) Model and serial number label (view through crack between door and oven chamber) CERAMIC INFRARED (IR) BROIL BURNER: The infrared broil burner is the source of top heat.
Setting Up Your Range Cooktop Assembly The burner rings spread the flame evenly around the burner cap. All burner parts must be properly seated for proper burner lighting and operation. To assemble the burners: 1. Remove the burner rings, burner caps and grates from their shipping packages. 2. Install the burners as shown below. Gently twist each piece back and forth after installation to make sure it is properly seated. A small gap below the burner ring is normal when installed properly. 3.
Setting Up Your Range Installing the Oven Racks Burning-in the Oven When the oven comes from the factory, residue for certain materials used in the manufacturing process are left on the parts of the oven. These residues should be “burned off” before the oven is used for the first time. WARNING The oven racks become hot when the oven is in use. The rack supports provide six heights for positioning of the oven racks. To burn off the residues in the oven: Three chrome-plated oven racks are provided.
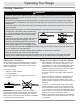
Operating Your Range Cooktop Operation WARNING • To avoid the chance of fire, explosion or carbon monoxide poisoning, do not attempt to use your range without the burners completely and properly assembled (see page 6). The burner rings must be properly seated for proper burner lighting and operation. • To avoid burns and scalding, always turn pan handles to a position where they cannot be easily hit. Also, handles should not extend over adjacent burners.
Operating Your Range Lighting a Burner Each burner control knob has a small diagram next to it to tell you which burner it operates. 1. Push in on the knob and turn it counter-clockwise to the HIGH position. The knob will illuminate and the igniter for the burner will spark repeatedly until it lights. The spark makes a “clicking” sound. The burner should light within four seconds.
Operating Your Range Basic Oven Operation You may use your oven to cook in one of the following modes: IMPORTANT: • Bake The bake process uses the bottom oven burner to provide conventional baking heat. Temperatures may be set from 125˚F to 500˚F. Use the standard bake mode for single rack baking. Before starting the oven, position the oven rack(s) at the proper height(s). If the oven is warm, use potholders for safety.
Operating Your Range To Broil: To Convection Broil: 1. Adjust the rack position based on the food thickness. Dacor recommends rack levels 4 or 5. 1. Set the oven to broil according to the Broil instructions at the left. 2. Turn the oven control (center) knob on the control panel to the BROIL setting. The oven ON indicator light will illuminate to indicate the oven is on. Within 60 seconds, the burner (on the ceiling) will ignite. While the broil burner is on, the bake burner is off. 2.
Operating Your Range Bakeware Tips Baking Tips (Continued) • Dacor’s optional full-sized cookie sheets maximize baking capabilities by utilizing the most usable rack space. See the Accessories section for ordering information. • Use the pan size and type recommended by the recipe to ensure best results. • Cakes, quick breads, muffins and cookies should be baked in shiny, reflective pans for light, golden crusts.
Operating Your Range Broiling Tips • When using a meat thermometer, insert the probe halfway into the center of the thickest portion of the meat. For poultry, insert the thermometer probe between the body and leg into the thickest part of the inner thigh. To ensure an accurate reading, the tip of the probe should not touch bone, fat or gristle. Check the meat temperature 2/3 of the way through the recommended roasting time.
Care and Cleaning Cooktop Disassembly and Cleaning Cleaning 1. Disconnect the power cord. 2. When the range is cool, remove the grates from the top of the cooktop. WARNING • Clean only the parts of the range listed in this manual. Clean them only in the manner specified. 3. Disassemble the burners: Lift the burner caps and burner rings off of the burner bases.
Care and Cleaning Cleaning the Igniters and Other Burner Components caution Inner burner cap Use care while cleaning the igniters. The porcelain is fragile and can crack or break. Outer burner cap IMPORTANT: The igniters will not work properly if the burner rings, burner bases or igniters are not clean. Dirty or wet igniters may not spark at all. After disassembling the burners, check for any dirt or grime deposited on the individual parts, including the igniters. Burner ring 1.
Care and Cleaning Brass, Chrome and Copper Surfaces Cleaning (Continued) Clean brass, chrome and copper surfaces the same way as stainless steel surfaces (see column one). Knobs and Trim Rings Porcelain Surfaces WARNING The oven interior, the inner side of the oven door and the spill tray are finished in porcelain enamel. • Do not operate the cooktop without the knobs and spill protector rings in place. Clean porcelain surfaces with a solution of mild detergent and hot water.
Care and Cleaning IR (Infrared) Broil Burner Replacing the Oven Light caution caution To prevent damage to the broil burner, do not spray the burner or its igniter with any type of cleaner or attempt to scrub them in any manner. • To prevent an electrical shock hazard and/or personal injury, make sure that power to the range has been disconnected and that the light fixture is cool before replacing the light bulb. The IR broil burner is self-cleaning.
Before You Call for Service Problem Nothing works. Igniters do not spark. No flame. Burner goes out at low setting. May Be Caused By Range not connected to electrical power. Check to make sure range power plug is connected to electrical outlet. Power is off. Turn on power at circuit breaker or fuse box for electrical outlet range is connected to. Check for tripped breaker or blown fuse. Power outage. Contact power company. Power not supplied to unit. See Nothing Works above.
Before You Call for Service Problem Oven will not heat when turned on. May Be Caused By What to Do No power to range. See Nothing Works on facing page. Gas is turned off. Make sure the gas supply valve is in the “ON” position. Gas supply interrupted. Contact gas company. Oven light will not work. Light bulb is burned out. See Care and Cleaning section. Oven ON indicator light goes on and off repeatedly. Normal operation. The oven ON indicator light illuminates when the oven is on.
Warranty and Service OUTSIDE THE FIFTY STATES OF THE U.S.A., THE DISTRICT OF COLUMBIA AND CANADA: Getting Help LIMITED FIRST YEAR WARRANTY Before you request service, please review the Before You Call for Service section on page 18. If you have performed the checks in the Problem Solution Guide and the problem has not been remedied, please contact us at one of the numbers below.
fold here NO POSTAGE NECESSARY IF MAILED IN THE UNITED STATES BUSINESS REPLY MAIL FIRST-CLASS MAIL PERMIT NO 1600 CITY OF INDUSTRY CA POSTAGE WILL BE PAID BY ADDRESSEE DACOR ATTN WARRANTY PROCESSING DEPT PO BOX 90070 CITY OF INDUSTRY CA 91715-9907
Please visit www.Dacor.com to activate your warranty online. WARRANTY INFORMATION IMPORTANT: Please rest assured that under no conditions will Dacor sell your name or any of the information on this form for mailing list purposes.