
Installation Guide


9
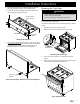
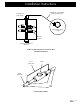
Fasten the backguard and the stainless steel trim piece in 5.
place with the five (5) existing chrome plated screws.
Secure the rear of the backguard to the back of the range 6.
with the eight (8) existing hex screws.
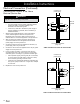
On the 24 inch backguard7. : Secure the “C” channels on the 24
inch backguard to the brackets mounted on the range chassis
using eight (8) hex screws from the kit. Insert the screws
through the holes in the back side of the backguard.
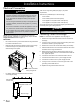
Installation Instructions
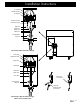
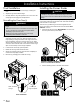
Removing the Oven Door
WARNING
Do not attempt to disengage the hinge catches with the •
door(s) removed from the range. The hinge springs could
release causing personal injury.
Do not lift or carry the oven door(s) by the handle.•
NOTE: When installing a backguard, always install it before sliding
the range into place. See page 8.
To make the range easier to move, remove the door(s) to reduce
weight.
Open the door to its fully opened position.1.
Rotate the catch over the retaining arm on each hinge.2.
Lift the oven door to about a 15° angle from the vertical 3.
position.
Hold the door with both hands just below the handle and pull 4.
it away from the oven while continuing to lift.
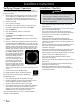
Door Gripping Points
Backguard
Hex screw,
8 places
Chrome plated
screw, 5 places
Backguard Installation
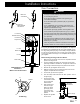
Hex screw,
8 places
Securing the Support Brackets on 24 Inch Backguard
Catch
Retaining arm
Releasing the Door Hinges