User Manual Heritage Pro Range HDPR30S, HDPR36S, HDPR48S, HDER30S, HDER36S, HDER48S Part No.
Table of Contents Before You Begin 5 Important Notes To the Owner Energy-Saving Tips About the Oven Vent 5 5 5 Regulatory Notice 6 Important Safety Instructions 7 Safety Symbols and Cautionary Information Use-and-Care Safety Instructions 7 8 Product Overview 12 Included Accessories: 30" HDPRS/HDERS Included Accessories: 36" and 48" HDPRS/HDERS HDPRS/HDERS External Features HDPRS/HDERS Internal Features HDPRS/HDERS Control Panel HDPRS/HDERS Control-Panel Display 12 13 14 15 16 17 Operating the
Table of Contents Operating the Oven, cont.
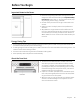
To Our Valued Customer: Congratulations on your purchase of the very latest in Dacor® products! Our unique combination of features, style, and performance make us a great addition to your home. To familiarize yourself with the controls, functions, and full potential of your new Dacor range, read this manual thoroughly, starting at the Before You Begin section (pg. 5). Dacor appliances are designed and manufactured with quality and pride, while working within the framework of our company values.
Before You Begin Important Notes to the Owner • Electrical and gas equipment with moving parts can be dangerous. Read and follow closely the Important Safety Instructions section (Pgs. 8 – 11) to minimize risk of property damage, personal injury, and death. • For best results, maintain the range as instructed in this manual. • Keep this manual handy for personal and professional reference. • Wipe down the range's exterior surfaces before its first use.
Regulatory Notice 1. FCC (Federal Communications Commission) Notice Any modifications not expressly approved by the party responsible for compliance could void the user's authority to operate the equipment. This device complies with Part 15 of FCC Rules. Operation is subject to two conditions: 1) This device may not cause harmful interference; and 2) this device must accept any interference received, including that which causes undesired operation.
Important Safety Instructions Safety Symbols and Cautionary Information Electrical and gas equipment can be dangerous if not handled properly. The Important Safety Instructions in this manual are intended to minimize the risk of property damage, personal injury, and death. Carefully follow the instructions in this manual. About the Symbols In This Manual These icons alert you to potentially unsafe conditions or helpful information.
Important Safety Instructions Use-and-Care Safety Instructions Read these instructions thoroughly to reduce the risk of property damage, fire, personal injury, and death, and to ensure proper installation. General Safety • Do not touch any part of the range during or immediately after cooking. • Learn where the gas-supply valve is and how to open/close it. • When returning the range to its operating position, make sure it engages the anti-tip bracket.
Important Safety Instructions Use-and-Care Safety Instructions, cont. Read these instructions thoroughly to reduce the risk of property damage, fire, personal injury, and death, and to ensure proper installation. Gas Safety If you smell gas: • close the range's gas-supply valve and evacuate the building • do not use a flame or sparking device (e.g.
Important Safety Instructions Use-and-Care Safety Instructions, cont. Read these instructions thoroughly to reduce the risk of property damage, fire, personal injury, and death, and to ensure proper installation. Cooktop Safety • Burners should only be on when in use and should never be unattended. • Do not line the grates or any part of the cooktop with foil. • Before turning on a burner, ensure its components are properly seated.
Important Safety Instructions Use-and-Care Safety Instructions, cont. Read these instructions thoroughly to reduce the risk of property damage, fire, personal injury, and death, and to ensure proper installation. Oven Safety • Do not use the oven for non-cooking purposes (e.g., drying clothes, storage). • Do not spray water on the oven glass while the oven is on or still hot. • Do not clean the door gasket. • Do not cover/line any part of the oven with foil or other material.
Product Overview Included Accessories: 30” HDPRS/HDERS *The range comes with brass and porcelain burner caps to suit customer preference.
Product Overview Included Accessories: 36” and 48” HDPRS/HDERS *The range comes with brass and porcelain burner caps to suit customer preference.
Product Overview HDPRS/HDERS External Features HDPRS models shown (door handle and bullnose are the only variations between HDPRS and HDERS models) 30" HDPRS 36" HDPRS EXTERNAL FEATURES Callout Description A SimmerSear Burner (800* – 15,000 BTU); left-/right-front (36", 48"); left-front (30") B Spill Tray C Burner-Control Knob D Control Panel E Removable Oven Door F Standard Burner (800* – 18,000 BTU); left-/right-rear, center-front/ rear (36", 48"); left-/right-rear, right-front (30") *Eff
Product Overview HDPRS/HDERS Internal Features HDPRS model shown CONTROL-PANEL FEATURES Callout Name Description A Air Intake Grill Air is drawn through horizontal slot (not shown) below door and up within door, then out grill at top of door through this grill to cool internal cooktop parts; keep slot and grills clear. B Broil Element Inside oven ceiling behind glass panel; top heat source.
Product Overview HDPRS/HDERS Control Panel 30", 36" Single Oven (top), 48" Double Oven (bottom) CONTROL-PANEL FEATURES Callout 16 Name Description A Operation-Mode Keys Tap a key to select an operation mode (e.g., cooking, bread proofing, self-cleaning; double ovens: one op-mode keypad per oven with all above modes and temperature-probe mode. B Time-Delay Cooking Keys Set oven to turn on/off automatically; 48" model: one set of keys per oven (see Pg. 29).
Product Overview HDPRS/HDERS Control-Panel Display 30", 36" Single Oven (top), 48" Double Oven (bottom) CONTROL-PANEL FEATURES Callout Name Description A Cook-Mode Icons From left: Convection, Bake, Broil, Roast; these appear, sometimes in combination, according to selected cook mode. B Oven-On Indicator Appears when oven is in use. C AM-PM Indicator One of these appears according to time of day.
Operating the Cooktop Assembling the Burners Assembling a Standard Burner 1. Place the burner ring so its base fits within the ridge around the burner head, and rotate the ring until it drops into place. 2. Place the burner cap so the ridge on the bottom of the cap fits over the perimeter of the ring. Assembling a SimmerSearTM Burner 1. Place the burner head so its locating tab is in the base’s keyed hole. 2. Place the burner ring so the its tabs fit into the slots in the head. 3.
Operating the Cooktop Using the Griddle • Before using the griddle for the first time, wash it in hot, soapy water, then rinse, and let it dry fully. • For best results, preheat the griddle for 10 minutes. • Orient the griddle's grease trap at the rear of the cooktop. 1. With all burners off and the range cool to the touch, place the griddle on the cooktop's center-front/rear grates. (30" models: Place the griddle on the right-front/rear burners.
Operating the Cooktop Before Using the Cooktop • A normal flame is steady and blue. Foreign matter in the gas line, especially a new line, may cause an orange flame that disappears with use. Yellow-tipped flames are normal when using LP gas. • See Page 14 for the heat ranges of the different burners. • Food cooks just as quickly at a gentle boil as at a vigorous boil. Maintain a gentle boil to conserve energy and food moisture/flavor/nutrients.
Operating the Oven Control-Panel Settings Setting the Clock 1. On the control panel, tap CLOCK. The colon between the minutes and seconds blinks. 2. On the numeric keypad, enter the current time. Example: If the time is 12:08, tap 1-2-0-8. 3. Tap #, and set AM or PM. 4. Tap START or CLOCK. The colon stops blinking; the time of day is set. • During time-delay cooking, the clock cannot be set if a timer, Self-Clean mode, or Sabbath mode is active.
Operating the Oven About the Control-Panel "Beep" The control panel beeps: 1) when you tap a key, 2) when a timer reaches zero, 3) when there is an error, and 4) when the oven performs certain set functions. You can silence/activate this tone as desired. 1. On the control panel, tap-hold START TIME for 6 seconds. "Beep" appears on the display. 2. On the numeric keypad, tap #, then tap CANCEL/SECURE. The beep is enabled/disabled.
Operating the Oven Positioning the Oven Racks, cont. The oven comes with a set of Dacor GlideRack oven racks. These racks can be pulled out further than a standard rack and still support pots and pans or an optional Dacor baking stone. Inserting a GlideRackTM Oven Rack 1. Align the left and right safety clips on the back of the rack guides with the rack supports (see left). You can insert the rack with the guides extended or retracted. 2.
Operating the Oven About Cook Modes The oven operates in three basic cook modes: Baking—Gentle cooking of dry foods (e.g., cookies, cakes, soufflés); Roasting—Long-term cooking of meat/vegetables; Broiling—Short-term cooking under intense heat. HDPRS-HDERS OVEN COOK MODES Cook Mode Convection Bake Convection Broil Pure Convection Convection Roast Bake Broil Description • • • • Convection fan with bottom heat source; for single-rack cooking in a deep pan.
Operating the Oven Cooking Tips This section provides suggestions and information that will help with various aspects of oven cooking, including baking, broiling, and roasting, proper cookware, and high-altitude cooking.
Operating the Oven Cooking Tips, cont. COOK MODE AND COOKWARE Subject Tip Bake, Convection Bake, Pure Convection • Do not open the oven door frequently; check doneness through the door window when possible. • Use a timer to time baking functions. • Check doneness at the shortest suggested cook time; for cake/brownies, a wooden toothpick/skewer poked through the center should emerge clean. • For best results, measure ingredients carefully and follow proven recipes.
Operating the Oven About Oven Temperatures About Cook-Mode Temperature Presets COOK-MODE TEMP PRESETS Mode Convection Bake Pure Convection Temperature 325°F (163°C) Bake 350°F (177°C) Convection Roast 375°F (191°C) Broil Convection Broil 555°F (291°C) Default cook-mode temperatures are set at the factory so you do not need to enter the temperature manually. Changing the Oven Temperature While Cooking You can change the oven temperature without interrupting the cook cycle. 1.
Operating the Oven Using the Timers Enabling the 12-Hr. Oven Shut-Off Timer The oven has a factory-programmed timer that automatically turns the oven off after 12 hours of continuous use. This timer automatically resets if you change the cook temperature or mode, and is automatically disabled when you activate Sabbath mode. You can use this same procedure to disable the 12-hr. timer. 1. With the oven off, tap-hold TIMER 1 for about 10 seconds.
Operating the Oven Using Time-Delay Cooking About Time-Delay Cooking • You can set the oven to turn itself on/off. • Time-delay can be used for all but Broil and Convection Broil modes. • You can use the timers while using time-delay cooking. • You can cancel a time-delay cycle any time by tapping CANCEL/SECURE. • Time-delay cooking cannot be used if Sabbath mode is active.
Operating the Oven Using Time-Delay Cooking, cont. Setting a Time-Delay-Cooking Cycle 1. Adjust the racks as needed, and place the food in the oven. 2. Select a cook mode (except BROIL or CONVECTION BROIL). 3. Enter a cook temperature. If you want the oven to turn on immediately and turn off automatically later, skip to Step 6. 4. Tap START TIME, and enter the time of day you want cooking to start. (Ex: 12:35, tap 1-2-3-5. You may enter a time up to 22 hr 59 min beyond the present time.) 5.
Operating the Oven Using the Meat-Temperature Probe, cont. 1. (With the meat read to cook) Insert the probe skewer in the thickest part of the meat away from fat and bone. With fowl, hold the skewer parallel to the pan, and insert it into the deepest part of the breast until the tip is 3/4 in. from the body cavity.
Operating the Oven Dehydrating/Defrosting Foods You can dehydrate or defrost foods at low heat settings in Pure Convection mode. Cook meats immediately after defrosting. FOOD TYPE DEHYDRATIMG TEMP Fruit 100°F (38°C) Vegetable 125°F (52°C) Meat 150°F (66°C) 1. Position the racks, and center the food on the rack. (If dehydrating) Place prepared food on a drying rack. 2. Tap PURE CONV. 3. (If defrosting) Enter a temperature up to 150°F (66°C).
Operating the Oven Using Sabbath Mode, cont. Activating Sabbath Mode • Double ovens: perform this procedure for one oven, then use Steps 2 – 4 to activate Sabbath mode on the other oven. • Tap each successive key within 6 seconds of the previous, or the process cancels itself. 1. 2. 3. 4. Tap #. Tap BAKE or PURE CONV. (Double ovens: Tap the mode key for LEFT OVEN or RIGHT OVEN.) Tap 0 (decrease) or 2 (increase) repeatedly to change the preset oven temperature on the display. Tap START.
Maintaining the Range General External Maintenance • Turn off power, and let all surfaces cool before cleaning the range. • Wear rubber gloves, and do not use abrasive cleaners/scouring pads anywhere on the range. • Do not spray liquids anywhere on the range; when using sprays, spray the cloth or paper towel. Cleaning Stainless-Steel Surfaces To prevent scratching, wipe stainless steel “with” the grain, and do not clean with abrasive cleaners/scrubbers. 1.
Maintaining the Range Maintaining the Cooktop, cont. About Burner Caps and Heads • Burner parts are not dishwasher-safe. Clean them in hot, soapy water with a sponge or plastic scouring pad. (Do not use steel wool or scouring powders.) • Use a pin to unclog the holes in the burner heads if needed. • The brass parts will discolor with use; discoloration does not affect performance. • During cleaning, ensure that all burner ports are unclogged. • You may use either set of burner caps (brass or porcelain).
Maintaining the Range Turn off power, and let all surfaces cool before cleaning the cooktop. Wear rubber gloves, and be mindful of sharp edges. Clean the cooktop as instructed in this manual. Using Self-Clean Mode About Self-Clean Mode • For best results, clean the oven chamber regularly. Self-cleaning, which takes about 2 1/2 hours, heats the oven to very high temperatures to burn off surface deposits in the oven chamber. • Smoke from the oven chamber is normal during the first few self-clean cycles.
Maintaining the Range Using Self-Cleaning Mode, cont. Self-Cleaning the Oven, cont. • When self-cleaning is done: –– the door latch releases when the oven chamber has cooled sufficiently. The cleaning icon, lock icon, and ON indicator disappear from the display. The oven is still hot. –– reinstall the convection filter before using the oven. –– a powdery residue normally coats the oven floor after self-cleaning.
Maintaining the Range Steam-Cleaning the Oven This is a convenient way to clean light soil from the oven. (Double ovens: Both ovens may be steam cleaned at once.) Run a steam-clean cycle when you see soil accumulating in the oven chamber. • To avoid steam burns, do not pour water into a hot oven. • Do not touch the water in the oven chamber immediately after steam-cleaning. 1. Remove the racks and all foreign items from the oven chamber. 2.
Maintaining the Range Cleaning the Oven Accessories, cont. Cleaning the Oven-Door Gasket This gasket helps trap hot air in the oven by sealing the seam around the front of the oven chamber when the door is closed. The gasket needs occasional cleaning to remove cooking residue that may compromise the seal and reduce cooking efficiency. • Be extremely careful in cleaning the fragile gasket to avoid compromising its ability to form a tight seal around the front of the oven chamber.
Maintaining the Range Replacing the Oven Lights If no lights work, see Troubleshooting, Pg. 42, before replacing them. • To prevent electric shock, turn off power to the oven, and ensure the oven and bulbs are cool. • Use the oven only with the lens covers installed. The covers protect the bulbs from high temperatures and mechanical shock. • Replacing the lens cover without lining up the cutout with the light socket will damage the light fixture. • Do not use a screwdriver to remove the lens.
Troubleshooting This section offers solutions to various operational and maintenance issues, which may help you avoid a service call. If, after reviewing this table, you are unable to resolve the issue, call Dacor Customer Assurance: 833-35-ELITE (833-353-5483). Gas Safety Issue You smell gas Possible Cause Solution Burner is on but is not lit. Turner burner-control knob off. Gas leak • Evacuate building.
Troubleshooting Oven Issue Possible Cause Solution Oven not fully plugged in. Verify that plug is properly inserted in outlet. Bad fuse/tripped circuit breaker. Replace fuse/reset circuit breaker. Oven too hot. Let oven cool. Incomplete service wiring. Call for service. Power outage. Check house lights; call service provider if needed. Light is loose/defective. Tighten/replace light; call for service if light stays off. Broken light switch. Call for service. Meat too close to broil element.
Warranty What Is Covered CERTIFICATE OF WARRANTIES: DACOR RANGES WITHIN THE 50 STATES OF THE USA, THE DISTRICT OF COLUMBIA, AND CANADA: Full 1-Year Warranty The warranty applies only to Dacor Heritage appliances sold to the original purchaser, starting from the original retail purchase date or closing date for new construction, whichever period is longer. The warranty is valid on Modernist products purchased new from a Dacor Authorized Dealer or other Dacor-authorized seller.
Warranty What Is Not Covered • Slight color variations due to differences in painted parts, ambient lighting, product location, other factors. • Service calls to educate the owner on product use and care. • Service fees for travel to islands and remote areas (including but not limited to ferries, toll roads, and other travel expenses). • Consequential or incidental damage (including but not limited to food or medicine loss, lost work time, or restaurant meals).
Notes English 45
Notes 46 English
Please visit www.dacor.com to activate your warranty online. WARRANTY INFORMATION IMPORTANT: Your warranty will not be activated until you activate it online or return this form to Dacor. If you have purchased more than one Dacor product, please return all forms in one envelope, or activate the warranty online for each product. Owner Last Name (please print) First Middle Init.
fold here NO POSTAGE NECESSARY IF MAILED IN THE UNITED STATES BUSINESS REPLY MAIL FIRST-CLASS MAIL PERMIT NO 1600 CITY OF INDUSTRY CA POSTAGE WILL BE PAID BY ADDRESSEE DACOR ATTN WARRANTY PROCESSING DEPT PO BOX 90070 CITY OF INDUSTRY CA 91715-9907