
Product specifications


Dishwasher (Continued) Attaching the Anti-Tip BracketsLeveling the
3. Remove the toe
kick mounting plate
to expose the front
legs. To adjust the
front leveling legs,
place a wrench on
the top of each leg
and adjust where
the top of the
dishwasher tank
front trim is flush
with the lower edge
of the countertop.
L_
Toe kick mounting plate_
(pull out to remove)
Front leg
II
H
4. To adjust the rear leveling legs, rotate the #2 Phillips
drive shafts, located at the toe-kick, to level the
dishwasher from front to back and left to right.
j. - .
CAUTION
Make sure to anchor at least one anti-tip bracket on
each side of the dishwasher.
• The anchoring material must be no more than 114" (6
mm) from the anti-tip bracket.
• To prevent leaks, square the dishwasher in the cutout.
When attaching the anti-tip brackets make sure the
tub and frame are not skewed so that the tub gasket
contacts the door liner fully all the way around the
door.
The anti-tip brackets protect against possible tipping
caused by heavy bottom rack loads on the door. There
are anti-tip mounting locations provided around the top
and sides of the dishwasher front frame.
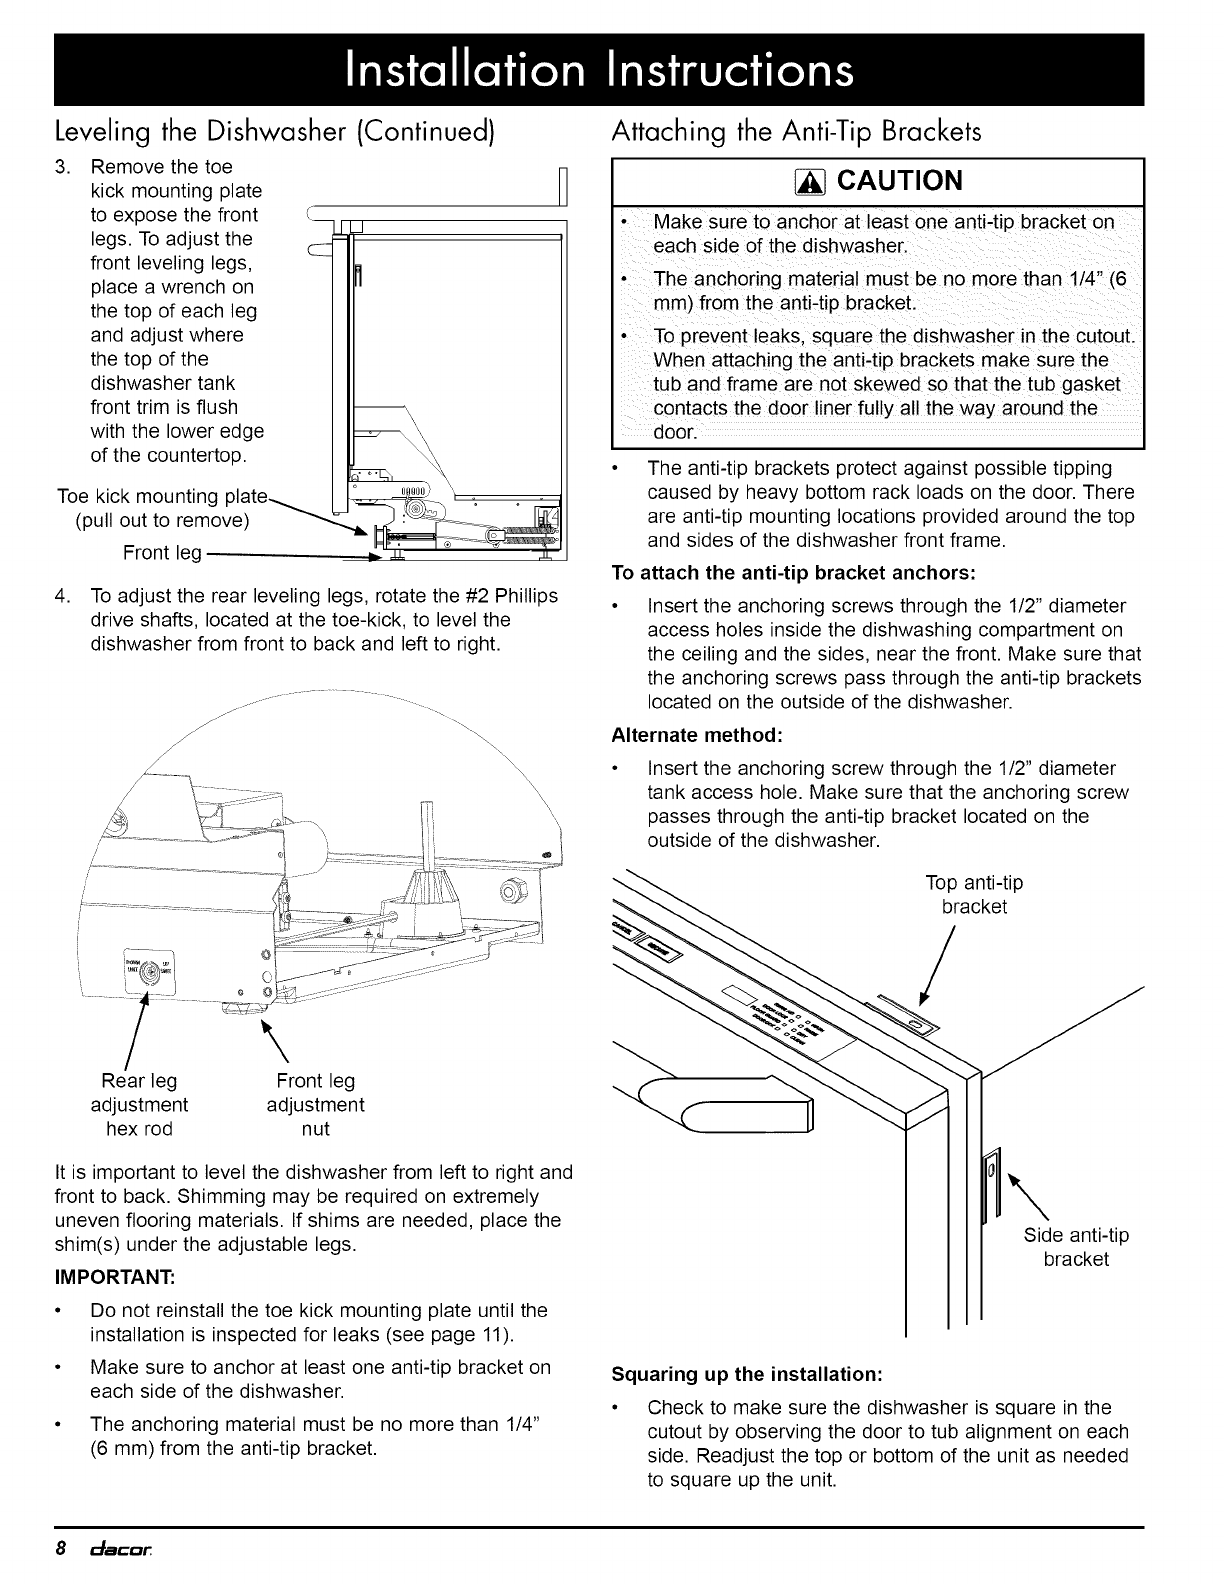
To attach the anti-tip bracket anchors:
Insert the anchoring screws through the 1/2" diameter
access holes inside the dishwashing compartment on
the ceiling and the sides, near the front. Make sure that
the anchoring screws pass through the anti-tip brackets
located on the outside of the dishwasher.
Alternate method:
Insert the anchoring screw through the 1/2" diameter
tank access hole. Make sure that the anchoring screw
passes through the anti-tip bracket located on the
outside of the dishwasher.
Top anti-tip
bracket
/
Rear leg Front leg
adjustment adjustment
hex rod nut
It is important to level the dishwasher from left to right and
front to back. Shimming may be required on extremely
uneven flooring materials. If shims are needed, place the
shim(s) under the adjustable legs.
IMPORTANT:
• Do not reinstall the toe kick mounting plate until the
installation is inspected for leaks (see page 11).
• Make sure to anchor at least one anti-tip bracket on
each side of the dishwasher.
• The anchoring material must be no more than 1/4"
(6 mm) from the anti-tip bracket.
1
Side anti-tip
bracket
Squaring up the installation:
Check to make sure the dishwasher is square in the
cutout by observing the door to tub alignment on each
side. Readjust the top or bottom of the unit as needed
to square up the unit.
8 _mC_